|
|
|
| 07-12-2018, 07:49 PM | #1 |
|
Captain
 348
Rep 728
Posts |
E70 X5M Turbocharger Removal DIY
Gents,
I went on a road trip recently and apparently it was just a bad time, because I started getting 310B codes between 65-75mph and it would put me in limp mode. I kept having to pull over, turn the vehicle off and on again, then be on my way. After doing some research I found that it was likely the wastegate arms on the turbos. I ordered a borescope off of amazon and piped it in through the oxygen sensor to verify, and found that there was a bit of play in the arm. Basically, the arm has so much play that it overextends and opens back up when its supposed to close. I contacted Turbo Lab America and Austin said he could do a full rebuild with wastegate replacement. I wanted an upgrade also so we threw in a Compressor wheel upgrade while we were at it. Unfortunately, he only has the compressor wheel upgrade and not the turbine so only stage 1 upgrade, not stage 2. I pulled off the turbos over two days and it took me about 4.5 hours total. When I get the turbos back Ill post an Installation DIY with all the gaskets I bought and review the upgrade. 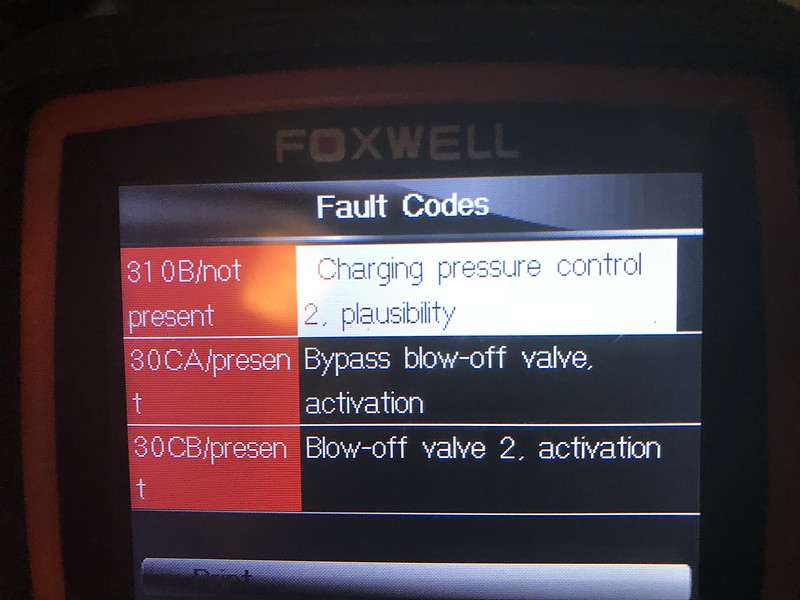 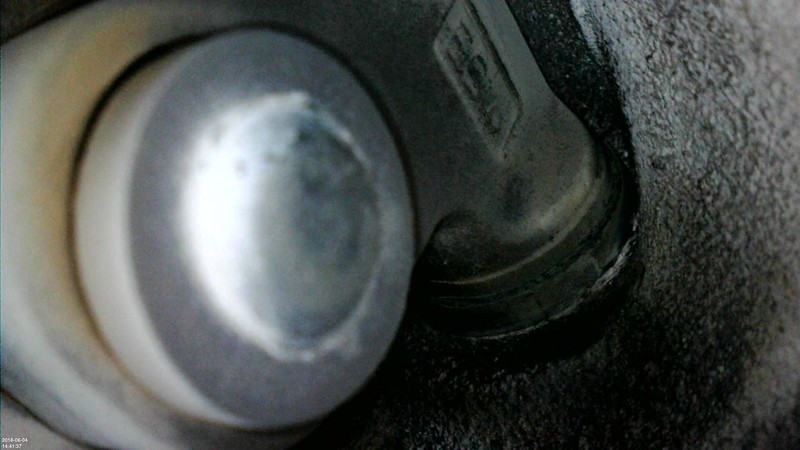 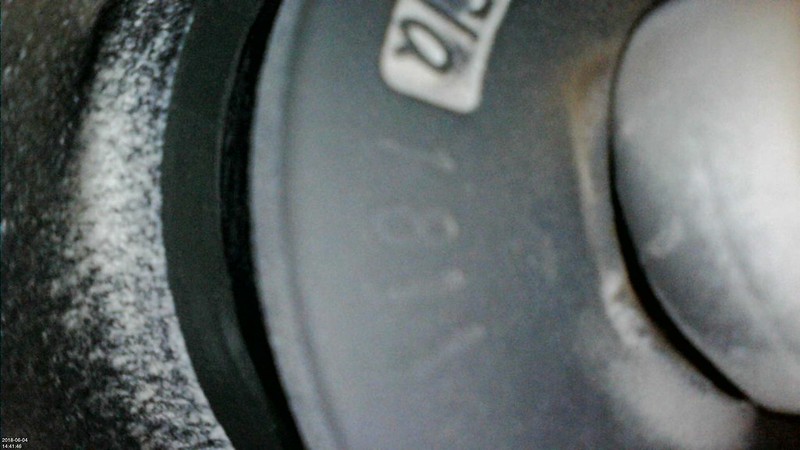 DIY: E70 X5M TURBOCHARGER REMOVAL NOTE: I RECOMMEND THAT ALL MAINTENANCE IS COMPLETED BY A CERTIFIED MECHANIC;This DIY is merely a record of what I did to complete this vehicle maintenance; I DO NOT RECOMMEND COMPLETING THIS YOURSELF. Tools Needed: 1/4 Drive Ratchet 1/4 Drive Extensions 3/8 Drive Ratchet 3/8 Drive Extensions 3/8 Drive Torque Wrench 7/8 Oxygen Sensor Socket (Cutaway Style; 3/8 Drive) 13mm Socket 14mm Socket 10mm Socket 10mm Deep Socket 8mm Socket 6mm Socket T25 Torx Bit T30 Torx Bit E8 External Torx Bit Flat Head Screw Driver Small Flat Head Screw Driver Needle nose pliers Wire Cutter STEP 1: Remove the Filtered Air Ducts and Charge Pipes a) ENSURE YOU ABSOLUTELY REMOVE THE NEGATIVE WIRE FROM THE BATTERY TERMINAL. YOU ARE WORKING NEXT TO A LIVE WIRE AND WILL SHORT/START A FIRE WHEN THE TURBOS TOUCH THE LIVE WIRE b) Follow this DIY for removal of Filtered Air Ducts and Charge Pipes: https://www.xbimmers.com/forums/show....php?t=1434167 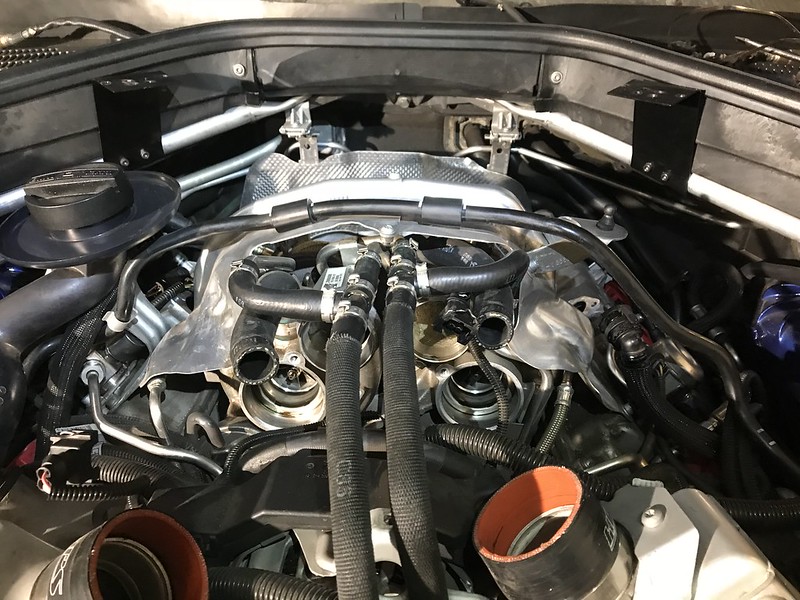 STEP 2: Remove Crankcase Ventilation Heat Shield a) Remove Driver side crankcase ventilation heat shield using T30 Torx Bit (4 bolts total) 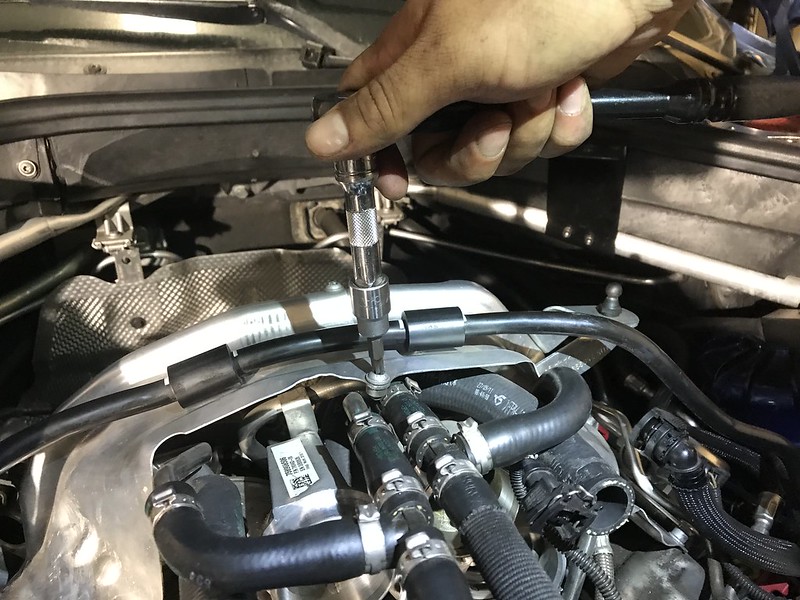 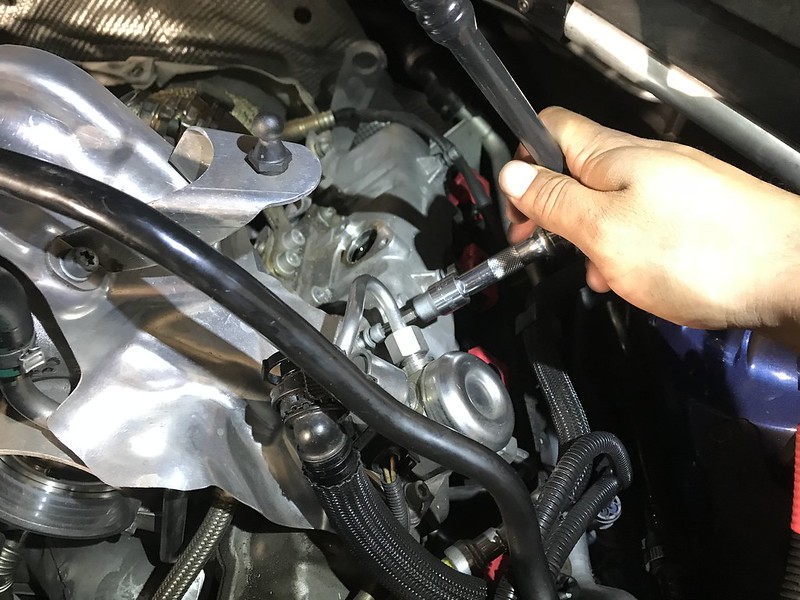 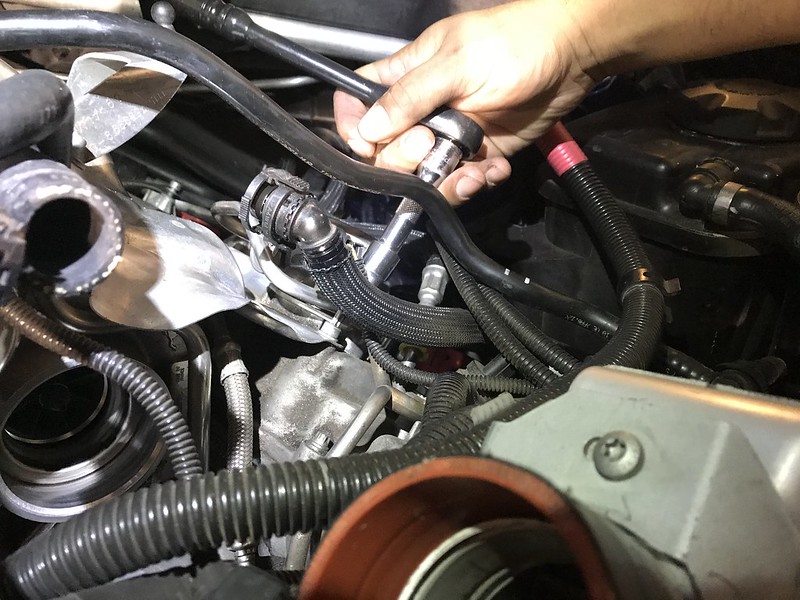 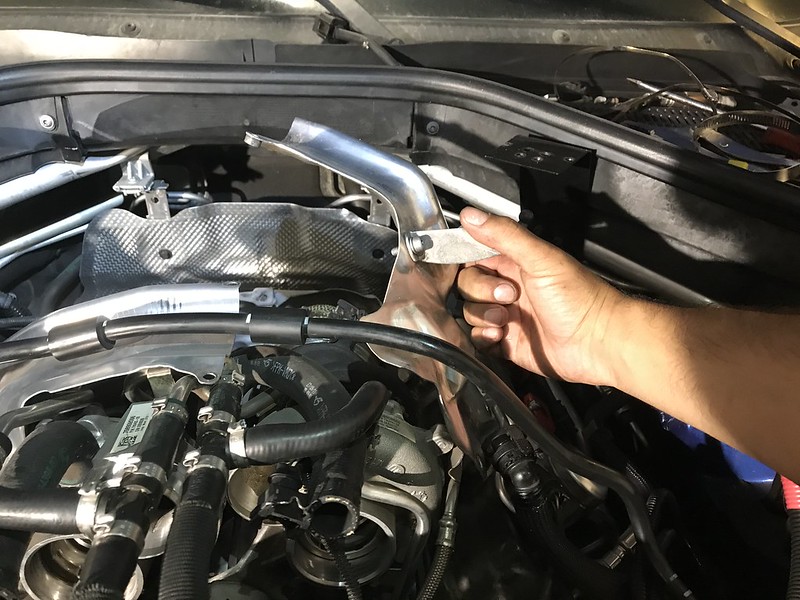 b) Remove Passenger side crankcase ventilation heat shield using T30 Torx Bit (2 bolts and a PITA) 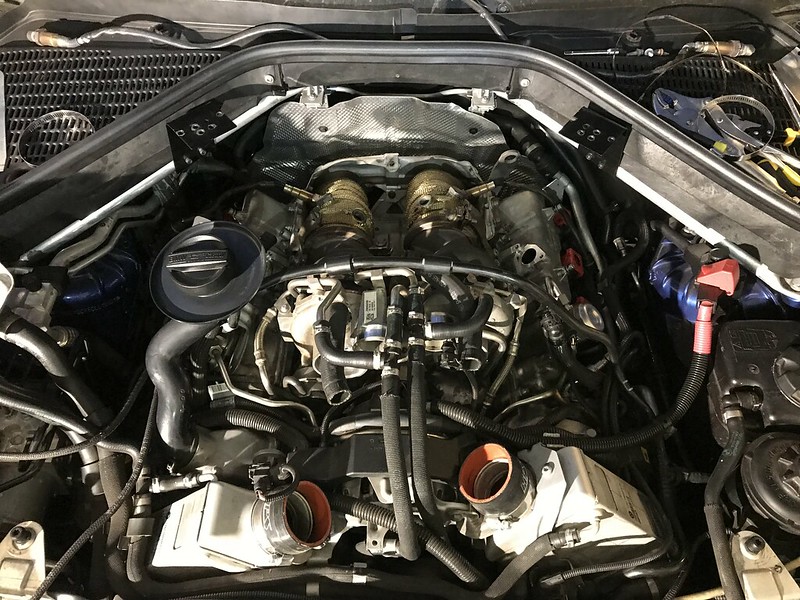 STEP 3: Disconnect Turbocharger Cooling Lines a) Cut off hose clamps using wire cutters or heavy duty shears (4 hoses total) 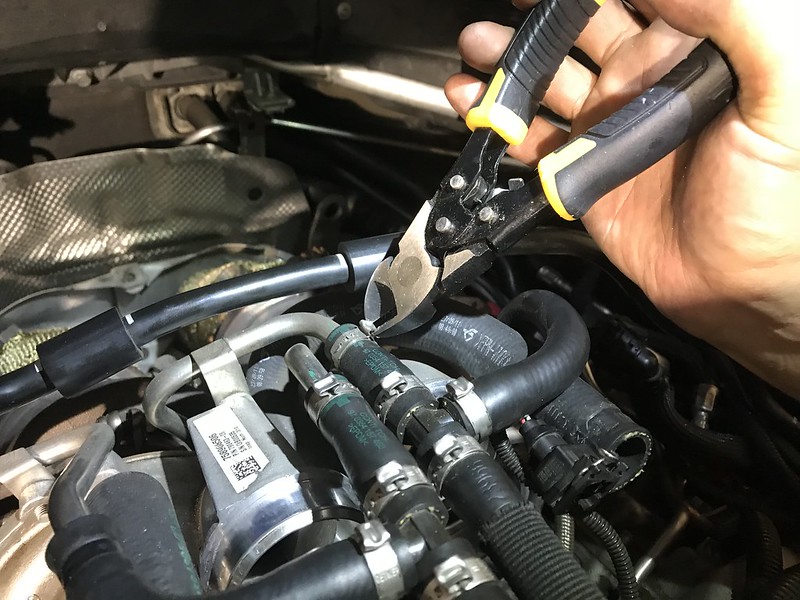 b) Pull hoses off of hardlines, place in plastic bag, seal, and move out of the way. 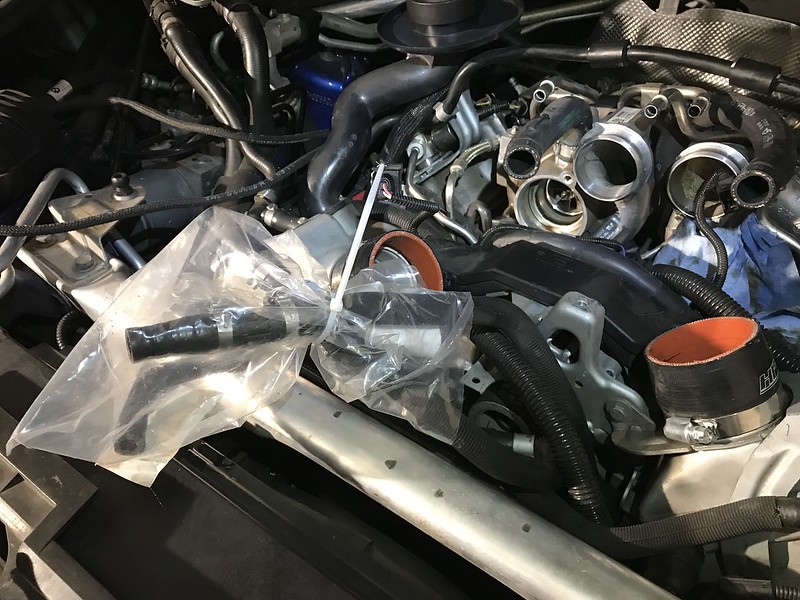 c) Plug hardlines leading to turbochargers using vacuum plugs 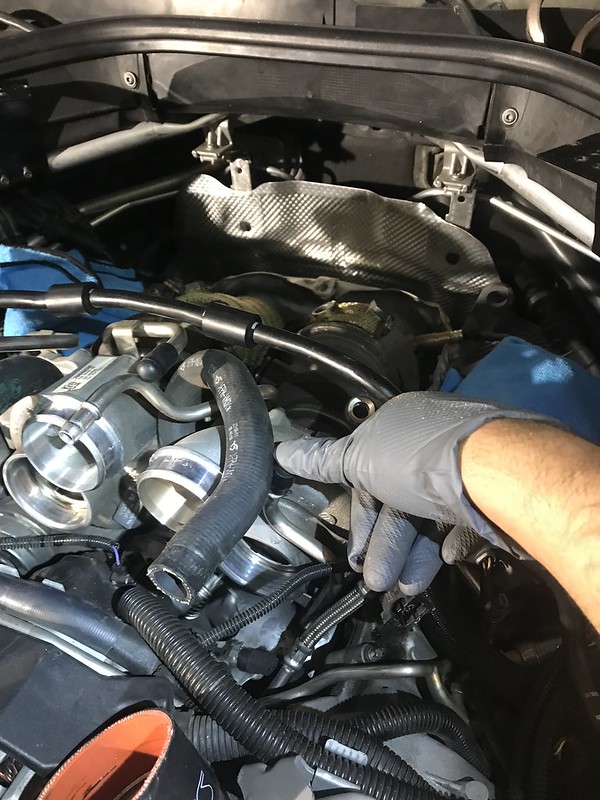 STEP 4: Disconnect Turbochargers from exhaust manifold (Headers) and exhaust manifold with catalyst (Downpipes) a) Loosen screw clamps connecting turbochargers to exhaust manifolds with catalyst (Downpipes) using 13mm Socket. 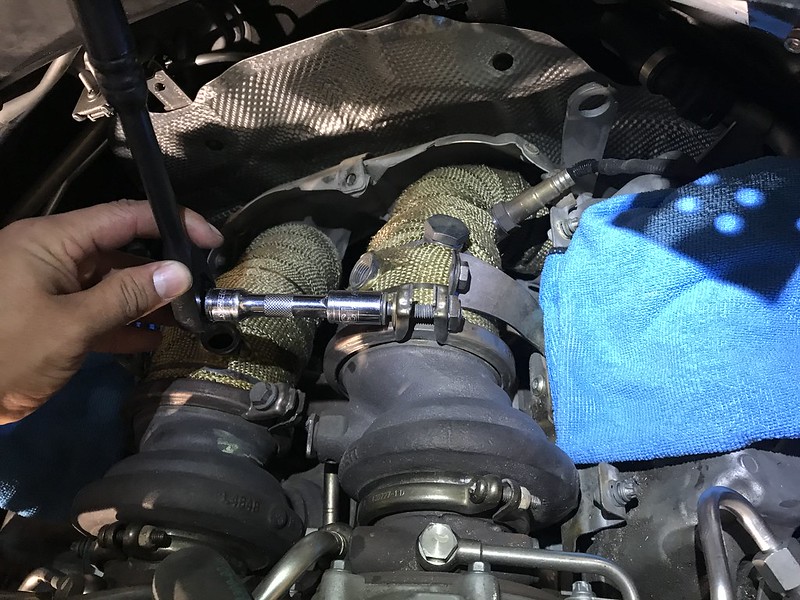 b) Use flathead screwdriver to press clamps apart and off of Turbocharger/Exhaust manifold with catalyst (Downpipes) 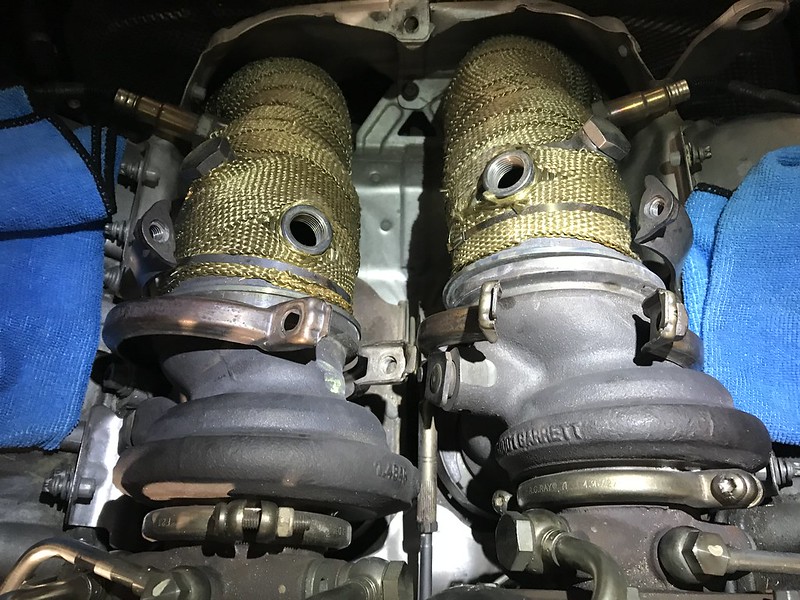 c) Loosen screw clamps connecting turbochargers to exhaust manifold (headers) using 13mm Socket. 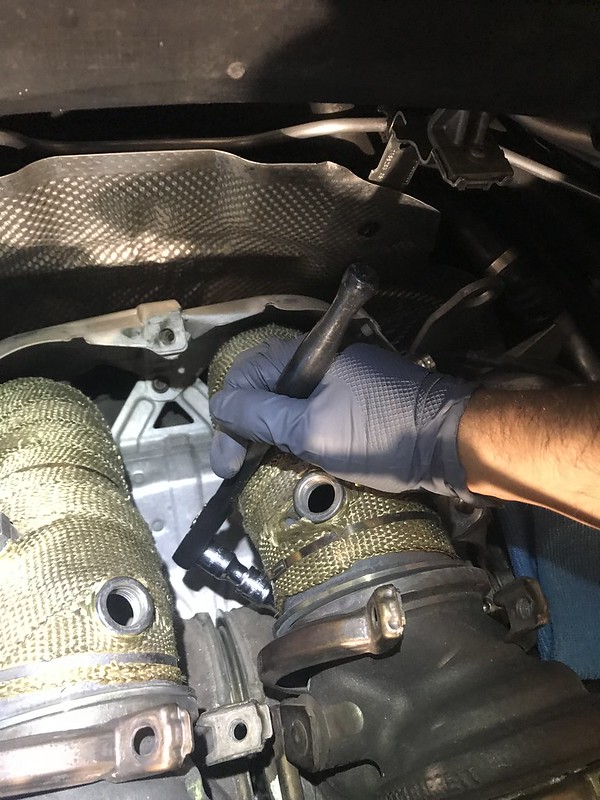 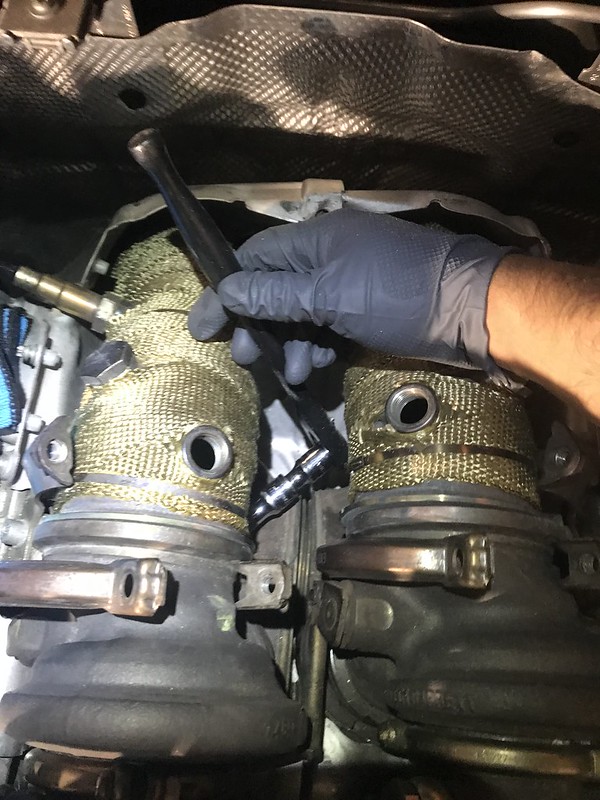 d) Use flathead screwdriver to press clamps apart and off of turbocharger/Exhaust Manifold (Headers) 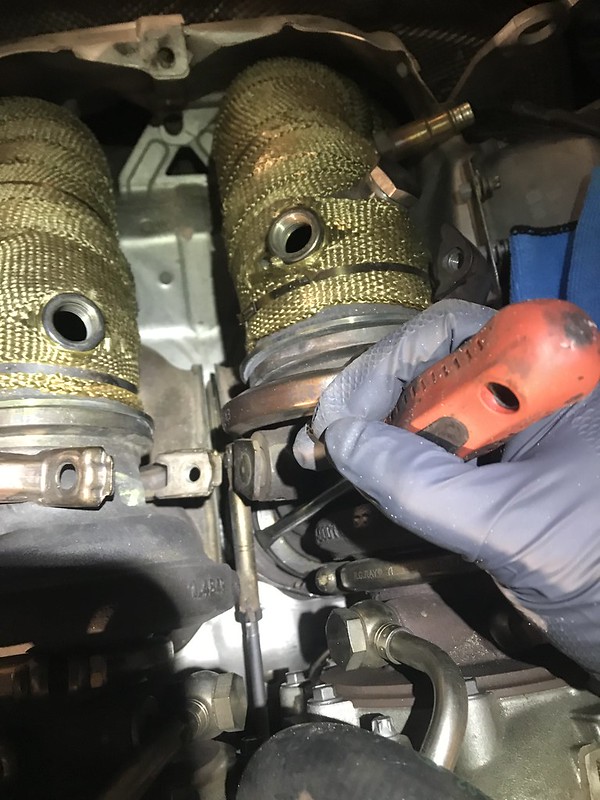 e) The turbochargers are still connected to the vehicle by oil lines and vacuum lines but should be free moving. If they are not moveable then you must work to find where the clamps are stuck on and free the clamps completely. Once the turbochargers are capable of moving, you can pull the screw clamps off completely and set them aside. 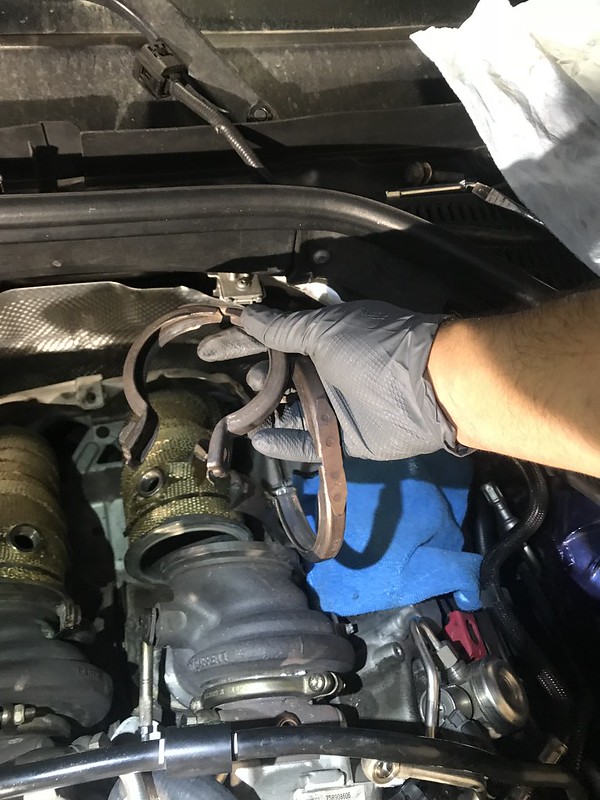 STEP 5: Disconnect Turbocharger Oil lines a) Loosen and disconnect Turbocharger oil feed lines using 14mm socket (one for each Turbocharger) 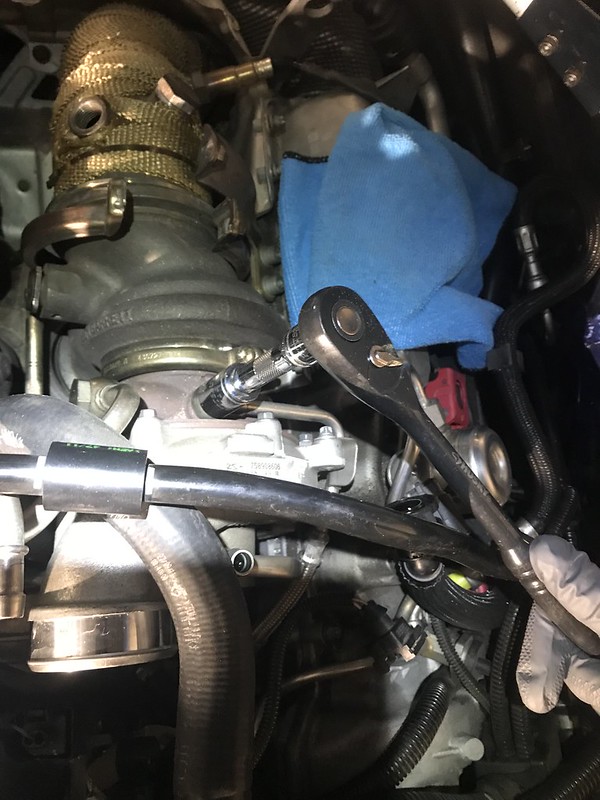 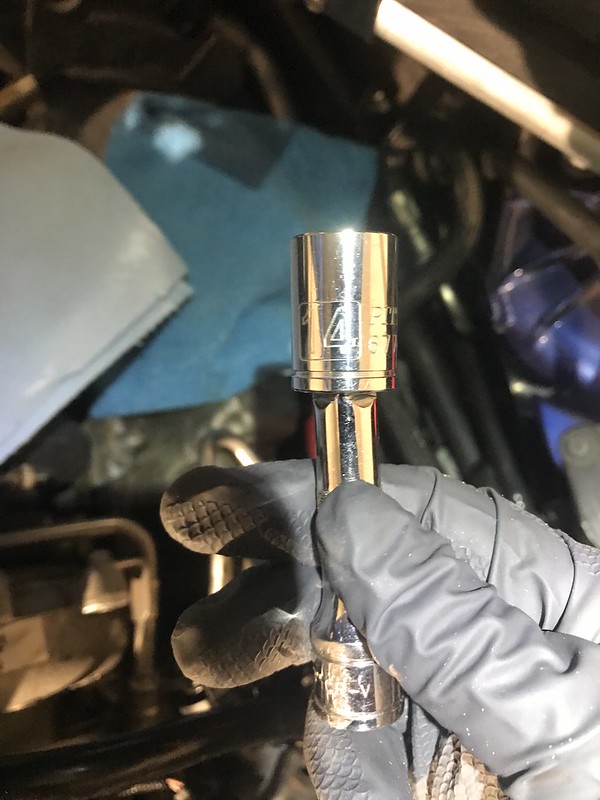 b) Loosen and disconnect Turbocharger oil return lines using E8 External Torx Bit (2 bolts per turbo, 4 bolts total) NOTE: Holy crap this is the hard part and took over an hour just to remove these. You must lift the turbo up and work different combinations of ratchets and extensions to get to each bolt. Super aggravating take your time. 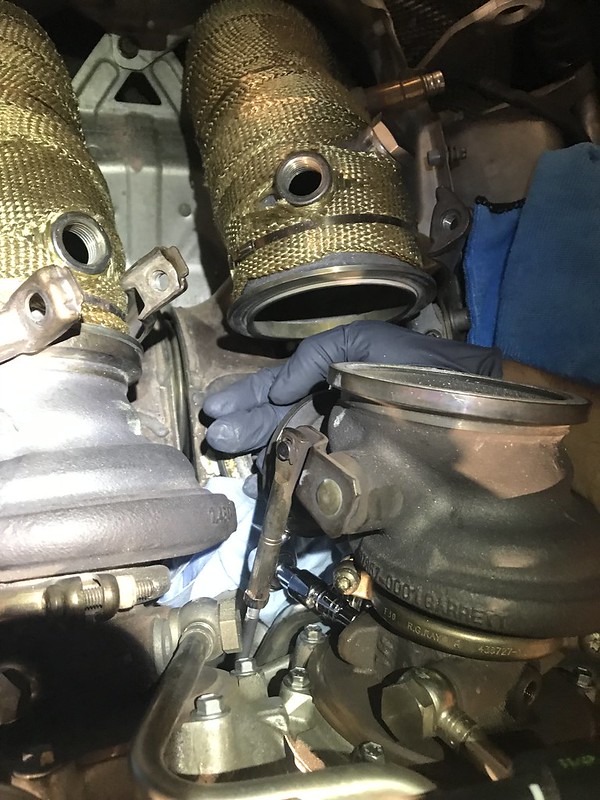 c) Loosen and remove bolts securing turbo charger oil feed lines to the turbochargers using E8 External Torx Bits (1 each side) 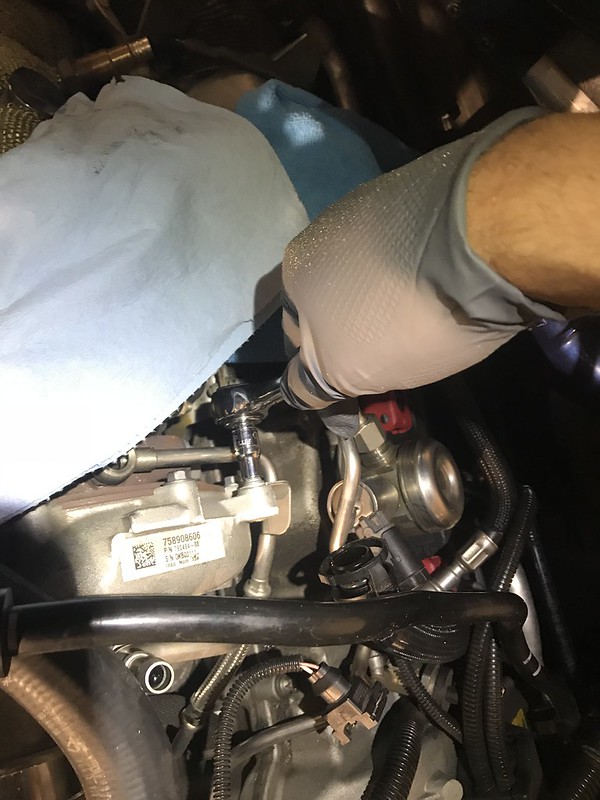 STEP 6: Remove Turbochargers a) Carefully pull out vacuum lines from wastegate actuators 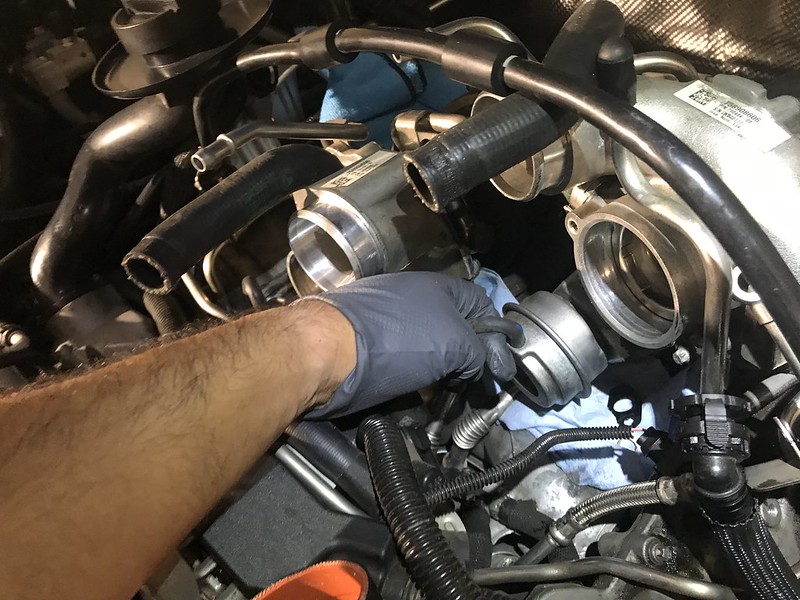 c) Carefully Maneuver Turbochargers up and out, around the fuel tank breather line. NOTE: At this point I held the turbocharger in the air and announced that I was the greatest weekend mechanic in the world. 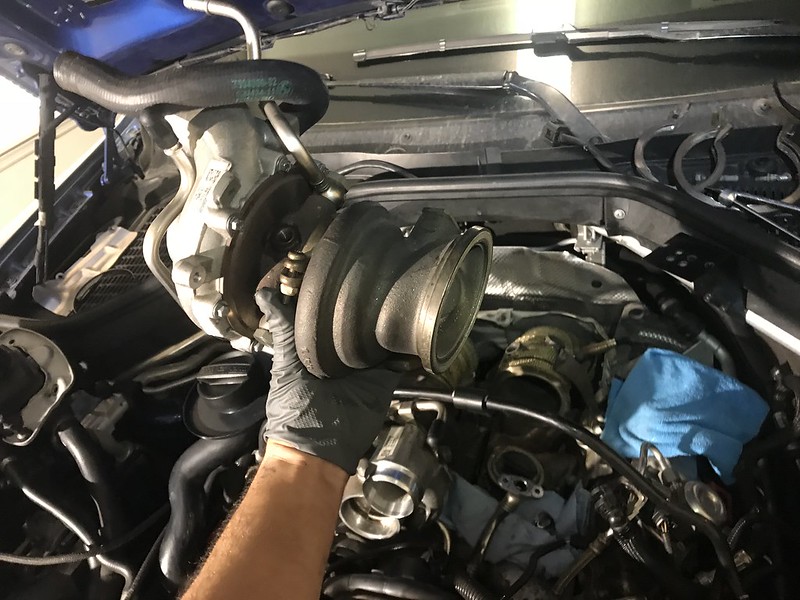 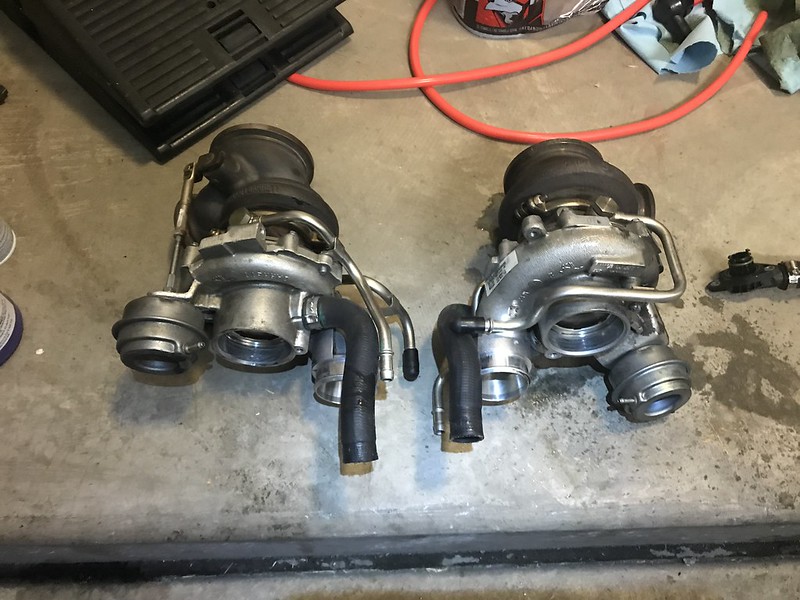 STEP 7: Remove hoses, hardlines, and brackets from Turbochargers a) Cut off Charged Air Pipe bypass hose clamps using wire cutters or heavy duty shears and carefully remove them using flathead screwdriver (This took some time) 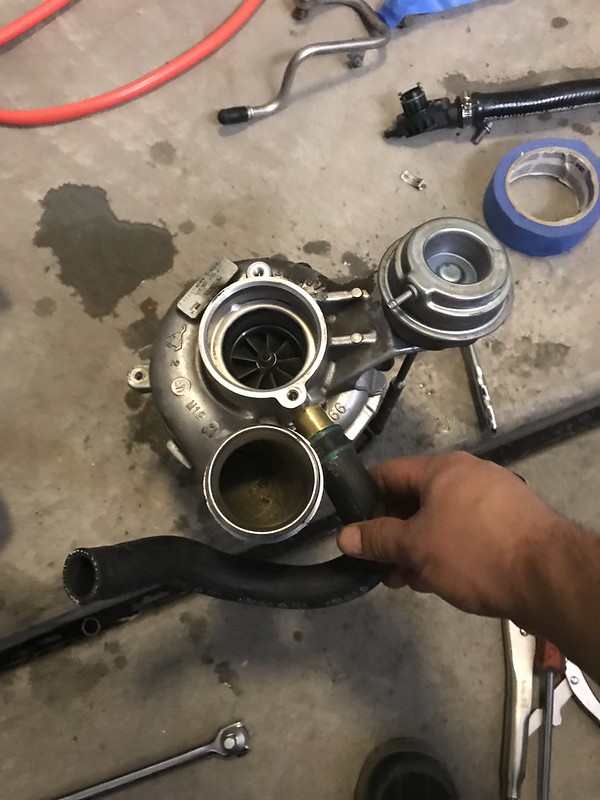 b) Loosen and remove bolts securing the turbocharger cooling system hardlines to the turbochargers using 14mm socket with breaker bar and E8 External Torx Socket (Two banjo Bolts and two E8 bolts per turbocharger) 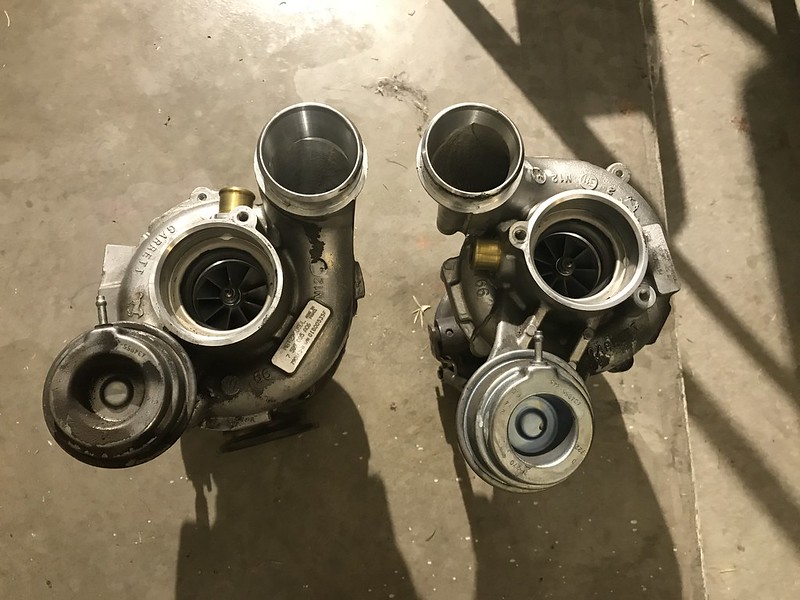  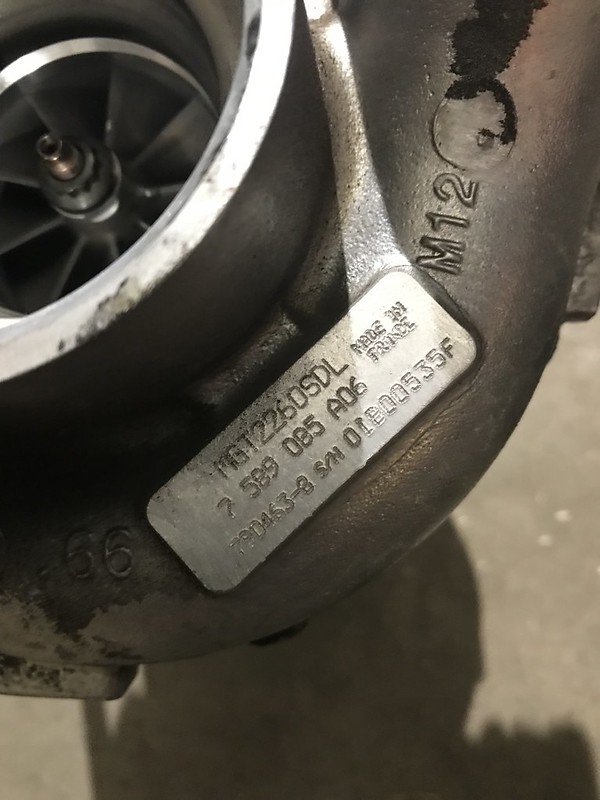 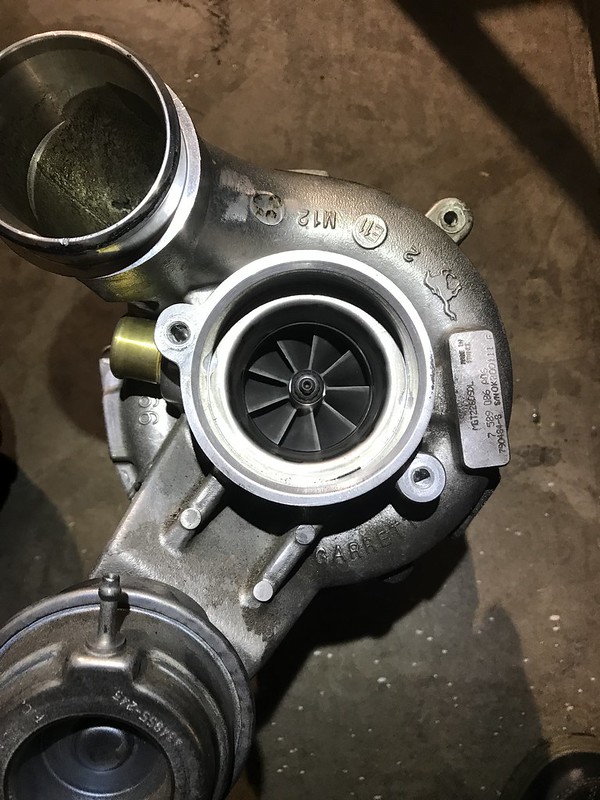 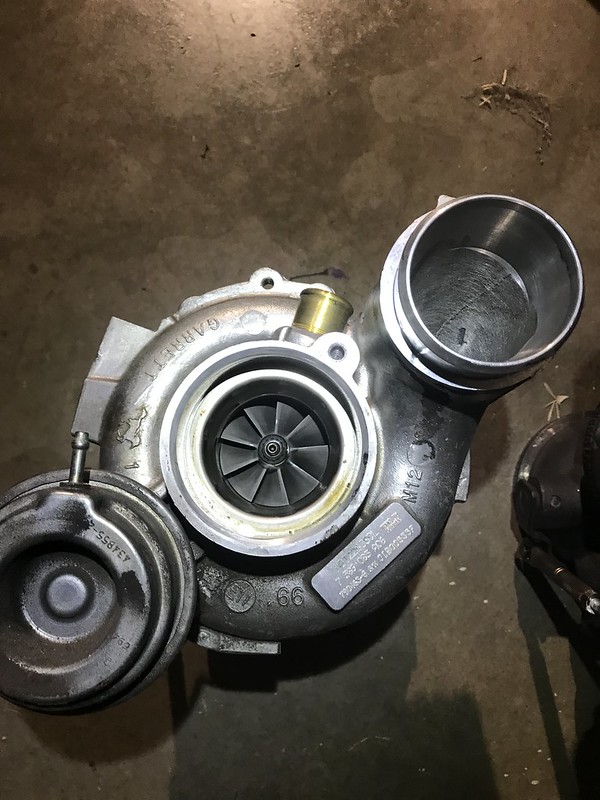 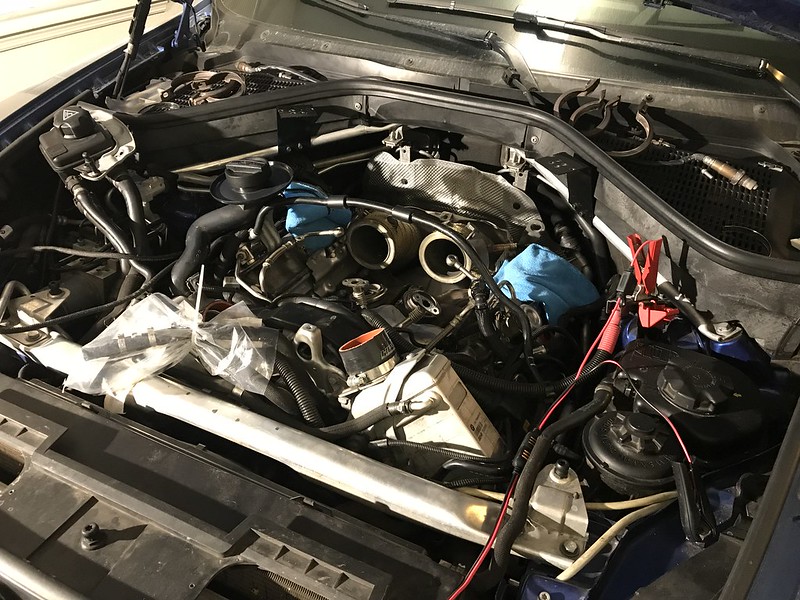
__________________
 2020 G01 X3 30e CURRENT M Sport Package 2019 Ford Raptor SuperCrew CURRENT 802A, KN Drop-in, RB Flaps, Husky Well Liners 2012 E70 X5M SOLD Stg 1+ Turbos, DPs, Velos Stg 2+, JB4, Race Cats, Bavauto Coils 2003 E46 M3 SOLD aFe CAI, AP Axleback, SSK, H&R Springs, TMS CMBR Arms, PF RTABs Last edited by jandref321; 07-12-2018 at 07:55 PM.. Reason: Fix Grammatical Errors |
|
Appreciate
6
|
| 07-15-2018, 05:27 AM | #2 |
|
Brigadier General
 

848
Rep 3,190
Posts |
Nice DIY!
__________________
Current Mods:
2004 E46 M3cs JB/CSL 2010 E70 X5M AW/BLACK 2011 VW Golf R DSG White/Black IG: @060Motorsports |
|
Appreciate
0
|
| 07-19-2018, 07:25 PM | #6 |
|
Captain
348
Rep 728
Posts |
Thanks for the support guys! It was noted on another thread that it is actually more difficult with stock catted downpipes since the cats block off where you put the ratchet to loosen the clamps leading from the exhaust manifold to the turbo. Maybe a swivel joint would help. I would hate to have to remove the DPs to remove the turbos.
|
|
Appreciate
0
|
| 07-20-2018, 07:59 PM | #7 |
|
Colonel
 2123
Rep 2,388
Posts |
OP when you'll be putting them back - will you need new gaskets?
Also, to put back oil and cooler lines - is it just torquing them down again and nothing else is needed? Will you buy new clamps for ones you cut? |
|
Appreciate
0
|
| 07-23-2018, 08:34 PM | #8 | |
|
Captain
348
Rep 728
Posts |
Quote:
1) No one makes replacement wastegate arms/valves for the S63 Turbos. Turbo Lab America has been working with another company and my turbos to prototype a wastegate arm fix. They said it would take another month, which I don't have so Austin is going to fabricate a fix using a S63TU Arm and a different valve since it will fit. I should have them next week and be able to start the install the following weekend. 2) I looked up and ordered all the possible gaskets/O-rings that I will need on realoem.com and also ordered some extra bolts in case I loose a couple in the process. I will have a list when I complete the install DIY. 3) I have replacement crush washers for the oil lines and plan on simply hand torqueing the difficult to reach ones. There are a few companies that make special tiny torque wrenches, but the cost is significant. 4) Several hoses will require new clamps. I plan on using generic hose clamps that I already have on hand to replace them instead of the stock style clamps.
__________________
2020 G01 X3 30e CURRENT M Sport Package 2019 Ford Raptor SuperCrew CURRENT 802A, KN Drop-in, RB Flaps, Husky Well Liners 2012 E70 X5M SOLD Stg 1+ Turbos, DPs, Velos Stg 2+, JB4, Race Cats, Bavauto Coils 2003 E46 M3 SOLD aFe CAI, AP Axleback, SSK, H&R Springs, TMS CMBR Arms, PF RTABs |
|
|
Appreciate
1
DuSh2123.00 |
| 09-07-2018, 07:40 PM | #9 |
|
Captain
348
Rep 728
Posts |
Got the Turbos back! Rebuilt internals, replaced wastegate valves and bushings, upgraded compressor wheels, clipped turbine wheels, ceramic coating. I have installed them but my aux water pump took a dump so waiting on a new one for review, etc. Will make the install DIY sometime in the next couple of weeks.
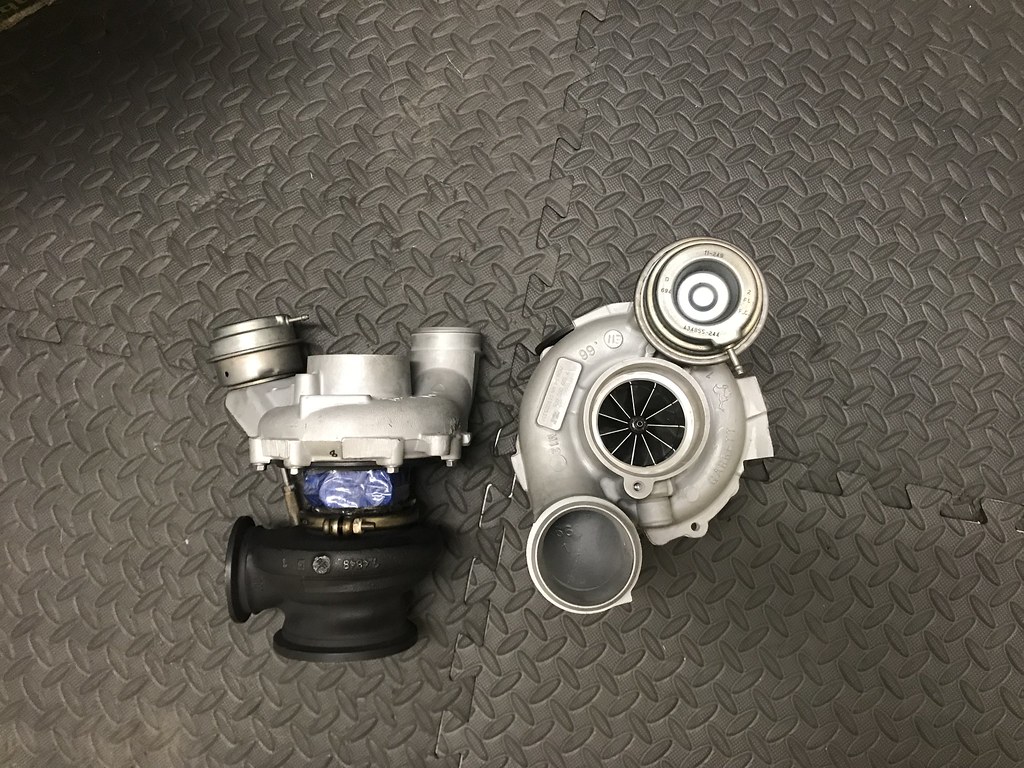 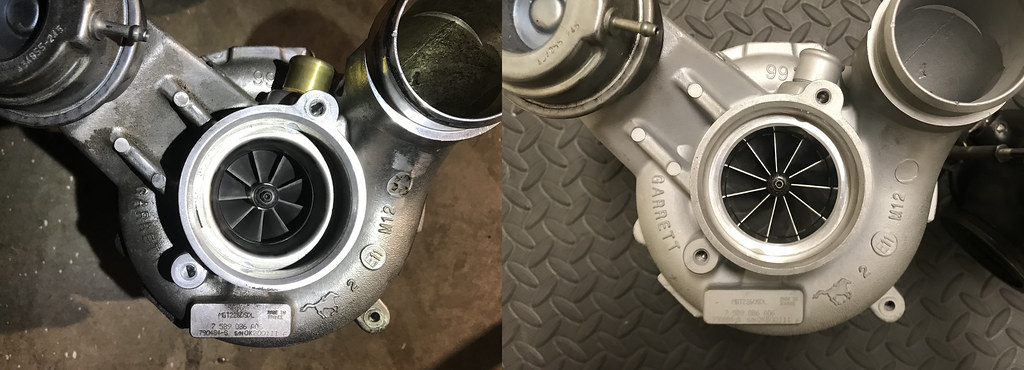 (I actually stole the left image from M5James): 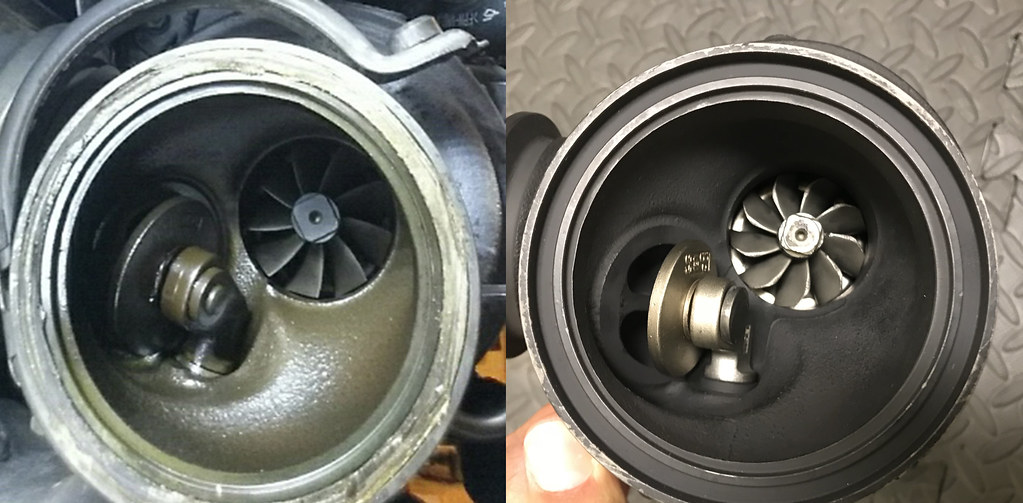 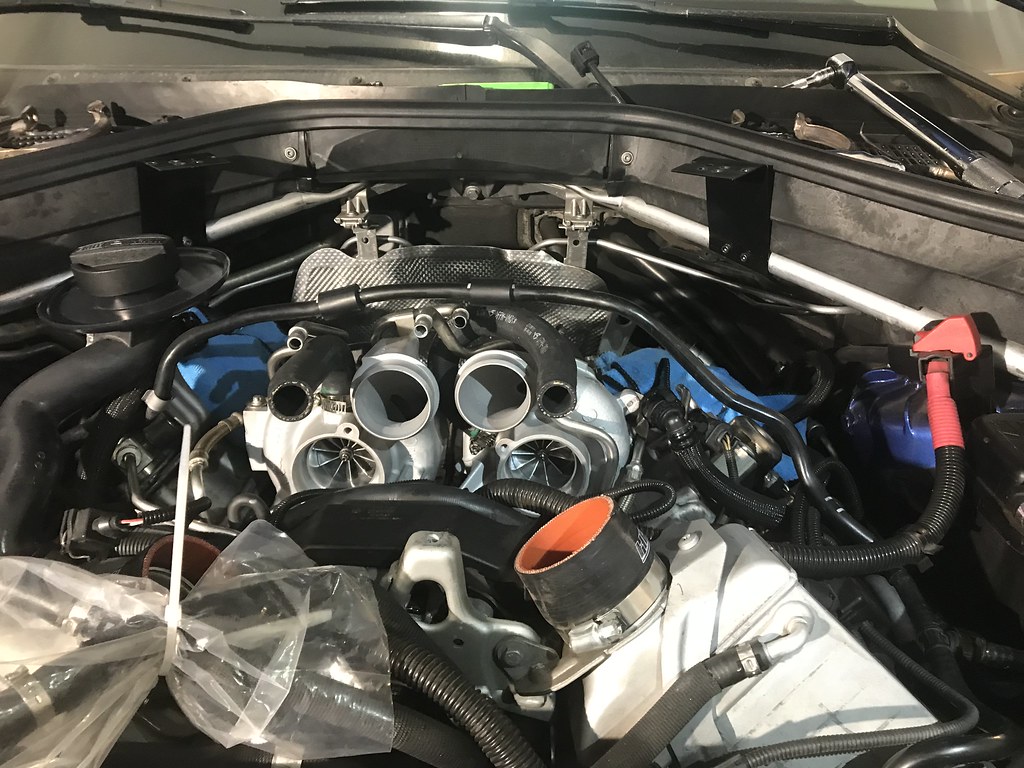
__________________
2020 G01 X3 30e CURRENT M Sport Package 2019 Ford Raptor SuperCrew CURRENT 802A, KN Drop-in, RB Flaps, Husky Well Liners 2012 E70 X5M SOLD Stg 1+ Turbos, DPs, Velos Stg 2+, JB4, Race Cats, Bavauto Coils 2003 E46 M3 SOLD aFe CAI, AP Axleback, SSK, H&R Springs, TMS CMBR Arms, PF RTABs |
|
Appreciate
0
|
| 09-07-2018, 10:43 PM | #10 |
|
First Lieutenant

83
Rep 362
Posts |
Oh this is inspiring to me. I am in the throws of tearing apart my engine now. I need to replace the turbo oil return cover. The service instructions call for taking off the cats.
Did you reuse the metal v-band clamps on the turbo charger? |
|
Appreciate
0
|
| 09-07-2018, 11:51 PM | #11 | |
|
Captain
348
Rep 728
Posts |
Quote:
I did reuse the v band clamps...and I have pulled them off before and reused them. Just make sure you get new gaskets and take your time putting them back on |
|
|
Appreciate
0
|
| 09-11-2018, 11:17 PM | #13 |
|
First Lieutenant
114
Rep 369
Posts |
Great write up, I was hoping a full blown upgrade would be possible with the stock turbos. I will be eyeing PureTurbos as an $$$$ option. Appears to be several hoses to replace while in there. Looking forward to read8ng your impressions.
|
|
Appreciate
0
|
| 09-14-2018, 08:12 PM | #14 |
|
Lost user
4
Rep 28
Posts |
Just a heads up, much easier to remove the oil drain hoses from engine side with an extension rather than turbo side. Removes quite a lot of time and struggling from this process. Also order a set of flex head ratchet wrenches off amazon if you have stock catted downpours and it will also save a lot of struggling. You can have both turbos out in under 3 hours
Also cti turbo which is a branch of comp turbo can rebuild or upgrade stock turbos, then they balance to a believe it was 100k rpms and provide a warranty for just under a thousand dollars. So that is another option available that no one ever seems to mention. While doing this job I would also recommend replacing whatever wastegate vacuum lines you can get your hands to. |
|
Appreciate
1
jandref321348.00 |
| 10-20-2018, 09:21 AM | #16 | |
|
Captain
348
Rep 728
Posts |
Quote:
https://www.xbimmers.com/forums/show....php?t=1537049 I'm still hunting down the boost leak codes. I'm getting 30FF, 310B, and 3108. I have replaced: Rebuilt turbos and wastegates (obviously) All vacuum lines (have removed the T line going to exhaust) Boost solenoid Replaced TMAPs Crankcase vent lines Deleted my catch cans Filtered air ducts (in 2017) I took it to an indy shop and they inspected all the hoses visually and under load, but couldn't run full diagnostic due to flash and piggyback tune. They said that boost leaks occur at lower boosts and speeds normally so he believes that the issue is in the tune software and referred me to a tuner. I decided to instead run a smoke test myself and pressurized the system and found no leaks except in a vent line leading from the bank 1 intake manifold. I replaced that last night and it didn't fix the issue. This morning I decided to run back through my pictures and make a timeline of boost related things I did: October 22, 2017 New charge pipe hoses and filtered air ducts October 24 DV+ diverter valves installed March 12 JB4 installed March 18 BMS data cable installed through firewall April 5 P3 gauge hardwire into JB4 TMAP cable April 15 AVIN installed and wired to JB4, P3 gauge removed April 19 First 310b Code I have already double checked all the JB4 wiring and verified that the P3 gauge tap didn't damage the wiring. I ran the JB4 hard for a month before the first code and the closest thing was wiring the data cable to AVIN. Next steps: 1) Remove Data Cable and double check JB4 wiring to DME 2) Remove JB4 3) Take truck to tuner BTW, if anyone saw that I installed the BMS 4 Bar TMAP sensors...I also uninstalled them because the voltage change in the JB4 is only for N54 and couldn't get BMS to respond. After I fix the boost leak issue I'll look for a solution to the TMAPs.
__________________
2020 G01 X3 30e CURRENT M Sport Package 2019 Ford Raptor SuperCrew CURRENT 802A, KN Drop-in, RB Flaps, Husky Well Liners 2012 E70 X5M SOLD Stg 1+ Turbos, DPs, Velos Stg 2+, JB4, Race Cats, Bavauto Coils 2003 E46 M3 SOLD aFe CAI, AP Axleback, SSK, H&R Springs, TMS CMBR Arms, PF RTABs |
|
|
Appreciate
1
PsychoPhyr17.50 |
| 09-22-2020, 05:53 PM | #17 |
|
AW M Addict

40
Rep 217
Posts |
So I removed my turbos and each waste gate, the flap. Just rattles around. Is that normal?? The inducer side spins a little by hand but seems like more resistance than expected.
Turbo lab America won't respond and their phone number on website is now bad. Frustrating as I was counting on them. This all started as I still smelled coolant after doing the top lines. When I pulled alternator the crossover looked OK. The fun of tearing cars down right. Anyone with feedback on wastegate standard / expected behavior is appreciated. |
|
Appreciate
0
|
| 09-22-2020, 05:56 PM | #18 | |
|
AW M Addict
40
Rep 217
Posts |
Quote:
|
|
|
Appreciate
0
|
| 09-22-2020, 08:13 PM | #19 |
|
First Lieutenant
78
Rep 357
Posts |
Normal for the flap to have a little play as when the shaft moves, the flapper can self adjust to seal.
Now if there is play in the shaft, that can cause the flapper to misaligned the hole and cause gases to escape. Proper way to test is applying vacuum to the diaphram, 0.145 bar or something like that cant remember, and see if the flapper closes tightly and straight. |
|
Appreciate
0
|
| 09-22-2020, 09:50 PM | #20 | |
|
2022 M4 Comp Xdrive
1054
Rep 1,565
Posts |
Quote:
Might as well just get Pureturbos Stage 1 |
|
|
Appreciate
0
|
| 05-03-2022, 03:22 AM | #22 | |
|
Registered
0
Rep 1
Posts |
Quote:
 |
|
|
Appreciate
0
|
Post Reply |
| Bookmarks |
| Tags |
| e70, s63, turbo, wastegate, x5m |
|
|