


|
|
|
| 03-02-2023, 09:23 AM | #287 | |
|
Captain
 581
Rep 672
Posts |
Quote:
The X5 is still very "tilty" with the side to side weight transfer. I know it comes with a taller SUV but it's always seemed excessive IMO, my wife's 4M Q7 with base spring/strut suspension and static sway bars (as opposed to air suspension and active sways) seems like it's locked in this regard. That guy who posted #36 in the F15 forum it's unclear that he even owns an X5, his cars are listed an E90 and F10, if he does have an F15 the engine spec might also make a difference inthis regard but who knows. What really throws me is that guy says he runs H&R springs and he "loves it" ....he can't be trusted. lol I've done some annoying sway bars installs before (E39 540iT) so the hassle isn't a huge deterrent especially since the E70 seems like it could really use it. Not too crazy about the 320GBP price though.
__________________
N54 Powered M5 Wagon:
- M5 Shaft, M5 LSD, M5 Axles, M5 Brakes, M5 Front End, M5 skirts, M5 Mirrors - Manual Swap, MFactory SMFW, Spec Stg 3+, KW V3, RD Sport Sways, F14 SDC - EOS Port Injection Manifold, Fuel-It: Stg 2 LPFP +Lines +Ethanol Sensor - JB4, Hexon RR550s, Custom Inlet, AR DPs, 3" Exhaust, VRSF 7" IC, ER CP +Tial |
|
|
Appreciate
1
WordOnRoad313.00 |
| 03-02-2023, 12:44 PM | #288 | |
|
Captain
260
Rep 714
Posts |
Quote:
If you want to compare, tell me camera settings and I can set my old Canon dlsr with fixed settings so we can try to compare.
__________________
Daily/ Tow: 2010 X5 35D - 326k, Deleted w/DUDMD Stage 2, Sutphin Trans tune, Comfort seat retrofit
Fun car: 2004 ZHP 6mt - 256k miles, z4m FCAB, stock. Drift car: 2001 330i for sale  |
|
|
Appreciate
0
|
| 05-08-2023, 09:03 AM | #289 |
|
Captain
581
Rep 672
Posts |
End of Winter Start of Spring Update.
Truck/trailer rental? No thanks! 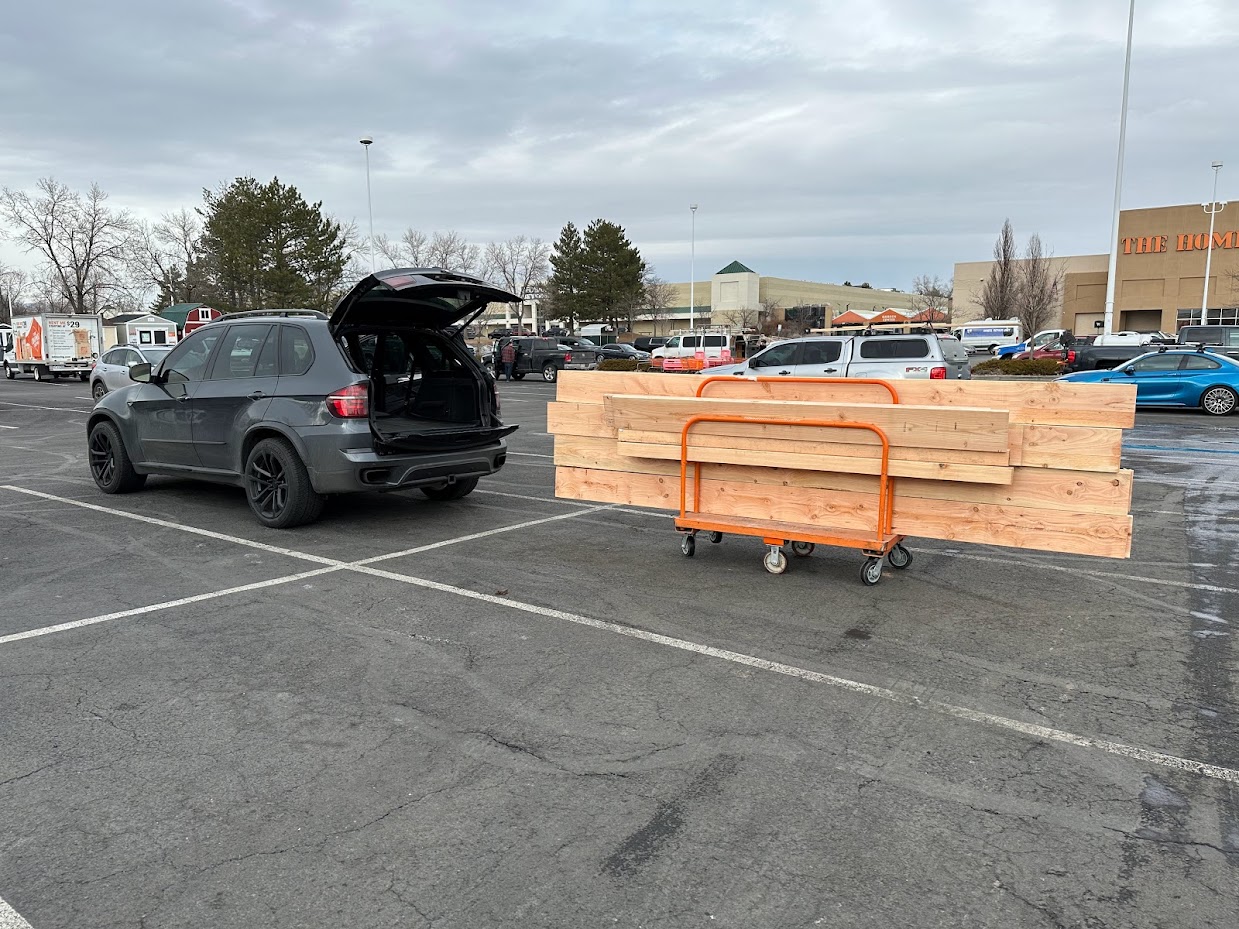 Passenger seat removal was key  Fighting the good fight against winter grime  Got caught in a snow squall on a snowboard trip. This was the drive up...  This was the drive back (in squall)  Aftermath, proud to say this is my best "winter coat" to date. 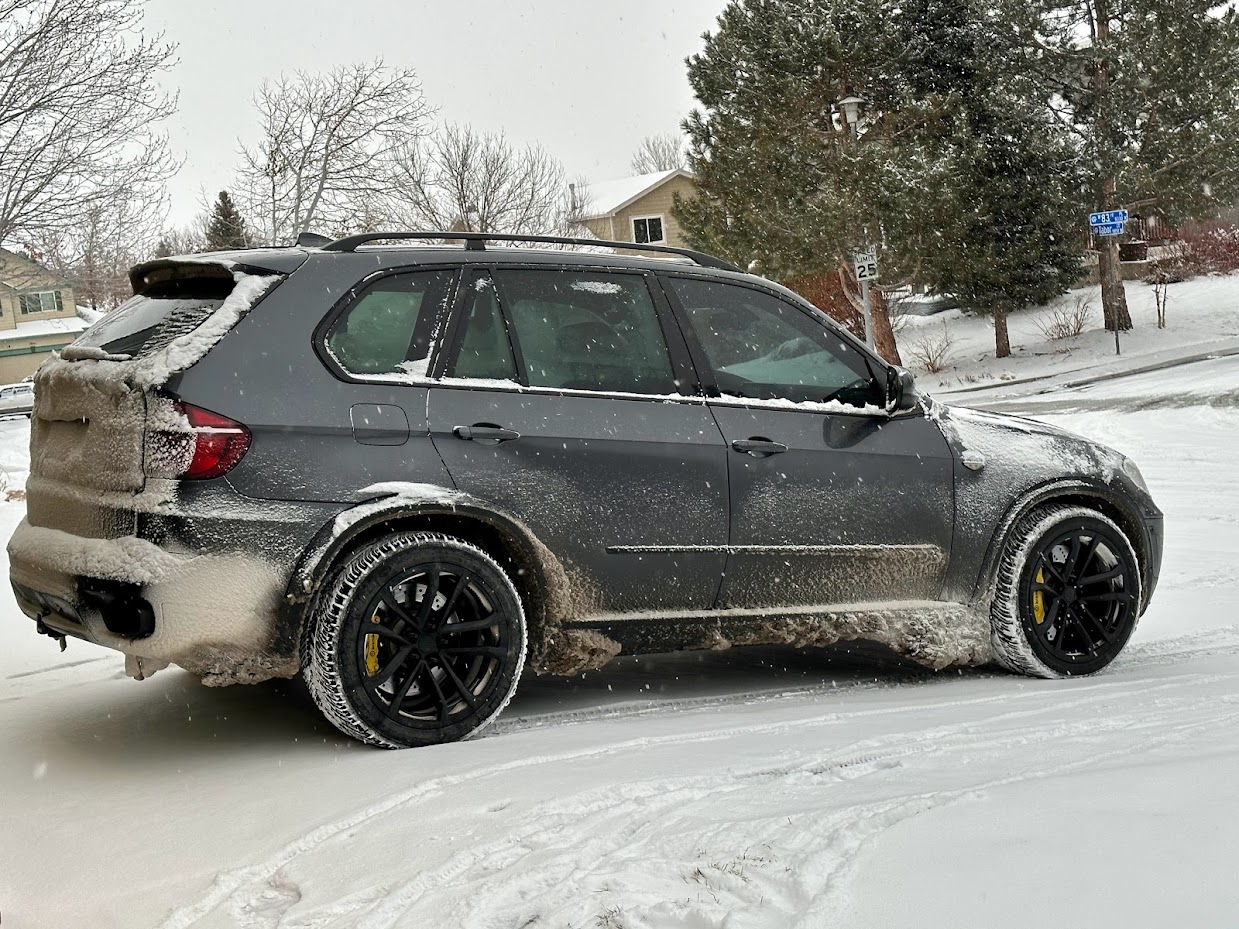 https://lh3.googleusercontent.com/pw...-no?authuser=0 X5 + SNOW + MUSHROOMS=  Telluride is very nice, probably the most striking mountains I have seen so far in the Rockies.   Picked up some kayaks from the in-laws. MPG wasn't great driving from Havasu, AZ to Denver.  All 3 vehicles clean at once? Had to snap a pic  New summer wheels inbound. Switching the 5th Gen 1LE ZL1 wheels for 6th Gen. I prefer the more traditional 5 spoke look but the wheels are still chunky, concave, and relatively light. The wheels are currently at the machine shop, then straight to the powder coated for a fresh satin black finish.    I also snagged an exhaust manifold which will be ceramic coated. This is part of my hot-side refresh which will include new ex-manifold studs, hardware, and all new gaskets to hopefully, finally, resolve my annoying exhaust leak. 
__________________
N54 Powered M5 Wagon:
- M5 Shaft, M5 LSD, M5 Axles, M5 Brakes, M5 Front End, M5 skirts, M5 Mirrors - Manual Swap, MFactory SMFW, Spec Stg 3+, KW V3, RD Sport Sways, F14 SDC - EOS Port Injection Manifold, Fuel-It: Stg 2 LPFP +Lines +Ethanol Sensor - JB4, Hexon RR550s, Custom Inlet, AR DPs, 3" Exhaust, VRSF 7" IC, ER CP +Tial |
|
Appreciate
4
|
| 05-17-2023, 03:07 PM | #290 | |
|
New Member
0
Rep 21
Posts |
[QUOTE=ucsbwsr;25817374
With the dark theme of the X5 the taillights and their bright red bothered me a bit so I got some Lamin-X smoked film. This is the lightest they make and offers the "dark-cherry" look I was going for. I also used some knifeless tape to cut the film so that it was only on the red and the white/clear sections have no film.[/QUOTE] I'm wondering if you could confirm the tint-color you used. I'm looking to darken the red slightly but don't want that fully tinted look. I know you said smoked film, but you also said the lightest they make which according to their site is "tint" while smoked would be considered medium-dark. Quote:
|
|
|
Appreciate
0
|
| 05-17-2023, 03:55 PM | #291 | |
|
Captain
581
Rep 672
Posts |
Quote:
__________________
N54 Powered M5 Wagon:
- M5 Shaft, M5 LSD, M5 Axles, M5 Brakes, M5 Front End, M5 skirts, M5 Mirrors - Manual Swap, MFactory SMFW, Spec Stg 3+, KW V3, RD Sport Sways, F14 SDC - EOS Port Injection Manifold, Fuel-It: Stg 2 LPFP +Lines +Ethanol Sensor - JB4, Hexon RR550s, Custom Inlet, AR DPs, 3" Exhaust, VRSF 7" IC, ER CP +Tial |
|
|
Appreciate
0
|
| 05-18-2023, 08:56 AM | #292 | |
|
New Member
0
Rep 21
Posts |
Quote:
One more question. I see you did a D2S conversion. I've actually got a set of Morimoto D2S bulbs + 55w ballasts sitting on a shelf in my basement for a project on a vehicle I ended up selling. What else would I need to pick up to use them? I see on their site they have a d1s to d2s adapter but that looks like for use with factory ballasts since it acts as the ignitor. Any more details you could share on that conversion? |
|
|
Appreciate
0
|
| 05-18-2023, 05:52 PM | #293 | |
|
Captain
581
Rep 672
Posts |
Quote:
Run a relay harness to power the ballasts. Get some D2S to D1S bulbs adapters, they are circular and snap onto the base of a D2S bulbs and then you can install it onto the projector like a D1S bulb.
__________________
N54 Powered M5 Wagon:
- M5 Shaft, M5 LSD, M5 Axles, M5 Brakes, M5 Front End, M5 skirts, M5 Mirrors - Manual Swap, MFactory SMFW, Spec Stg 3+, KW V3, RD Sport Sways, F14 SDC - EOS Port Injection Manifold, Fuel-It: Stg 2 LPFP +Lines +Ethanol Sensor - JB4, Hexon RR550s, Custom Inlet, AR DPs, 3" Exhaust, VRSF 7" IC, ER CP +Tial |
|
|
Appreciate
0
|
| 07-02-2023, 04:51 PM | #294 |
|
Second Lieutenant
39
Rep 223
Posts |
Hey ucsbwsr, how did you manage to remove the Rear compartment monitor aka RSE aka Rear seat entertainment display without damaging it?
I am referencing your post #36 https://www.xbimmers.com/forums/show...4&postcount=36 What is the correct procedure to follow here if you remember?  |
|
Appreciate
0
|
| 07-05-2023, 08:45 AM | #296 | |
|
Captain
581
Rep 672
Posts |
Quote:
__________________
N54 Powered M5 Wagon:
- M5 Shaft, M5 LSD, M5 Axles, M5 Brakes, M5 Front End, M5 skirts, M5 Mirrors - Manual Swap, MFactory SMFW, Spec Stg 3+, KW V3, RD Sport Sways, F14 SDC - EOS Port Injection Manifold, Fuel-It: Stg 2 LPFP +Lines +Ethanol Sensor - JB4, Hexon RR550s, Custom Inlet, AR DPs, 3" Exhaust, VRSF 7" IC, ER CP +Tial |
|
|
Appreciate
0
|
| 07-05-2023, 05:50 PM | #297 | |
|
Second Lieutenant
39
Rep 223
Posts |
Quote:
If anyone is wondering how to do this, keep in mind the following: The key to this job is an old credit card or other loyalty card you may have in your wallet. The pdf guide mentions a special tool sold by BMW, which is essentially a plastic card. Do not use metallic tools like screwdrivers or any thick plastic trim tools for this job, otherwise you will regret scratching or marring your monitor's finish. As the guide states, you start with the smallest pieces of the monitor's base. I will use the diagram in my previous post as a reference... see no.7. These are like the shoulders of the monitor and they are NOT hard plastic... they are soft and flexible and rubber like. So you carefully use the plastic card from their side, where they touch the hard plastic body. Get the card under the soft rubber and pop it out. So easy but do not be violent or in a rush! Then stick the credit card between the 2 remaining pieces (no.6) of the base and pry them apart. In my experience, the piece facing the front of the car popped out first. That was the bit which was covering all the screws for the monitor, console compartment and the console wooden trim. That's all I needed! I proceeded to remove trim pieces, console compartment, idrive controls, plastic trim covers (repainted a few days ago), console cage, and finally my cup-holder unit to which I performed a sliding cover replacement. I put everything back together and now the console looks factory new! Job well done.  |
|
|
Appreciate
0
|
| 07-24-2023, 09:11 AM | #298 |
|
Private
 

16
Rep 71
Posts |
Hey ucsbwsr, love the writeup and all the details. I have recently purchased a 2012 X5D with 3rd row. The only different to you is that I actually need to use the 3rd row as I have four kids. I have read and try to outline details around your progression with the suspension, but I am a bit confused as to what are the restrictions if I do keep the 3rd row. I am not sure if I can run the modified setup you had with the Konis keeping the 3rd row. Would you mind commenting on how your setup would have been different if you did keep the 3rd row. Also, would you mind outlining the part numbers that you would use to make that setup and finally what kit (part numbers) did you end up using with KW V3's (was it for non-air or air)?
Much appreciated!
__________________
2006 M3/MT Vert
2007 BMW X5 |
|
Appreciate
0
|
| 09-14-2023, 05:00 PM | #300 | ||
|
Captain
581
Rep 672
Posts |
Quote:
The KWs I have are P/N 35220091 I kept my rear air. Quote:
__________________
N54 Powered M5 Wagon:
- M5 Shaft, M5 LSD, M5 Axles, M5 Brakes, M5 Front End, M5 skirts, M5 Mirrors - Manual Swap, MFactory SMFW, Spec Stg 3+, KW V3, RD Sport Sways, F14 SDC - EOS Port Injection Manifold, Fuel-It: Stg 2 LPFP +Lines +Ethanol Sensor - JB4, Hexon RR550s, Custom Inlet, AR DPs, 3" Exhaust, VRSF 7" IC, ER CP +Tial |
||
|
Appreciate
0
|
| 09-14-2023, 05:26 PM | #301 |
|
Captain
581
Rep 672
Posts |
Just rolled over 131,000 and since my last update in April I have averaged >26mpg over the past 5,000 miles, very respectable. Over the past 5 months the X5 has been a doing it's job facilitating work and play.
Mountain bike here  Mountain bike there  Mountain bike everywhere  Yakin' too  Finally got a strut for my cargo floor!   Got my manifold back with it's ceramic coating.   Pile-o-goodies. Oil, various filters, tie rods, and some window surrounds for the C/D pillar window. Also exhaust manifold studs, nuts, and gaskets.  New tire deflectors  New wheels mounted     Washy wahsy  Back to Work! Strapping and insulation for my garage ceiling. It will be R59!  Back to Play! 
__________________
N54 Powered M5 Wagon:
- M5 Shaft, M5 LSD, M5 Axles, M5 Brakes, M5 Front End, M5 skirts, M5 Mirrors - Manual Swap, MFactory SMFW, Spec Stg 3+, KW V3, RD Sport Sways, F14 SDC - EOS Port Injection Manifold, Fuel-It: Stg 2 LPFP +Lines +Ethanol Sensor - JB4, Hexon RR550s, Custom Inlet, AR DPs, 3" Exhaust, VRSF 7" IC, ER CP +Tial |
|
Appreciate
0
|
| 09-14-2023, 06:31 PM | #302 |
|
Captain
581
Rep 672
Posts |
Driving home from a trailhead I was on a dirt road which had a lot of washboard surfaces. On the drive a small front end clunk became a front end bang-bang. When I got back onto paved roads the clunking continued so I knew something let go. When closer to home and stopped at a red light I did notice the smell of raw diesel which I thought was odd but I didn't think too much about it .....until I got home and noticed a trail of fuel in the driveway. lol
As it turns out the Phantom fuel system (which is like a small fuel filter) which was installed in-line near the OEM fuel filter had it's connection rattled loose and was leaking. For simplicity and reliability I removed the unit. This was originally installed since it is intended to "excite" the fuel and improve combustibility and therefore improve economy and performance. Hard to really extrapolate data to confirm that since there are so many variables in the mix but I figured with it now removed I can see if there are any noticeable differences. I figured the clunking was from the Phantom fuel sysytem banging around since it was loose and was only secured with a couple zip ties. When removing the Phantom fuel system I also swapped in a fresh OEM fuel filter. Better to have a fuel leak under the vehicle instead of the engine bay!  Phantom system which was removed  We replaced our utility sink with a dog wash for our good boi Oliver.  Dog-wash also = auto parts and wheel washer!  Going for a drive after addressing the fuel system it became very clear I did NOT resolve the clunking. Time to go back in...  rugh rough  RUGH ROUGH!!!   Found the problem! Sturt mounts had 40k on them but this damage was caused by an installation error ...by me. Turns out I didn't install the metal washer on the underside of the strut mount, therefore on the rubber was keeping the strut shaft from poking through, if the washer was installed it would bottom out on the strut mount and squish the foam rings. Whoops!!   I had some sturt mounts shipped from FCP and while I waited for them to arrive I took advantage of having the X5 in the garage and did some other maintenance. Cabin (and recirc) filters  New passenger handle    Added some more sound deadening material (felt tape) to various locations on the dash to known creaky locations, back of Nav screen shown here.  The metal grills on my P3 vent gauge were once black but have become copper-ish from, I assume, UV. So it was refreshed with Plasti Dip.    On a side-note this style jack stand does well on the Swisstrax floor and doesn't deform or damage it.   Time for the long overdue leather cleaning. I previously used Leatherique on my wife's Q7 which has awesome Valcona leather and the results were awesome. Q7 leather BEFORE  Q7 After   Shortly after coating all of the leather in Leatherique I realized I wasn't sure is Dakota was even real leather. As it turns out it's a real leather but has a coating on top which renders Leatherique not as effective. Thankfully my leather is perforated so the cleaner can penetrate there. I followed through with the procedure knowing it's unlikely the results would be as spectacular and in the end I am happy with the results but this really makes me want to track down an X5M interior with Merino leather. No doubt the Dakota is durable but I am not a fan of the way it feels, it reminds me of Crayons and plastic. Anywho, back to pictures!  Here are BEFORE photos 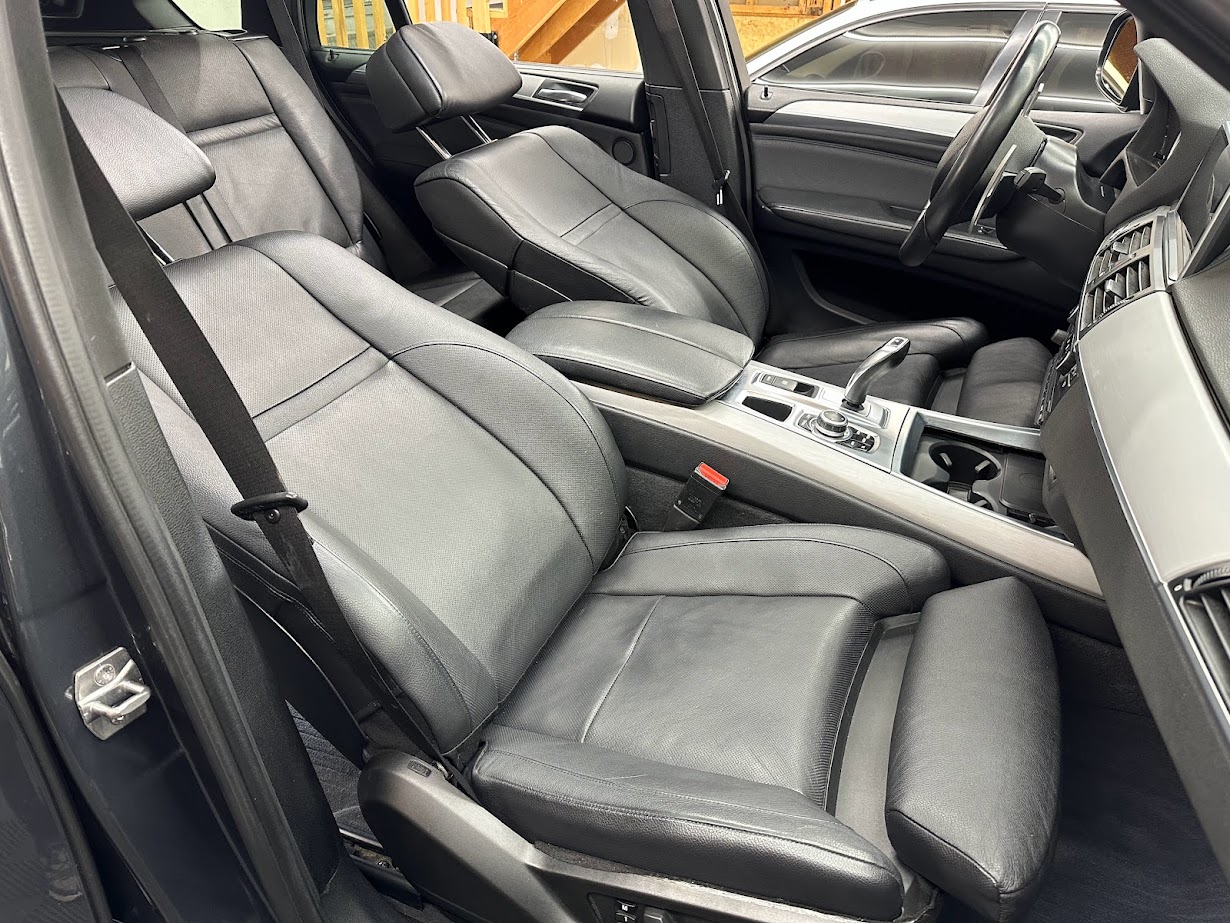    Leatherique Rejuvinator applied. 2.5 coats and let it sit overnight.    Leatherique Pristine Clean applied and then leather was agitated with a horse-hair brush, wiped, and buffed. It's always a fun transformation to observe, notice how the leather has a nice matte finish.    Steering wheel stitching before  Stitching after  Wheel after. There is still some shiny-ness (dirt and grease) up top so I may reapply later but overall it's a dramatic change.  Bucket before cleaning driver seat and steering wheel  ...After  Pokey pokey!    Rear seat During/After  AFTER   New strut mounts arrived. I couldn't find my OEM strut dust shields/washers and FCP/BMW wanted $35 per washer *pfft* get outta here, to the local yard I went for some recycling.  New strut mounts AND WASHERS installed, we're back in business.  Yea, that's some nice rubbing. You gotta pay the the 295/45/20 tax in order to enjoy the benefits of those cushy sidewalls. 
__________________
N54 Powered M5 Wagon:
- M5 Shaft, M5 LSD, M5 Axles, M5 Brakes, M5 Front End, M5 skirts, M5 Mirrors - Manual Swap, MFactory SMFW, Spec Stg 3+, KW V3, RD Sport Sways, F14 SDC - EOS Port Injection Manifold, Fuel-It: Stg 2 LPFP +Lines +Ethanol Sensor - JB4, Hexon RR550s, Custom Inlet, AR DPs, 3" Exhaust, VRSF 7" IC, ER CP +Tial |
|
Appreciate
1
Nyc Dito112.50 |
| 11-30-2023, 02:28 PM | #303 |
|
Lieutenant

238
Rep 453
Posts
Drives: ESS VT2-625 E92 M3
Join Date: Jul 2013
Location: Seattle WA
|
I've tried to look for the fitting that you've used on the OCC but couldn't find one..
Can you give me some information about the 2 fitting that you used on the OCC? Really confused about the size... Already failed buying different size 
__________________
2008 BMW E92 M3 Santorini Blue ESS VT2-625 Supercharged
 Last edited by Aha; 12-05-2023 at 03:13 PM.. |
|
Appreciate
0
|
| 12-02-2023, 10:17 AM | #304 | |
|
Captain
581
Rep 672
Posts |
Quote:
__________________
N54 Powered M5 Wagon:
- M5 Shaft, M5 LSD, M5 Axles, M5 Brakes, M5 Front End, M5 skirts, M5 Mirrors - Manual Swap, MFactory SMFW, Spec Stg 3+, KW V3, RD Sport Sways, F14 SDC - EOS Port Injection Manifold, Fuel-It: Stg 2 LPFP +Lines +Ethanol Sensor - JB4, Hexon RR550s, Custom Inlet, AR DPs, 3" Exhaust, VRSF 7" IC, ER CP +Tial |
|
|
Appreciate
1
JDAURIA725.00 |
| 12-05-2023, 03:17 PM | #305 | |
|
Lieutenant
238
Rep 453
Posts
Drives: ESS VT2-625 E92 M3
Join Date: Jul 2013
Location: Seattle WA
|
Quote:
I just removed it.I already purchased the 12an fittings for the pcv plate and the plastic hose. I was just looking for the fitting that you plugged in to the oil separator. I have purchased the same oil separator. The oil separator has two 1" wholes and since the 12an fitting for the pcv's uses 3/4. And also using fitting like you looks way better too.. Thanks and sorry for my bad english!
__________________
2008 BMW E92 M3 Santorini Blue ESS VT2-625 Supercharged
|
|
|
Appreciate
0
|
| 12-07-2023, 08:41 AM | #306 | |
|
Captain
581
Rep 672
Posts |
Quote:
https://www.ebay.com/itm/191856804642 Also, you are Korean? I used to live there in 2010/2011 when I played volleyball for Korean Air. I love that place! Evan
__________________
N54 Powered M5 Wagon:
- M5 Shaft, M5 LSD, M5 Axles, M5 Brakes, M5 Front End, M5 skirts, M5 Mirrors - Manual Swap, MFactory SMFW, Spec Stg 3+, KW V3, RD Sport Sways, F14 SDC - EOS Port Injection Manifold, Fuel-It: Stg 2 LPFP +Lines +Ethanol Sensor - JB4, Hexon RR550s, Custom Inlet, AR DPs, 3" Exhaust, VRSF 7" IC, ER CP +Tial |
|
|
Appreciate
0
|
| 12-07-2023, 12:54 PM | #307 | |
|
Lieutenant
238
Rep 453
Posts
Drives: ESS VT2-625 E92 M3
Join Date: Jul 2013
Location: Seattle WA
|
Quote:
OMG Thank you so much! Yes I am Korean  Oh wow Glad you liked it in Korea! I miss Korea too Q__Q
__________________
2008 BMW E92 M3 Santorini Blue ESS VT2-625 Supercharged
|
|
|
Appreciate
0
|
| 12-08-2023, 11:43 AM | #308 | |
|
Second Lieutenant
97
Rep 281
Posts |
Quote:
ucsbwsr Last I remember you took the OCC off - Is it still off and if so any findings one way or the other? |
|
|
Appreciate
0
|
Post Reply |
| Bookmarks |
|
|


