Found a deal and picked up a pair of B&W subs (65-13-2-622-510).
Given that audio is very subjective by individual, I’m extremely happy with the S752A amp powering the B&W underseat subs and can easily recommend this upgrade.
NOTICE: I realize not everyone is interested in audio upgrades, nor is interested in going to the extent I’ve documented. I only hope the info is helpful in some way.
If I could only do one audio mod to my vehicle it would be to replace the center dash coaxial speaker with a B&W midrange (65-13-2-622-774) and filtered tweeter (65-13-9-279-629). Note you’ll need to modify the enclosure b/c the tweeter bank is blanked out or purchase a used center dash enclosure (65-13-9-277-840) from the S677A (Top HiFi) audio system which has cutouts for a midrange and tweeter. Expect roughly $100 for brand new tweeter, ~$150 for brand new midrange, and ~$40 for used enclosure.
SUMMARY
The Bavsound ghost subwoofers I have been using were a modest improvement over the S752A under-seat subs when using the oem infotainment system. Once I upgraded my system as described below in combo with ghost subwoofers, the bass became very crisp and punchy [With the B&W subs installed, I now recognize my setup didn't have a lot of sub-bass]. The bass results only improved with custom crossovers and B&W midranges installed all around. I have been very happy with this setup. Then the thread below enlightened me that the S6F1A B&W subs could be swapped in and the results were significant. However, I still did not feel the need to swap subs...until after a year of monitoring when I found a deal on a lightly used pair and decided to try them out. The thread below by
SlowX6M identifies that the S6F1A audio system sends the subs 250w rms and
RL18 determined that even more amazing results could be had using the under-seat B&W subs when a separate amp and dsp are used to send 200+watts of power to the subs. It was/is my intent to duplicate this setup, however after this install I’m extremely happy to keep powering the B&W subs with the individual S752A amp. I will save this project after hitting some higher priority items and would expect the results to be significant.
https://www.xbimmers.com/forums/show....php?t=1774331
INSTALLATION:
1. Remove Front Seat Trim. For the seat front trim, you may be able to do step 3 and it'll slide out easily. Otherwise continue steps. All front seat trim removal is the same, as is all rear seat trim.

2. Unfasten Front Seat from Floor. Slide seat forward and remove Qty.2 T45 Torx Screws from rails. Slide seat rearward and remove Qty.2 T45 Torx Screws from rails. Bolt installation torque is 43Nm.
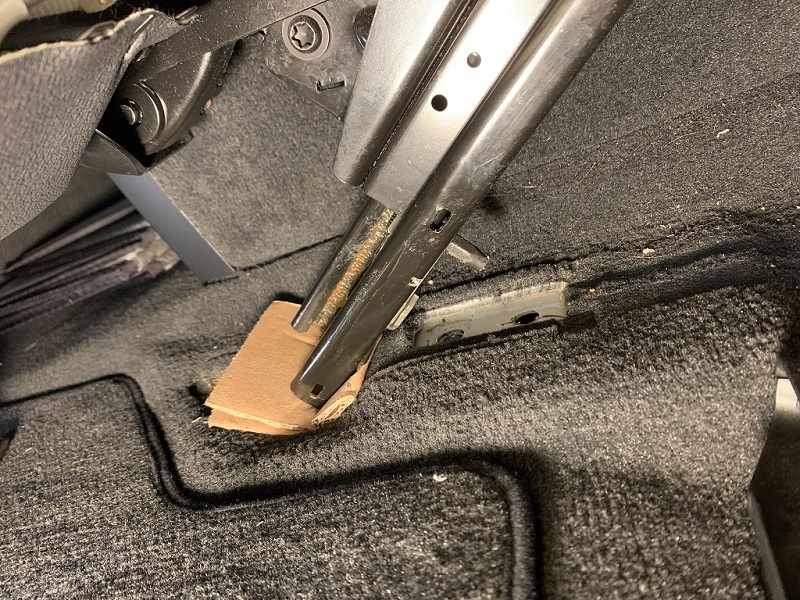
3. Position Front Seat for Sub Removal. Place folded cardboard under rear rails so that when seat pivots rearward, the cardboard is between rails and carpet. Position seat using seat control buttons so that when you manually pivot seat backward, the seat back rests on the rear seat AND the seat electrical harness is not in tension. This will require holding seat and monitoring of electrical harness as seat back adjustments are made.
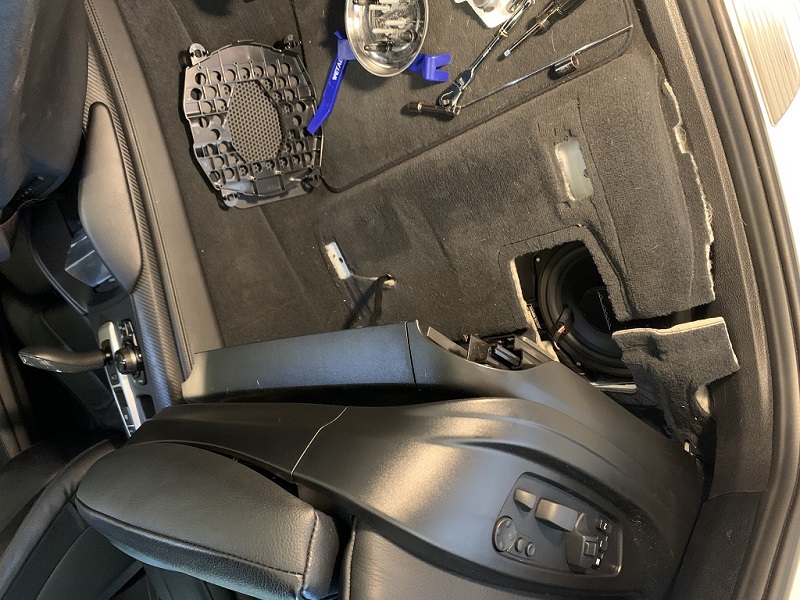
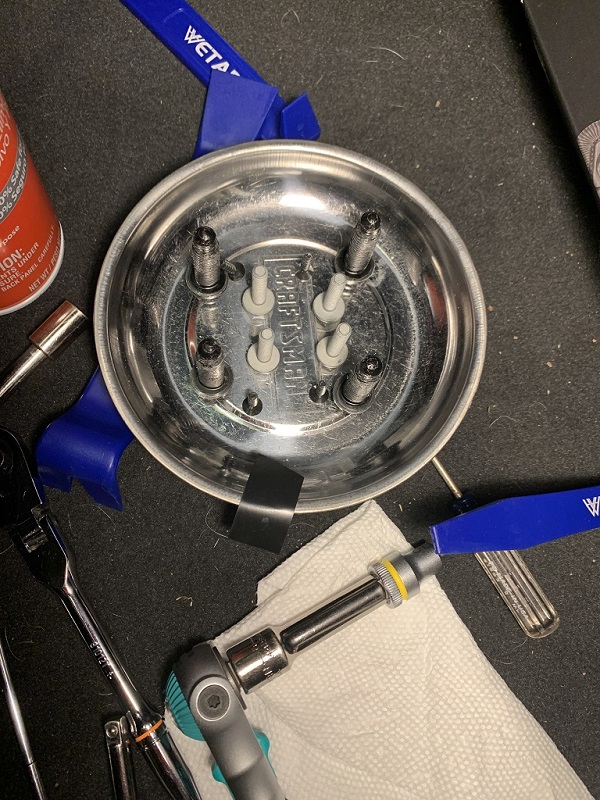
4. Remove underseat subwoofer. Remove Qty.4 T15 Torx Screws and remove top cover. Lift up surrounding carpet. Remove Qty.4 10mm Socket Head Screws. Disconnect electrical subwoofer connector. Pull out subwoofer.
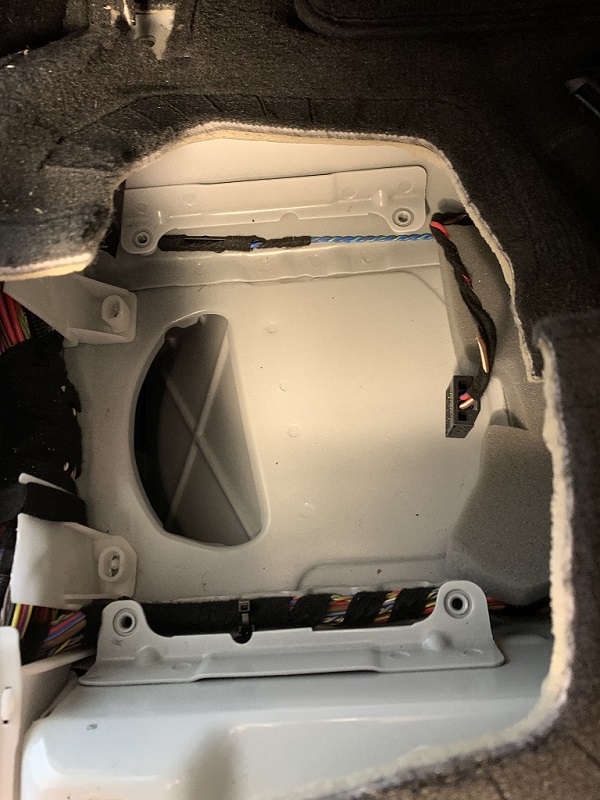
5. Install S6F1A B&W Subwoofer.
- Remove OEM S752A or Bavsound subwoofer, but reuse fasteners, enclosure, and top trim with S6F1A B&W subwoofer.
- The Bavsound subwoofer was installed with D-shaped adhesive gasket. Remove gasket as it is oversized and protrudes past the enclosure edge and prevents the S6F1A B&W sub from fitting flatly into the S752A oem subwoofer enclosure.
- When working on a table with the subwoofer, set it on some wax paper. The bottom of the subwoofer has a lightly sticky gasket that is supposed to make a seal with the floor. Setting it on wax paper prevents the gasket from picking up dirt, etc.
- Install foam adhesive (or D-shaped) gasket 5/16” wide by approx. 28.5” long and 1/8” thick. The S6F1A B&W subwoofer can be installed without, however doing so makes the sub susceptible to wobble upon assembly if care is not taken to tighten fasteners evenly. This is because the sub bottom is dome shape and interferes with the S752A enclosure like a bowl fitted inside a round hole. Even so, it was obvious that the sub mounting flange sat about 1/8” above the mounting surface of the S752A sub enclosure and thus appeared not to seal. As such, using the foam adhesive gasket results in the sub flange sealing while sitting more secure and evenly.


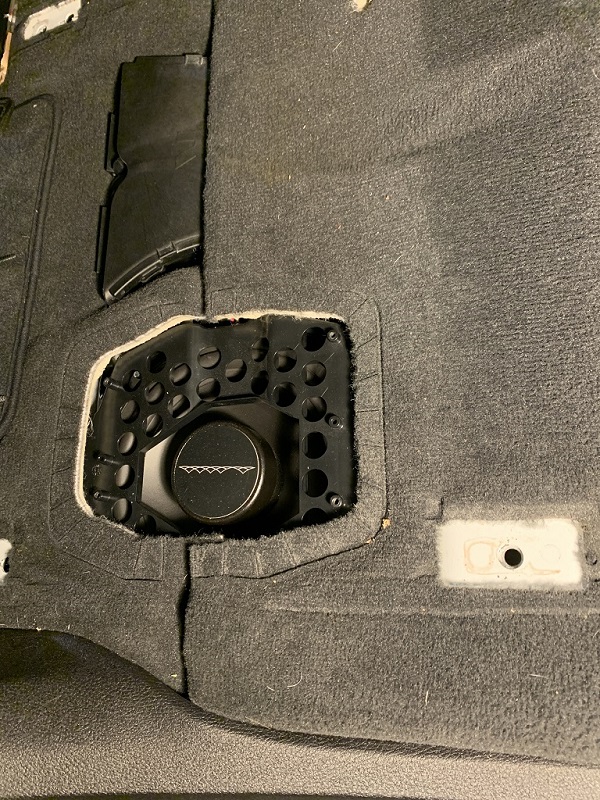
- Install the B&W subwoofer with existing fasteners such that the top flange of the subwoofer is flush with the enclosure surface surrounding the sub. This is a guide, just make sure it’s fixed in the enclosure. Making it flush just ensures it’s aligned evenly in the sub enclosure, as well as creates the seal.


- The S752 enclosure top trim piece does not fit perfectly back on top of the enclosure b/c it interferes with the S6F1A B&W sub top frame. However, the trim piece is required to install the protective trim cover which protects the sub under the seat as well as covers the carpet hole. As best possible, re-install with top trim piece sitting evenly on top of sub, then insert assembly into vehicle and fasten 10mm hex bolts making sure to screw them in evenly at all four corners to ensure top trim piece remains flat/even. Tighten only by hand and then ensure sub assembly is fixed to the floor and does not move. Note that this trim piece will deflect slightly and affect the hole alignment of the top trim piece, but no worries it shouldn't be enough to affect installation.
- Prior to reinstalling the subwoofer, the S752A under-seat subwoofer connector must be modified to interface with S6F1A B&W sub OR new universal connectors and pins must be purchased (see below). Pry up connector tab. Press pin locks and remove both wires from connector. Using a sharp chisel, remove long tab that prevents insertion into B&W subwoofer connector shell. Note the S752A connector does not lock into S6F1A B&W sub connector.

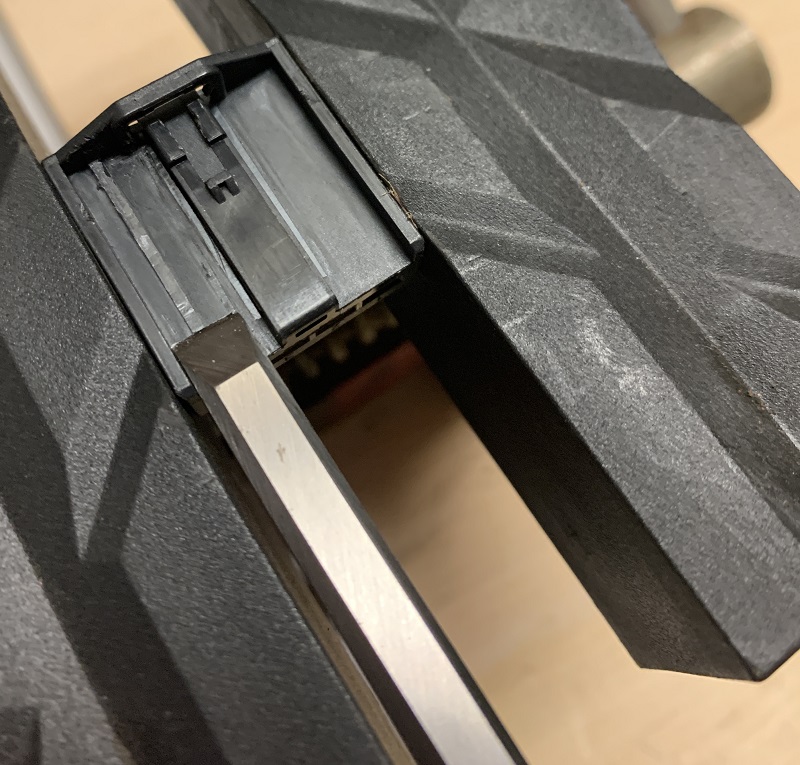
- The under-seat replacement connector is P/N: 61-13-2-359-996 and comes with three sizes of pins. It also appears to be universal so fits S752A and S6F1A under-seat subwoofer systems. Cost is about $25/each. To remove wires, lift connector top tab carefully (fragile). Using a tiny flat head, press down pin locks while simultaneously pulling on wires.
-Now is a great time to vacuum and grease the seat rails.
CURRENT AUDIO SYSTEM SETUP
- This section provides you a timeslice of my current audio setup when considering my conclusions below.
- My vehicle has the S752A Individual Audio System which is a great system. This OEM system has filters (capacitors) in the tweeters located in the D-Pillars and Rear Doors. The center dash is a coaxial speaker with filter. The front door component speakers have diplexers (crossovers) in the door panels. However, it’s important to note that as our vehicles age, so do the low quality capacitors in the diplexers and filters which cause drifting of the crossover points and can result in a muddy sound (relative to upgrades below). I have tested this statement first hand as I examined old diplexers and tweeter filters by measuring their capacitance and found significant deviance from the rated capacitance.
- Been using Bavsound Ghost under-seat Subwoofers in place of the S752A under-seat subwoofers for years. These point upward toward the seat, as opposed to the oem subwoofers that point down into a oem designed routed “port” (path that may go up the b-pillar)
- Have an android infotainment system stored with lossless music files which are played on the UAPP app. The UAPP app has a 10-band equalizer starting at 31Hz. Sound is output digitally via the android infotainment USB and then to an Audioquest Cobalt digital to analog converter (DAC). From there I use an audioquest high-end aux output cable that plugs into the OEM AUX socket in the center console. I now do not underestimate the ability of the OEM Aux to output great audio, especially as described above. It exceeds the listening experience I get on the oem infotainment system and is thus now preferred. If you dive into my previous pedantic posts, you’ll see I’m setup so that both systems are almost equalized in volume, so I don’t need to adjust volume when going from android infotainment to oem infotainment and vice versa. [Side note, if you don’t have an android infotainment system but do have an android phone, you should be able to duplicate playing music files with great results through the OEM Aux In if you use the UAPP player app. Assuming your android phone has music files, download UAPP from google play, connect your phone to a DAC, then use an aux cable from the DAC to the OEM Aux In in center console. Adjust UAPP equalizer as wanted.
Note...IMO music file, DAC, and aux cable quality critically matter. Be sure to clean out your Aux In port with compressed air, any filament in there can cause static.]

- OEM infotainment Treble and Bass set at 0. Equalizer set to flat. Surround OFF.
- In the process of upgrading all my S752A speakers to S6F1A B&W speakers: midranges (65-13-2-622-774) and non-filtered tweeters (65-13-2-622-773). At the moment, all locations except the front doors have upgraded B&W speakers.
- In the process of installing custom matched crossovers to the B&W speakers at all locations. I currently have completed the rear doors and center dash channel. The sound with the custom crossovers is another level in clarity. I compare them to the S752A components in the front doors and it’s not a fair comparison as the front doors sound very muddy. Had I not heard the what the sound could sound like with upgrades, I would be satisfied with my S752A system knowing that it sounds great and sure, like everything else, there’s better.
S6F1A B&W SUB CONCLUSIONS
After multiple measurements, the B&W subwoofer is between 5.5 ohms and 6.0 ohms, likely the latter. The Bavsound subwoofer is rated for 8 ohms. FWIW the S752A (individual) under-seat subs are the heaviest at 1637g, Ghost subs at 1038g, and B&W subs 1031g. BMW states that the B&W sub can handle 250watts rms. It’s unknown how much the S752A amp sends the under-seat subwoofers. However, the B&W subs have a much greater presence given the lower resistance.
The end result is a significant improvement. It’s difficult to write about sound. The clarity remains with increased SPL, fullness, and the addition of modest low frequency (~31hz) output. Using the UAPP equalizer I can zero out the 31Hz band and there is a definite shift in reduction of sound, hence the B&W subs are reproducing in that frequency range. It is a hypothesis, but I believe the OEM Aux Input audio is not altered by the S752A amp, whereas when using the OEM infotainment system the audio is altered by the S752A amp (even with settings to default). I get amazing clarity from the Android Infotainment setup and less clarity when playing through the OEM infotainment system, given the settings mentioned above. However, both sides output great audio IMO.
FWIW, a note on the quality of the B&W speakers, or at least the P/N's mentioned in this post, I had tested in post#219 Pg.10. The crossover/speaker designer showed me an analysis comparing a very high-end speaker to one that was not. The high end speaker curve was not flat and was indeed horribly jagged, where as the other was not great but in comparison was flat. The obvious point being that price does not necessarily make a speaker good and testing is your friend. He said these B&W speakers were "good", but he hoped I didn't spend a lot of money on them..LOL.