Gents,
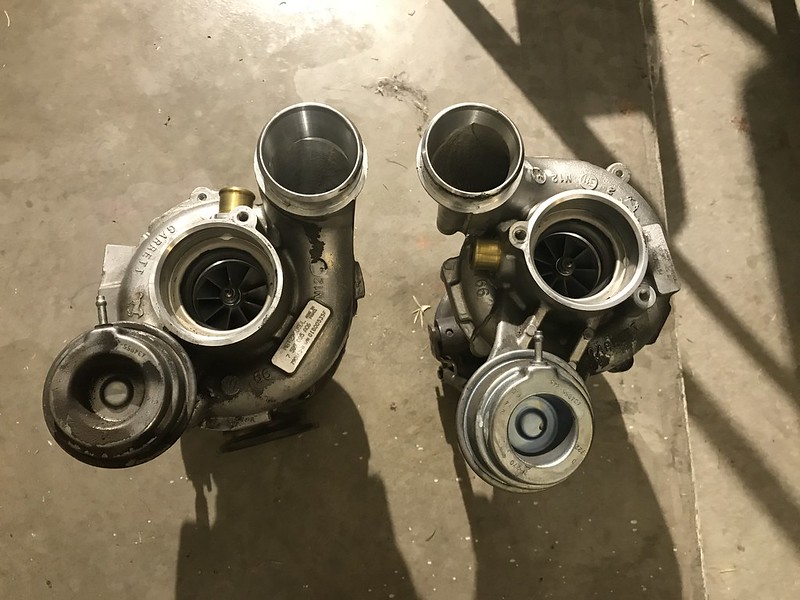
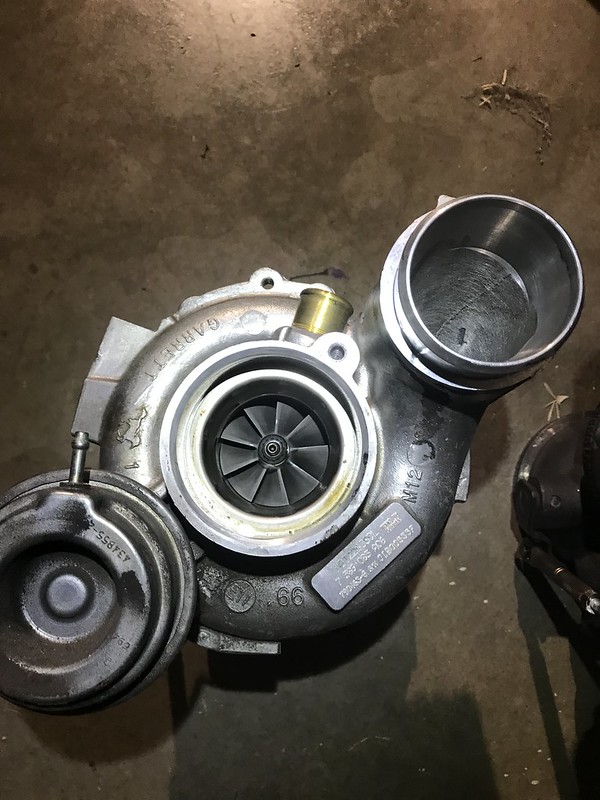
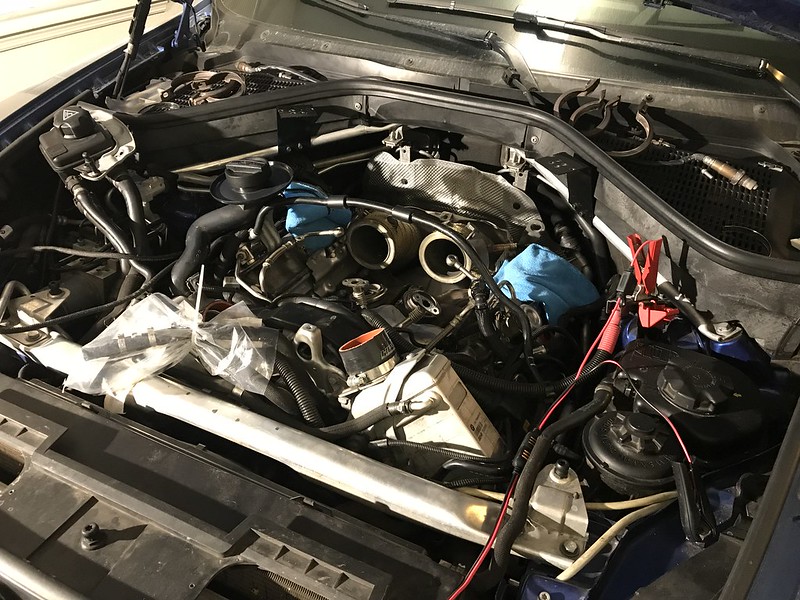
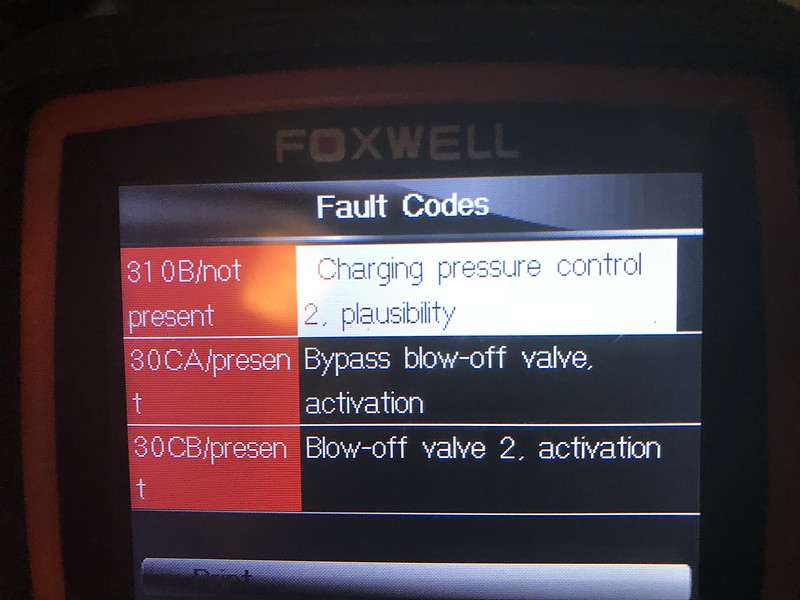
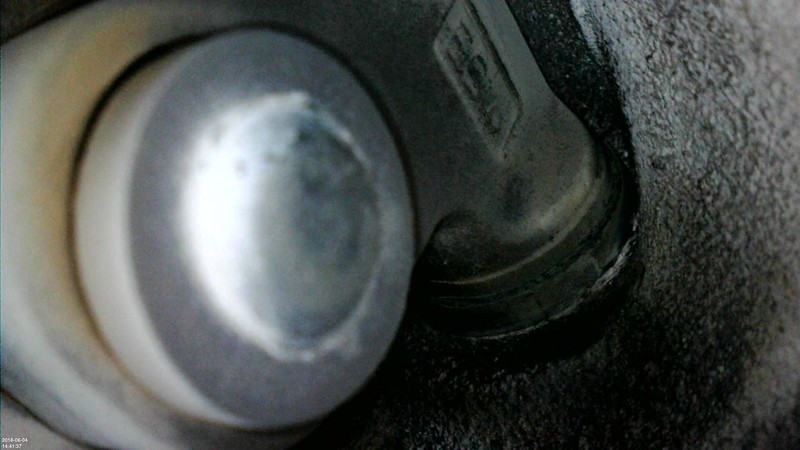
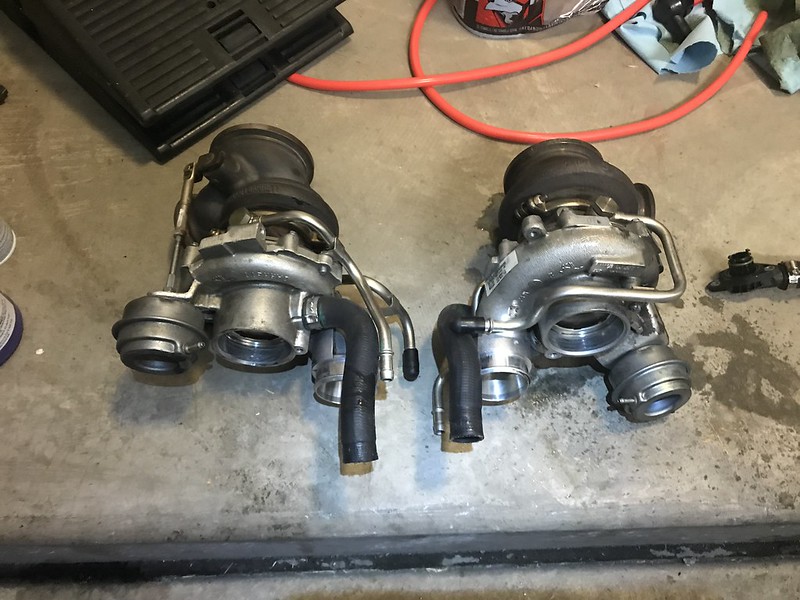
I went on a road trip recently and apparently it was just a bad time, because I started getting 310B codes between 65-75mph and it would put me in limp mode. I kept having to pull over, turn the vehicle off and on again, then be on my way. After doing some research I found that it was likely the wastegate arms on the turbos. I ordered a borescope off of amazon and piped it in through the oxygen sensor to verify, and found that there was a bit of play in the arm. Basically, the arm has so much play that it overextends and opens back up when its supposed to close. I contacted Turbo Lab America and Austin said he could do a full rebuild with wastegate replacement. I wanted an upgrade also so we threw in a Compressor wheel upgrade while we were at it. Unfortunately, he only has the compressor wheel upgrade and not the turbine so only stage 1 upgrade, not stage 2. I pulled off the turbos over two days and it took me about 4.5 hours total. When I get the turbos back Ill post an Installation DIY with all the gaskets I bought and review the upgrade.
DIY: E70 X5M TURBOCHARGER REMOVAL
NOTE: I RECOMMEND THAT ALL MAINTENANCE IS COMPLETED BY A CERTIFIED MECHANIC;This DIY is merely a record of what I did to complete this vehicle maintenance; I DO NOT RECOMMEND COMPLETING THIS YOURSELF.
Tools Needed:
1/4 Drive Ratchet
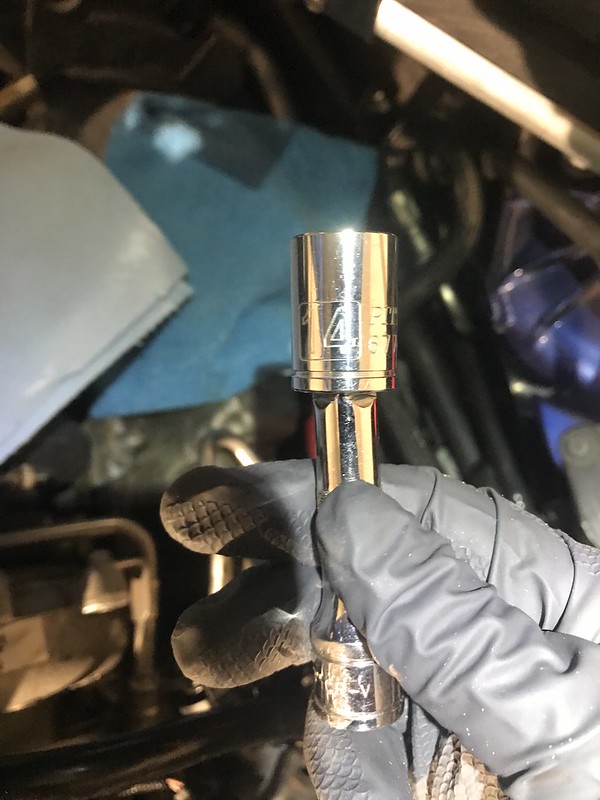
1/4 Drive Extensions
3/8 Drive Ratchet
3/8 Drive Extensions
3/8 Drive Torque Wrench
7/8 Oxygen Sensor Socket (Cutaway Style; 3/8 Drive)
13mm Socket
14mm Socket
10mm Socket
10mm Deep Socket
8mm Socket
6mm Socket
T25 Torx Bit
T30 Torx Bit
E8 External Torx Bit
Flat Head Screw Driver
Small Flat Head Screw Driver
Needle nose pliers
Wire Cutter
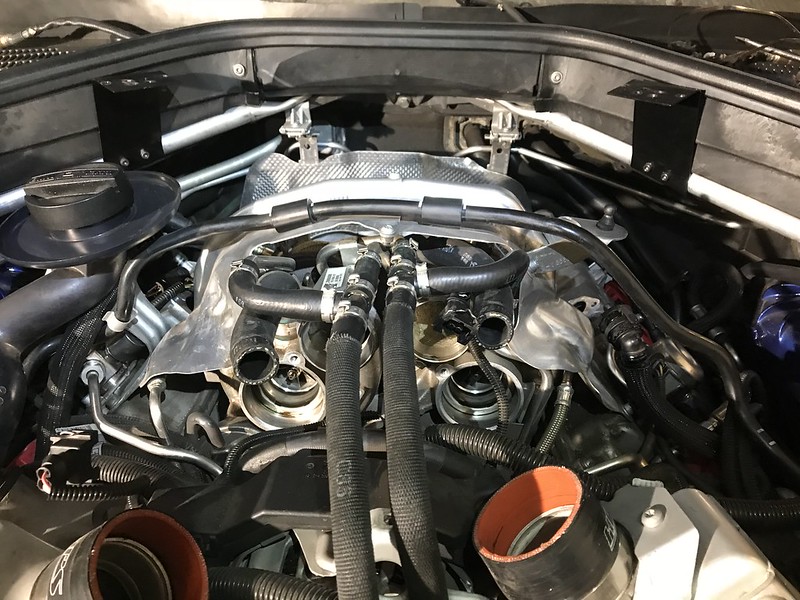
STEP 1: Remove the Filtered Air Ducts and Charge Pipes
a) ENSURE YOU ABSOLUTELY REMOVE THE NEGATIVE WIRE FROM THE BATTERY TERMINAL. YOU ARE WORKING NEXT TO A LIVE WIRE AND WILL SHORT/START A FIRE WHEN THE TURBOS TOUCH THE LIVE WIRE
b) Follow this DIY for removal of Filtered Air Ducts and Charge Pipes:
https://www.xbimmers.com/forums/show....php?t=1434167
STEP 2: Remove Crankcase Ventilation Heat Shield
a) Remove Driver side crankcase ventilation heat shield using T30 Torx Bit (4 bolts total)
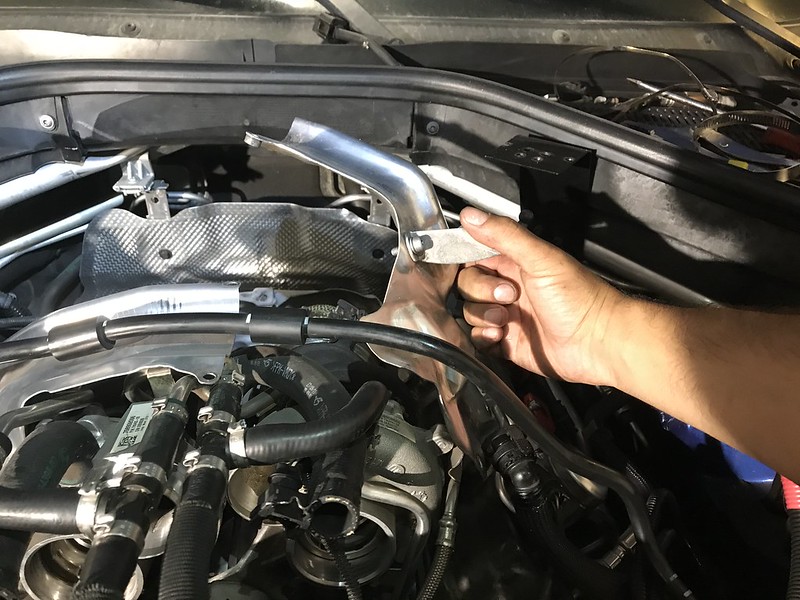
b) Remove Passenger side crankcase ventilation heat shield using T30 Torx Bit (2 bolts and a PITA)
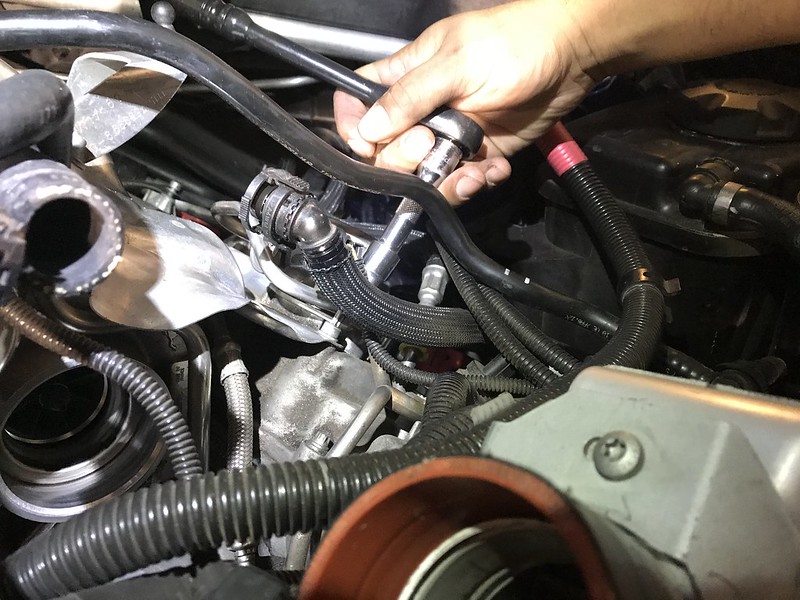
STEP 3: Disconnect Turbocharger Cooling Lines
a) Cut off hose clamps using wire cutters or heavy duty shears (4 hoses total)
b) Pull hoses off of hardlines, place in plastic bag, seal, and move out of the way.
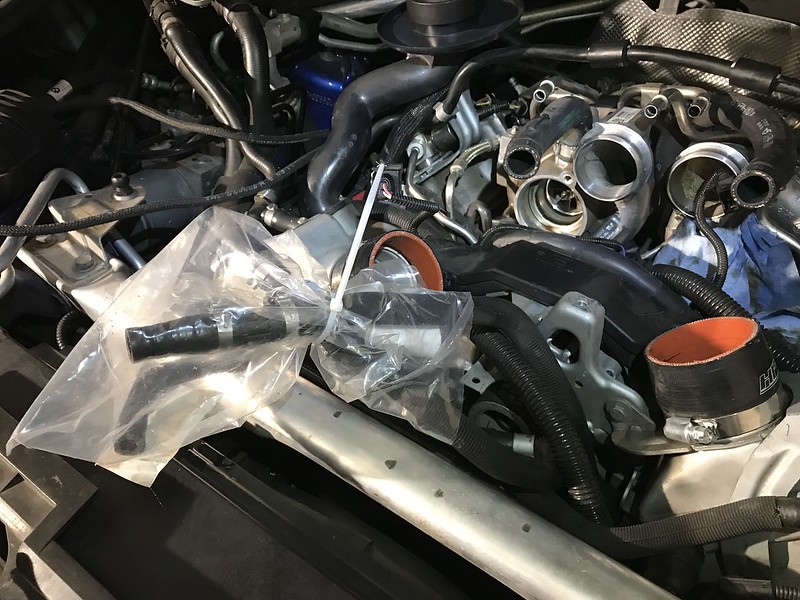
c) Plug hardlines leading to turbochargers using vacuum plugs
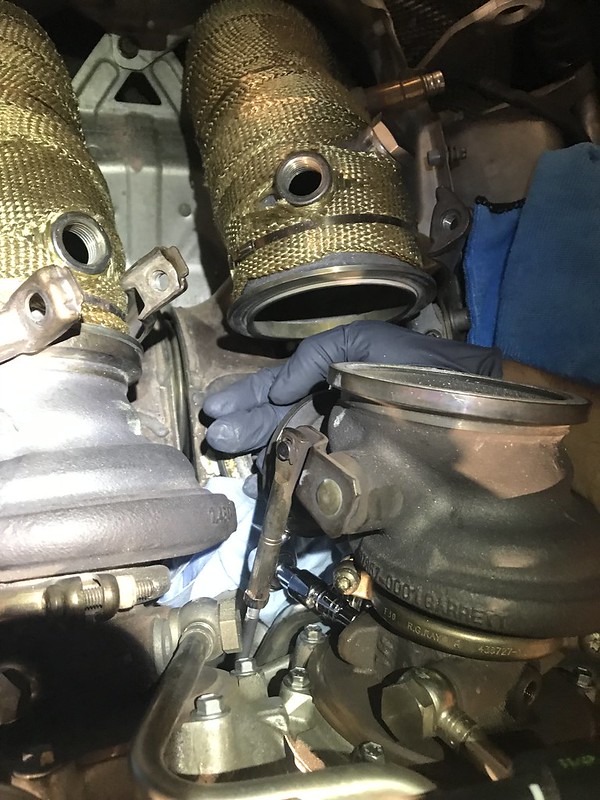
STEP 4: Disconnect Turbochargers from exhaust manifold (Headers) and exhaust manifold with catalyst (Downpipes)
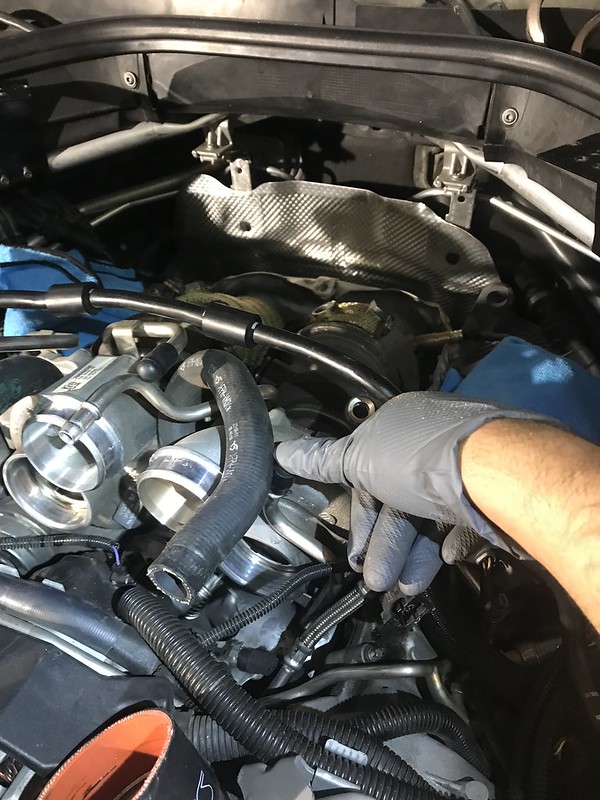
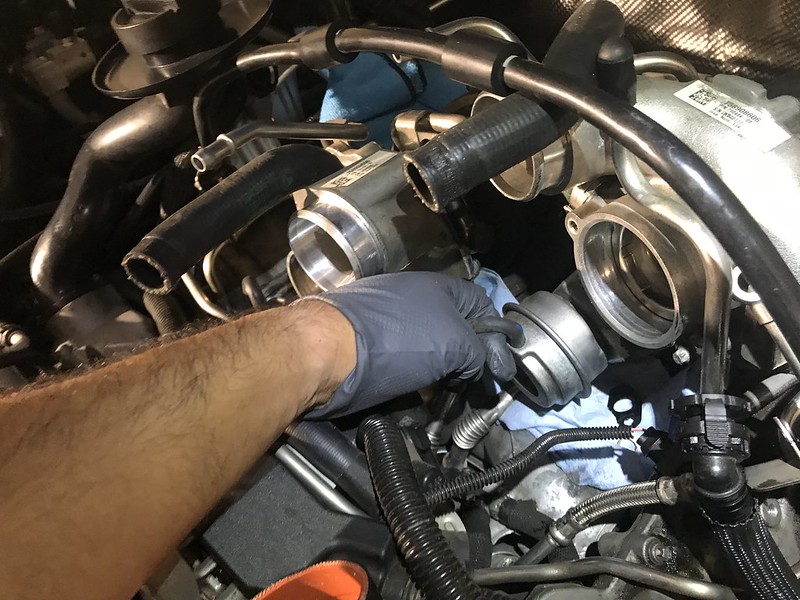
a) Loosen screw clamps connecting turbochargers to exhaust manifolds with catalyst (Downpipes) using 13mm Socket.
b) Use flathead screwdriver to press clamps apart and off of Turbocharger/Exhaust manifold with catalyst (Downpipes)
c) Loosen screw clamps connecting turbochargers to exhaust manifold (headers) using 13mm Socket.
d) Use flathead screwdriver to press clamps apart and off of turbocharger/Exhaust Manifold (Headers)
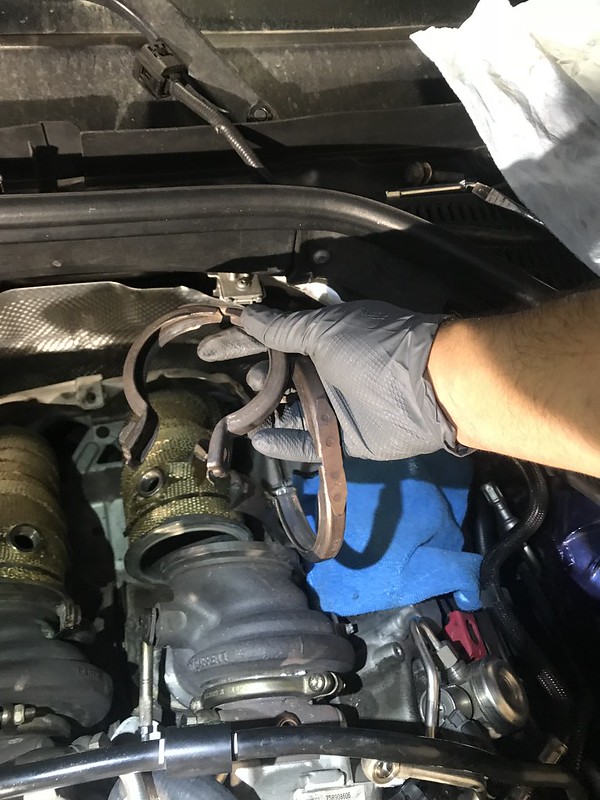
e) The turbochargers are still connected to the vehicle by oil lines and vacuum lines but should be free moving. If they are not moveable then you must work to find where the clamps are stuck on and free the clamps completely. Once the turbochargers are capable of moving, you can pull the screw clamps off completely and set them aside.
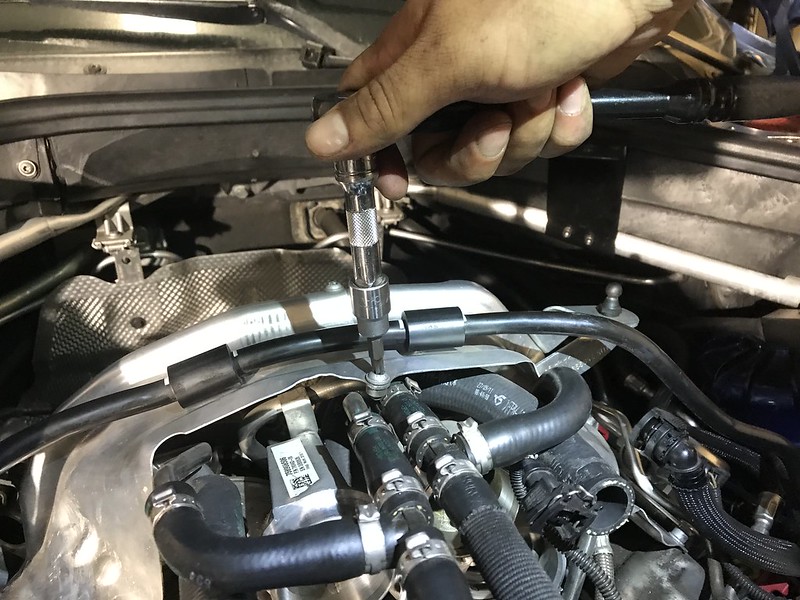
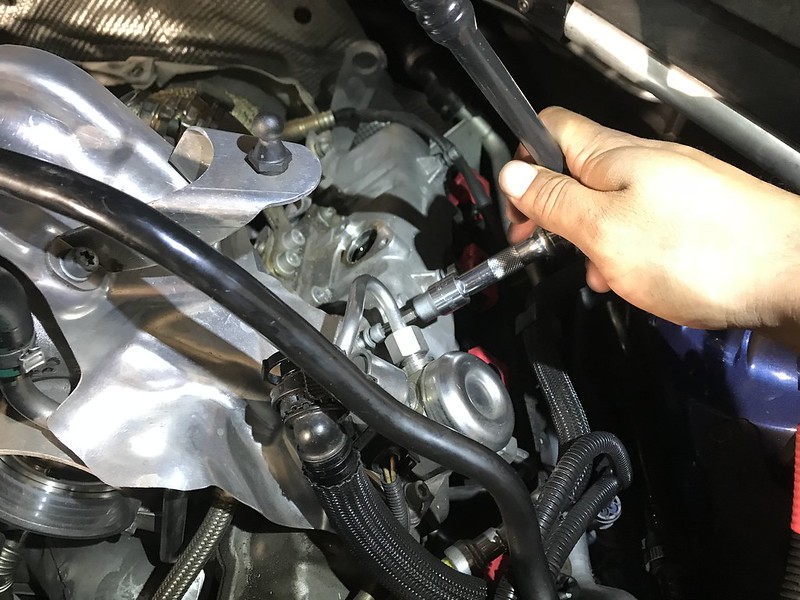
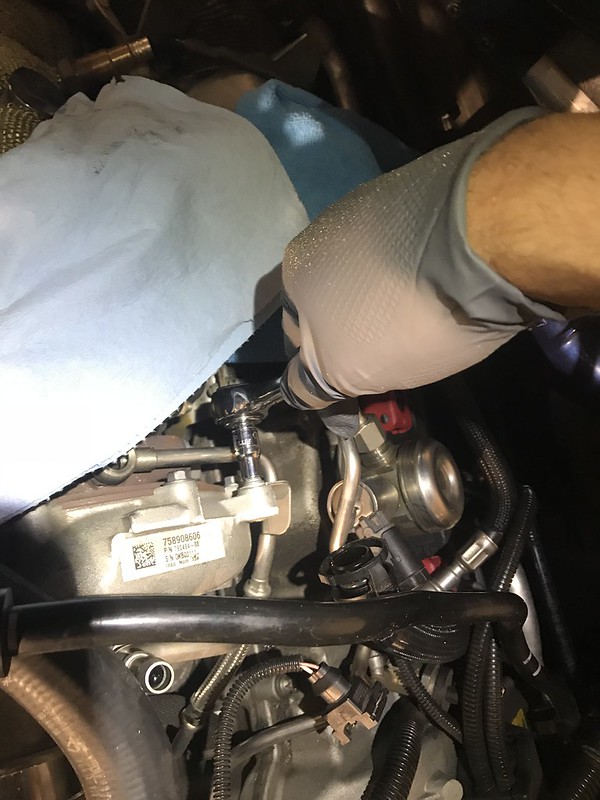
STEP 5: Disconnect Turbocharger Oil lines
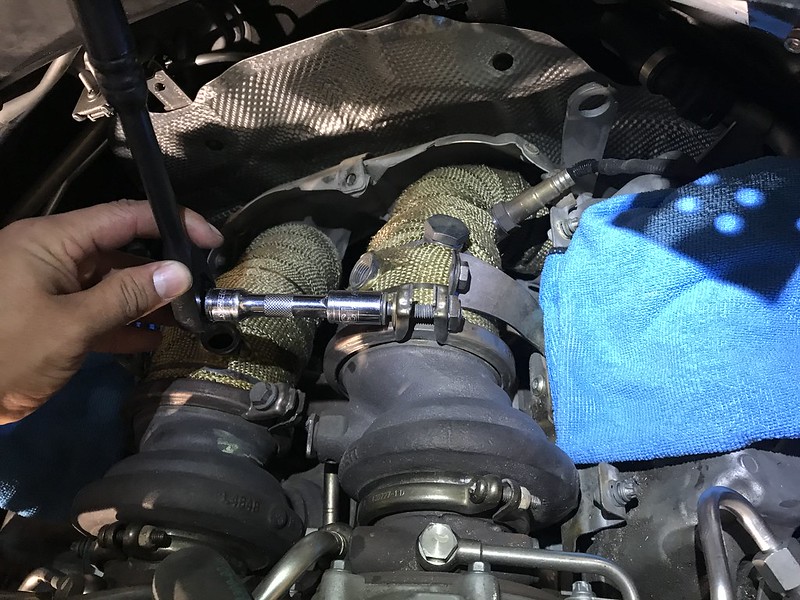
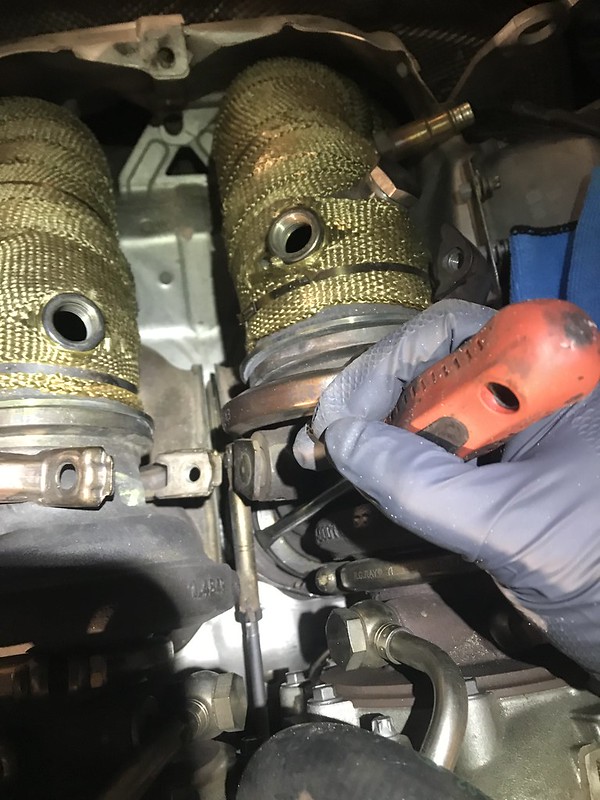
a) Loosen and disconnect Turbocharger oil feed lines using 14mm socket (one for each Turbocharger)
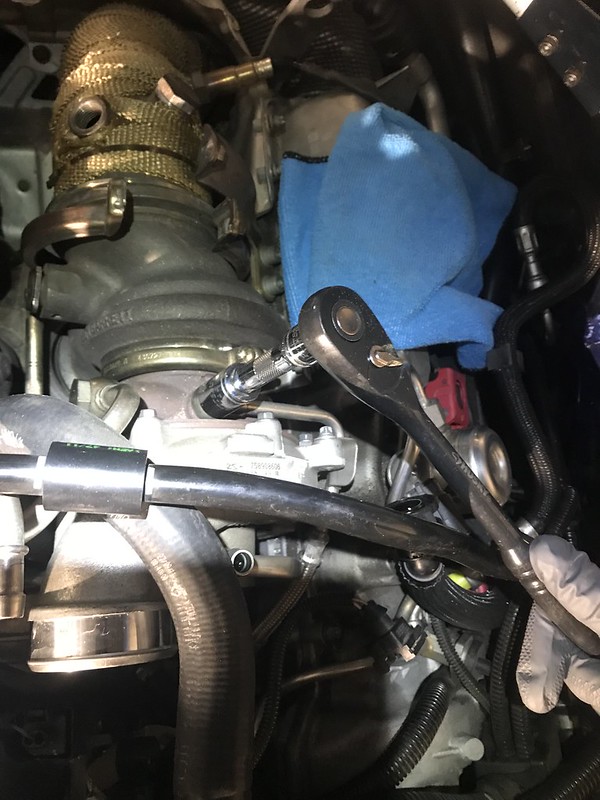
b) Loosen and disconnect Turbocharger oil return lines using E8 External Torx Bit (2 bolts per turbo, 4 bolts total)
NOTE: Holy crap this is the hard part and took over an hour just to remove these. You must lift the turbo up and work different combinations of ratchets and extensions to get to each bolt. Super aggravating
take your time.
c) Loosen and remove bolts securing turbo charger oil feed lines to the turbochargers using E8 External Torx Bits (1 each side)
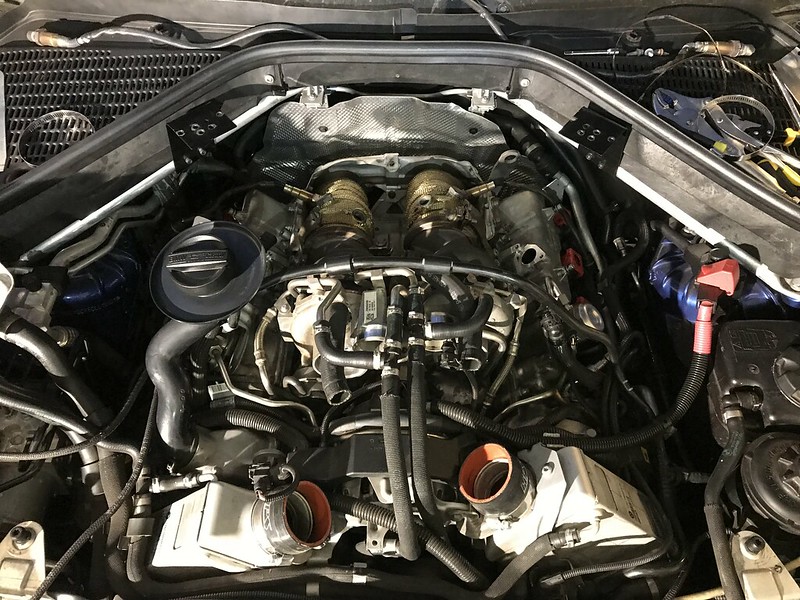
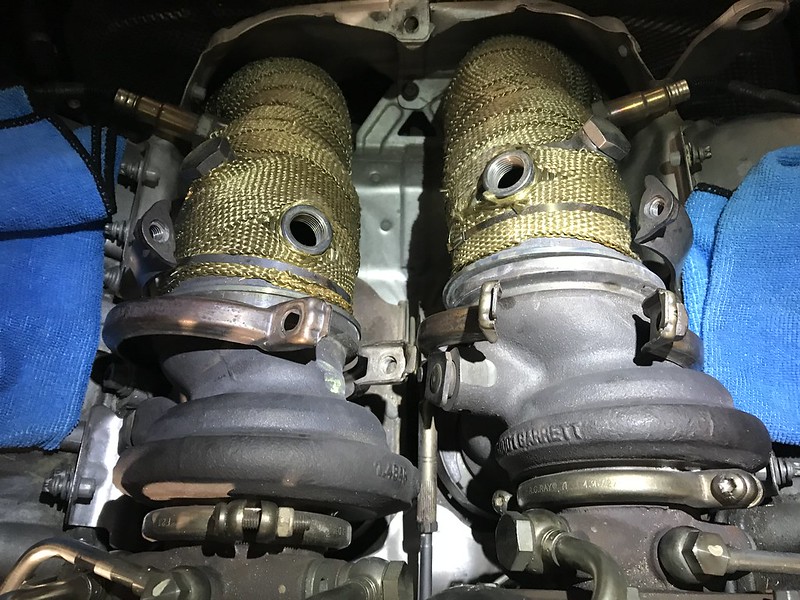
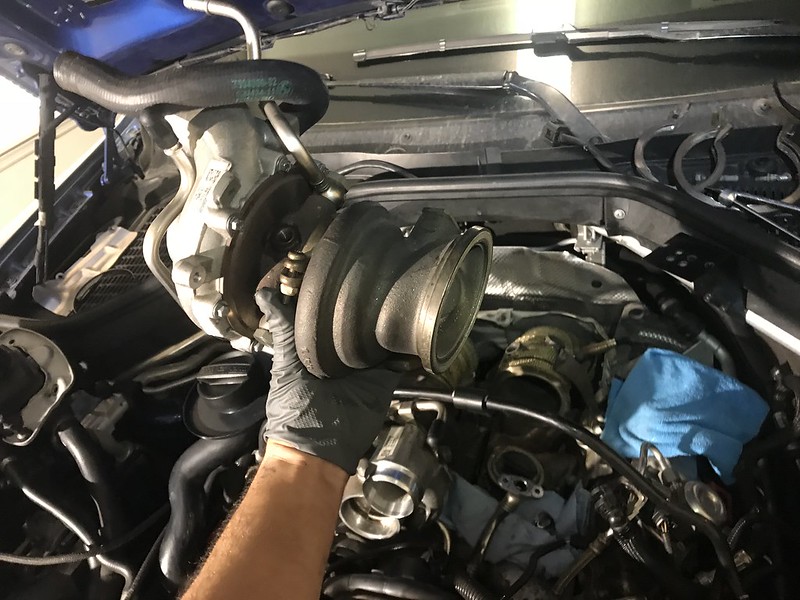
STEP 6: Remove Turbochargers
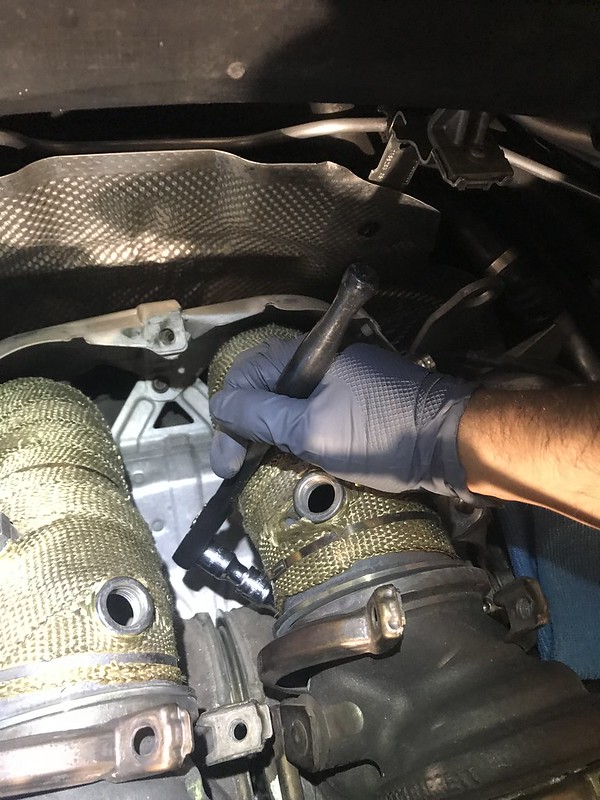
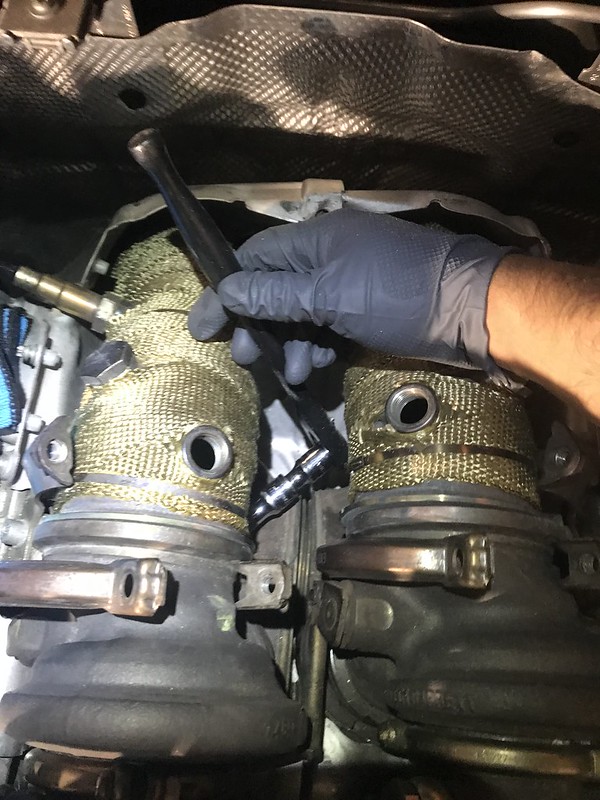
a) Carefully pull out vacuum lines from wastegate actuators
c) Carefully Maneuver Turbochargers up and out, around the fuel tank breather line.
NOTE: At this point I held the turbocharger in the air and announced that I was the greatest weekend mechanic in the world.
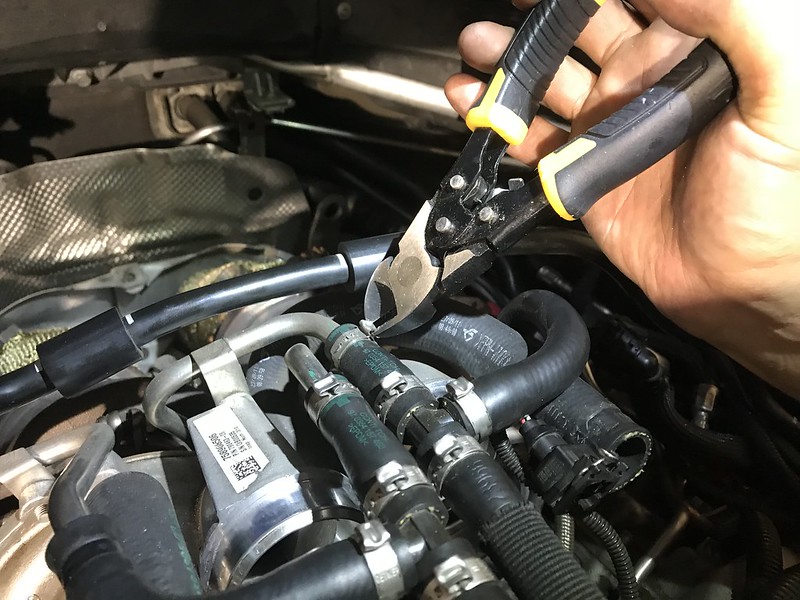
STEP 7: Remove hoses, hardlines, and brackets from Turbochargers
a) Cut off Charged Air Pipe bypass hose clamps using wire cutters or heavy duty shears and carefully remove them using flathead screwdriver (This took some time)
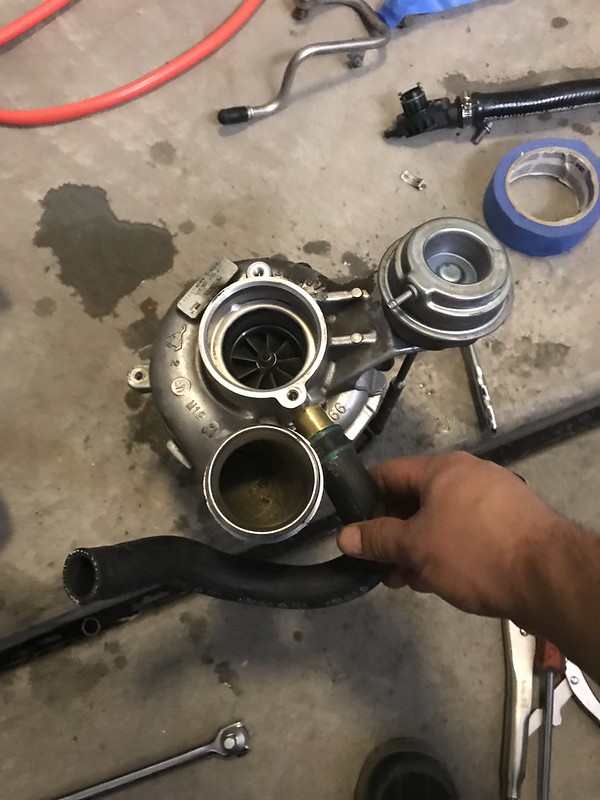
b) Loosen and remove bolts securing the turbocharger cooling system hardlines to the turbochargers using 14mm socket with breaker bar and E8 External Torx Socket (Two banjo Bolts and two E8 bolts per turbocharger)