Found this on eBay for a really reasonable price and decided to get. Installation is very easy, but figuring out the dimmer took some time.
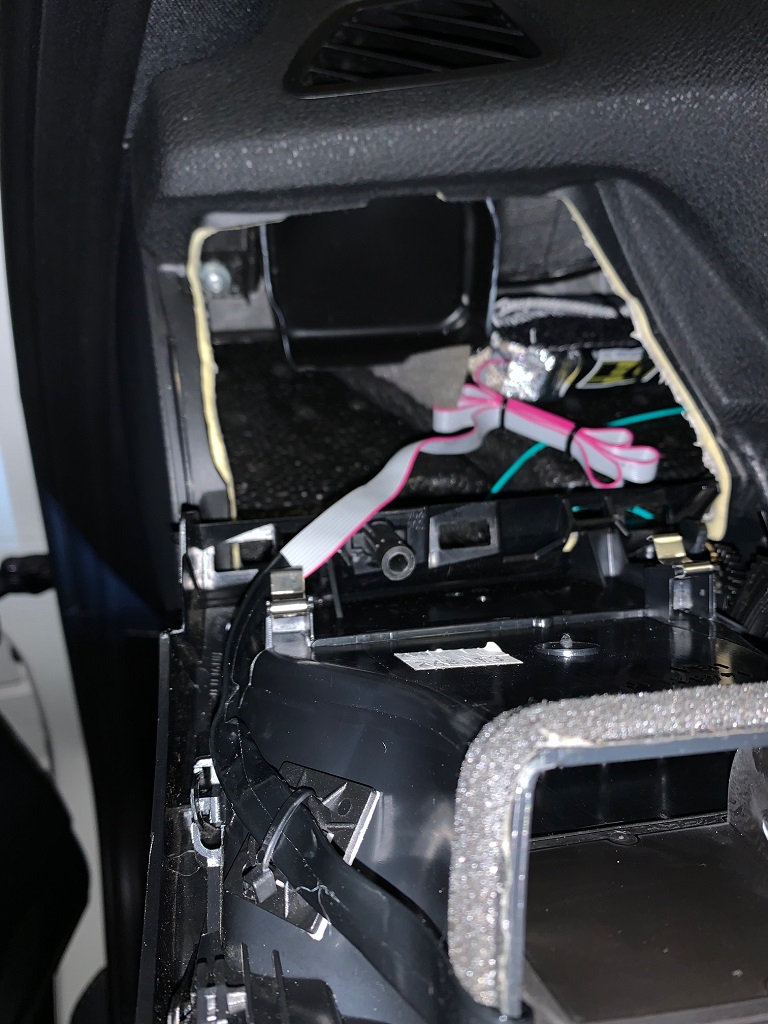
QUICK VERSION INSTALL NOTES: Remove driver side lower panel. Using nylon pry tool remove aluminum plastic trim piece from under vent. Remove single phillips head screw. Pull the external vent out and up from the bottom. Feed the P3 OBD2 connector end of the harness to the right of the dash vent tube (air supply tube that runs back into dash) and down. Run to OBD2 port and connect. I wrapped the rectangle shaped module up with something that would keep it from moving freely (left over heat shield from previous post). There is plenty of room on the right side of the dash vent tube for the module and harness. I used a 0.75" sq zip tie mount on the left side of the exterior vent...in order for the flap in the vent to work easily, you want the ribbon (flat) cable coming out of the vent (from the gauge) to be up against the inside vent wall and not interfere with the vent flap as it moves (controlled by wheel on outside of vent). I positioned the ribbon cable flat against the vent inside wall, did a U to the vent outside wall, and ran it down that left side (of the external vent) to the zip tie mount and tied it. Don't crush the ribbon cable with the zip tie. After the zip tie mount, bend the ribbon cable so that it runs under the external vent toward the right side. Upon assembly of the external vent, make sure none of the cables are impeding the vent from plugging into the dash vent tube. With the ribbon cable tied off, it should not be an issue, except a bit more force than normal to insert. Assembly of the remainder is reverse of disassembly. NOTES: Take care to make sure the external vent clips are properly attached prior to re-assembly. Also, before inserting phillips head screw, take a flashlight and shine in the hole to make sure the ribbon cable is not caught behind the screw hole so you don't drill into the ribbon cable upon installation.
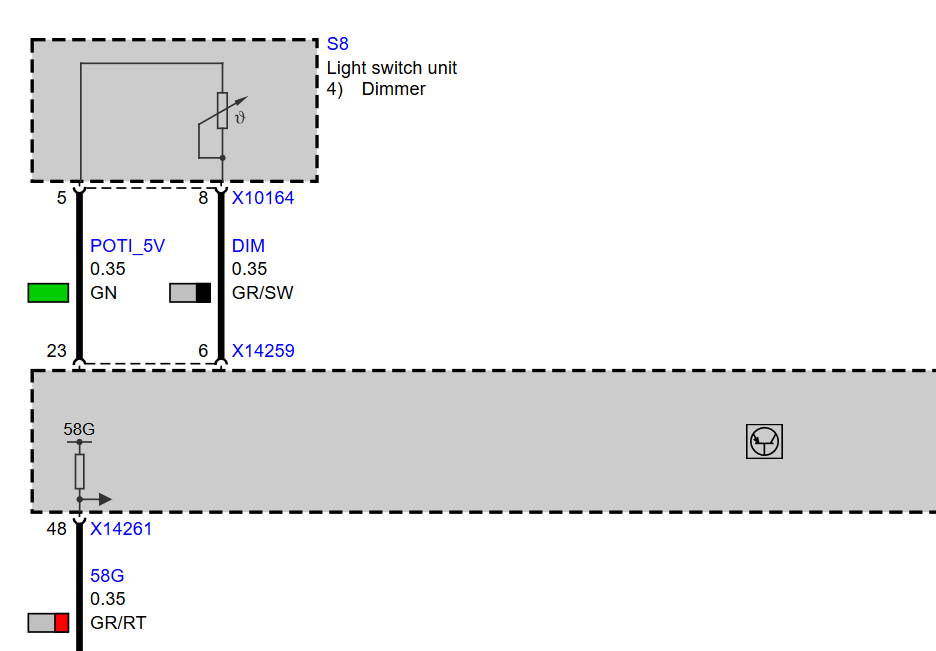
IF YOU WANT THE DIMMER FUNCTION...
Reworking...
Please let us know if you find a better wire to use. TIA
Last picture not completely assembled...vent trim piece still out and wires beneath not tucked yet. ALSO, the digital display is more orange than in the pic below.
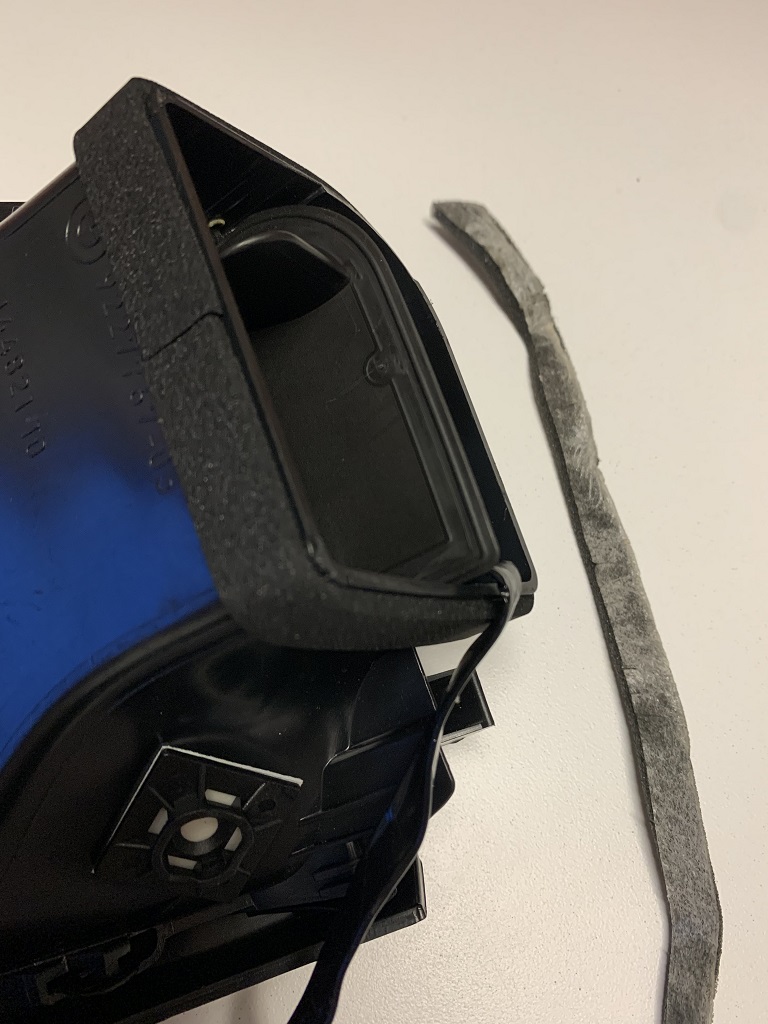
External vent shown pulled out and rotated 180deg towards camera:

With fan at high, door open, and humid hot day my vent picked up some major condensation. I wasn't too surprised, as you can see from the pics in this post the oem foam around the vent duct was compromised. Upon removal of the vent I could see about 1" of oem foam was peeled up and separated from the vent body...leaking a lot of air. I bought some Foam/Neoprene Tape 1/2" Wide x 1/8" Thick (
https://www.amazon.com/dp/B06XCK65QM..._OwQ-Eb8589A84). Fit perfectly snug. You can see the zip tie mount pretty clearly on the flat part of the outside wall.