I saw a forum member tint his taillights and really liked the cherry color in the images. I had also been wanting to tint my headlights to give the vehicle a darker look.
Long story short, I ended up trying LaminX (taillights), Rvinyl (taillights), and VVivid (tail and headlights). After trial and error, I went with VVivid for the tailights. I decided against tinting the headlights all together. As always with film, until I become some sort of expert (yeah, right), my installations resulted in some minor imperfections.
IMPORTANT: Do NOT touch the adhesive side of the film, your fingerprint will remain. Using gloves also leaves residue...and that was after using dawn dish soap to clean the gloves while wearing them. ALSO I read you do not want to install in a cold environment because the Vvivid film can become significantly less malleable which hampers installation.
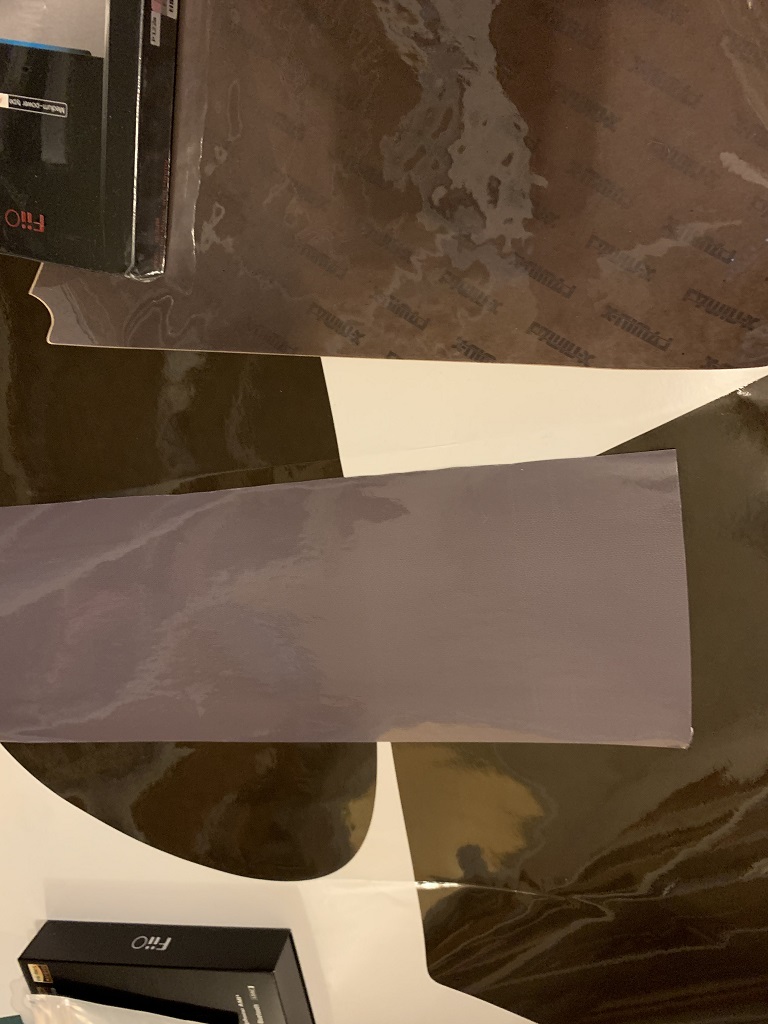
The following picture shows all three over each other...LaminX at the top, Vvivid is the lightest, and a couple Rvinyl pieces at the back (darkest).
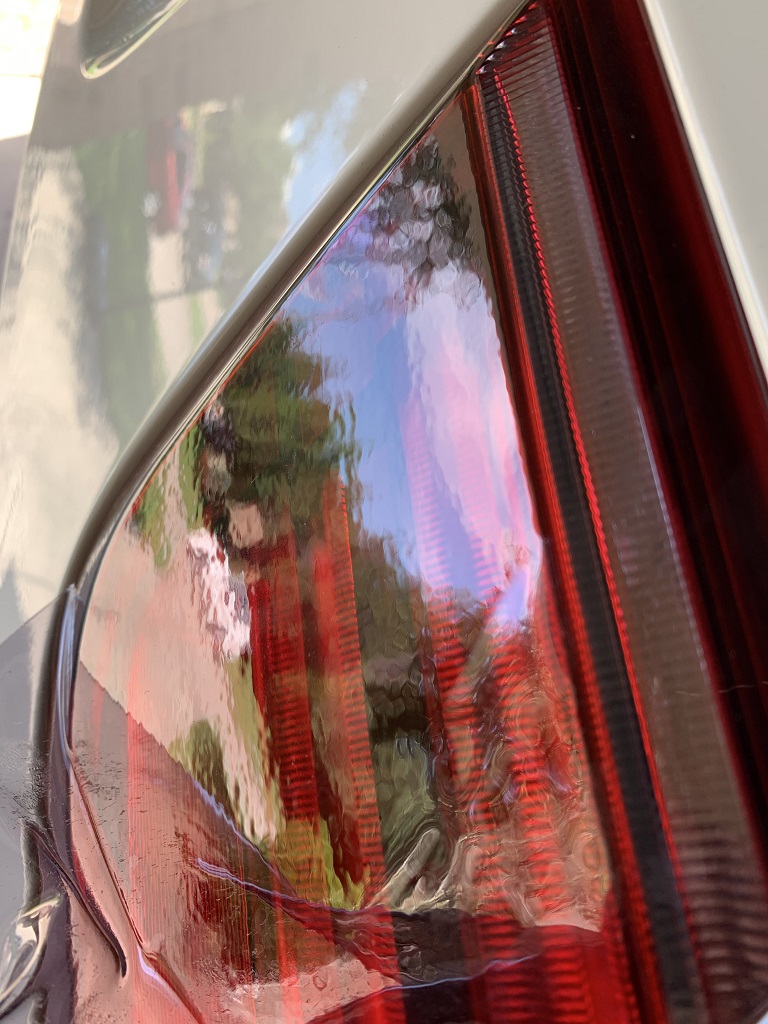
Lamin-X - This product (B237) is available only as pre-cut for the X5 and was relatively easy to install per the mfgs video. I chose the TINT color because it was the lightest tint, but the product also came in Gunsmoke, Smoked, Charcoal, and Red. This was medium darkness (relative to the other two), glossiest of the bunch, had the most orange-peel look, and the thickest film. The instructions require you to lubricate the surface before install which I did with the provided spray bottle and my own deionized water. It goes one easily and I didnt have to peel and re-install very many times. However the edges seemed to give me the most challenge b/c the edges would lift/delaminate. Multiple iterations of extra heat and firm pressure eventually fixed this, but didnt really start to work until at least a day had passed, likely to allow the lubrication I sprayed to evaporate. Note, the squeegee they provided was nice (slightly softer than others Id received), but I should have sprayed the exterior of the film to reduce heat and friction as I pressed the film in place. Without lubrication the pressing action made some minor scratches in the film that would mostly dissipate with heat but with a close eye I could still see some of them. I will say, heat seemed to fix a lot and this was as close as Ive seen to self-healing. The box knife they provided made it easy to trim the excess film, but be very careful not to scratch the paint behind the light. For the rear light in the trunk lid, I removed the light and installed. In hindsight, I think I would install the film with the light in place. I only installed this one piece and eyed it for at least a week, but the orange peel kept bothering me and I wondered if there was better out there. I took the picture below as I was removing to highlight the orange-peel.
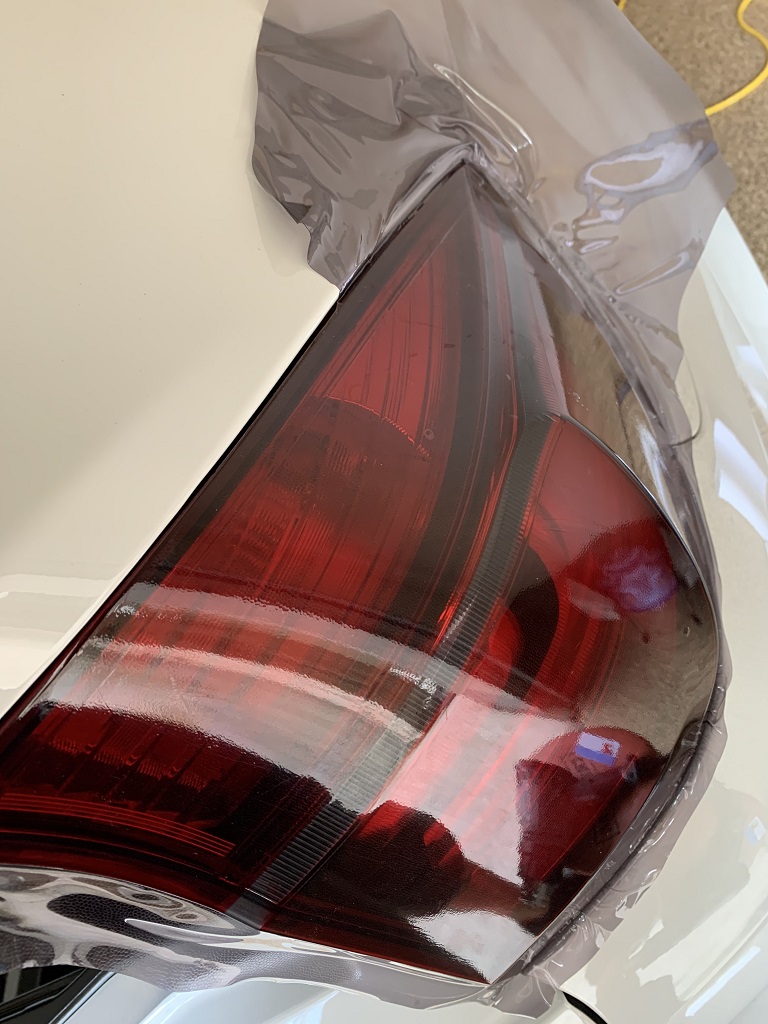
Rvinyl - This product (TT-BMW-X5-11) is available pre-cut for the X5 and I ordered the Smoke color b/c it was the lightest looking tint. They have a rainbow of colors and darker smoke. Ive ordered several films from Rvinyl since April and each time shipping takes forever compared to other mfgs. The item arrived damaged (cylinder roll smashed during shipping resulting in sharp pinpointed fold/creases), but I thought I could work out the damage with the heat gun. It helped, but remained damaged, so I had to eat this one. Instead of re-ordering, I decided to try another brand that I had been researching while waiting for this product to arrive. When I took the image below I had already installed Vvivid on the right side and I basically just placed this film in place for color comparison. The film was definitely thinner than the Lamin-X and install appeared to be similar style to the Vvivid film. However, I believe thinner pre-cut film really limits installation b/c there is little excess to grab with your fingers making this more difficult to avoid leaving your fingerprints or stretching, IMO. To be honest I didnt spend much time on installing, so I truly cant give a complete picture. BTW, you can see the tailgate light which is also covered in Vvivid for comparison.

Vvivid This product is not available pre-cut and I ordered the VVivid+ Light Smoke Air Tint Headlight Tint Premium Series (
https://vvividshop.com/collections/a...headlight-tint). Light Smoke was the lightest color and based on my research this same tint was also used on the rear lights. Ordering this allowed me the option to install tint on rear and front lights. I was intrigued with the version of this tint that had an integrated hex pattern, but ultimately went with the base film. What sold me were the detailed videos by CK Wrap
they were spot on. These are must watch if you plan to install, dont just go by my tips that follow.
I ordered 2ft x 5ft (10sqft) and it was exactly enough to do all four corners once (the dims I provide below total to 9.2sqft for one application on all four corners). The body taillight itself takes 13" x 17" each side, with the excess needed to grab and stretch as needed. For the tailgate lights expect to use 10"x13" of film for each. In fact, I recommend ordering more than 10sq ft to allow for some error should you mess up a section. If you are only doing the rear or only the front, then the 10sqft should suffice. This stuff is extremely resilient and I had to peel, heat, and re-install numerous times. This installation requires an immense amount of patience. I spent about 40m to an hour per large light. I didnt do them all on the same day, which prevents you from getting too hasty. Stretching is your friend with this material, you normally dont just place and squeegee. If you mess up, you can lift, heat and reapply with very good results. I did so many times in various areas with no ill effects to the film. If youve done a great job in an area and then you find you missed a bubble, do not worry, they can be addressed after installation. However, removing them involves a fine point needle and it may leave a tiny pin prick visible...as such you dont want to leave behind lots of bubbles or youll have lot of pin pricks on the surface. Some pin pricks will self-heal with enough heat, others wont. You will redo areas many times, this is normal. If you see a tiny thin wrinkle, just bite the bullet and start that area over. As mentioned above the bubbles can be addressed, wrinkles are permanent and very visible. You are trying to get the entire inside portion of the light as good as you can. The outer 1/2 perimeter can be done at the end. Once the internal surface area of the light is covered, start on the outer edges. Heat and use the squeegee to press the film into the crevice between the light edge and the vehicle surface. As you do so, it will pull the film taught on the light side and make it smooth. Do so all around the perimeter of the light. Since its the edge, if you have to redo the area, you only need to pull back a little bit, heat, and reapply. Once this has been done, cutting with a very sharp box cutter is made easy. You only need to insert the tip of the razor 1/16 of an inch or less
just enough to cut the film. It will take almost no effort as you move around the perimeter. If, as you lightly cut, it stops or takes any effort whatsoever, stop and make sure youre not pressing on the painted surface of the vehicle or have not bitten into the edge of the light. These tips apply to rear or front install. Below is an image of the final taillights covered, cleaned, and sprayed with Zaino Z8 Grand Finale Spray. There are a few spots on the outer most edges that have tiny lifting, but Im still working them. Not bad enough for me to want to rewrap the entire light. The good news is that this entire endeavor is reversible.
UPDATE: I want to recommend not cutting this product at the edge of the lens. The film is too thin and while I only had a couple spots recoil in tension, the final product will look much cleaner if you get to the point shown in the image below and then pop out the taillight just enough to wrap the film around the entirety of the lens, then cut the excess off behind the lens. For the Lamin-X, this is not an issue because the product is VERY thick and trimming the excess off the lens edge doesn't produce recoil.
Film application complete and shown with part of the excess film trimmed. Up close you can see some orange peel, more like dot matrix upon really close inspection. Also you can see one diagnal fine line where I peeled back, heated and stretched it back over. I can't figure out why that happened, but it did. Not sure if I overheated or what. I mostly used light heat, a few passes, you can feel the film get limp. Do not overheat or heat while simultaneously pulling b/c you'll get quick exponential stretching...
Lights off; Image with 3 of 4 lights wrapped; a good view of the vvivid shade color which is pretty light compared to the other options. Everyone's taste on shade is subjective, but I really like the lighter shade of the vvivid.

Lights on; Not as glossy as the oem lens alone, but a good compromise;

Vvivid (contd)
Headlights. I was really excited to try the film on the headlights and luckily the LED headlight surface is not complex.
You need a very minimum of 13" x 24" placed diagonally...this is what I used and I had to stretch one corner about 1/4 inch to make it cover the whole headlight. I would have cut more, but one roll of 2' x 5' isn't a lot for all four corners. It went on easily compared to the complex surface of the taillights. I eyed it for at least a week while in my garage and it looked great. I finally took the car out and snapped some pix, excellent. With the tint on one lens you realize how crisp, clear, and bright the oem lenses are
its a nice look as well. THEN I turned on the headlights.
The tinted side immediately looked aged and foggy. Sure enough, the LED beam makes two patches on the film thus negating the clean look from before. I truly did not like what I saw and it was an easy decision to remove it. The pix below capture the issue.
UPDATE 7Sept2021: Months later I ran into a ckwraps video on this vvivid exact film. He explained it takes a few weeks for the fog to burn off. I haven't confirmed, but will try again soon. FWIW.
Lights Off; DRL On:

Lights On; Left Tinted, Right OEM non-tinted:
