|
|
|
| 11-27-2012, 10:06 AM | #1 |
|
Second Lieutenant
 22
Rep 235
Posts |
Couple of pics of my x6 4.0d WIP
so picked up my x6 4.0d about 3 weeks ago and got down to some mods
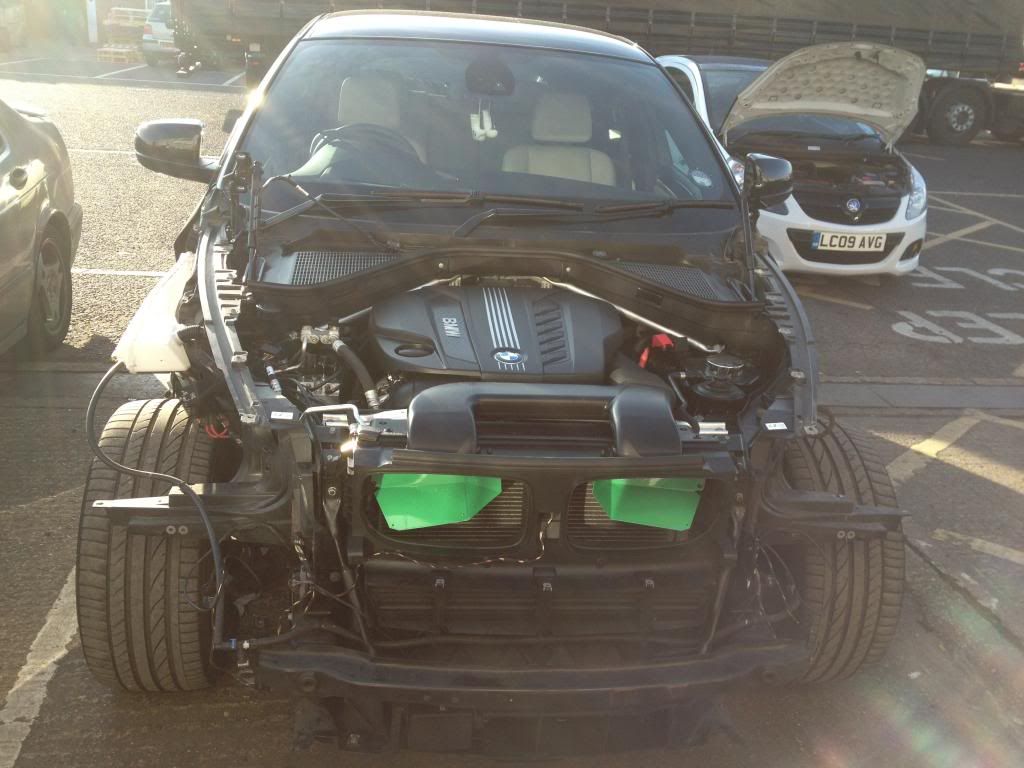
had the wheels sprayed sap black paint code 475 12mm spacers rear 5mm spacer up front fitted the bbk up front 405mm floating discs 10 pot calipers fitted the bbk rear 380mm floating discs 8 pot calipers Had the brakes painted porker single green (same as the GT but I had pearl added to the lacquar so in the sun they look yum) ordered some m6 RPI scoops (modded them to fit and also had then sprayed) Gloss black front grill LED reg plate lights and also replaced all of the interior lights replaced the BMW badges with Black BMW badges lowered on H and R springs (i'll post up pics of how i did that) Mods on order x6m front bumper performance side skirts/rear diffuser Vorstioner carbon front lip going to get the bonnet painted/wings and colour code all the plastic trim enjoy:-) 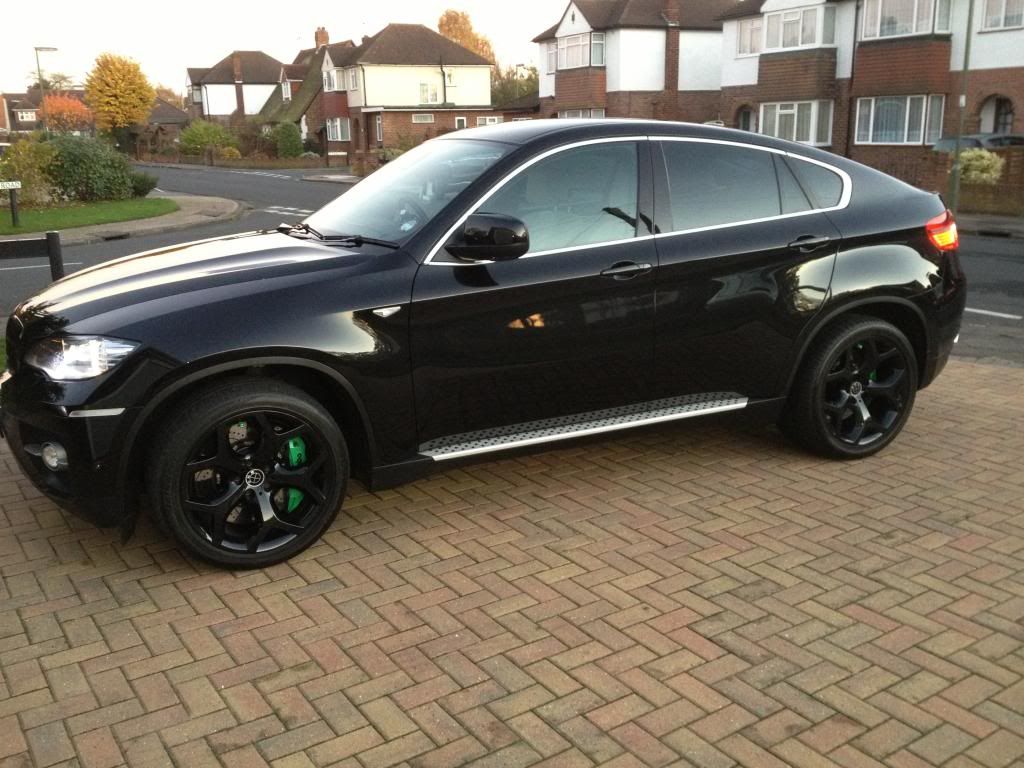 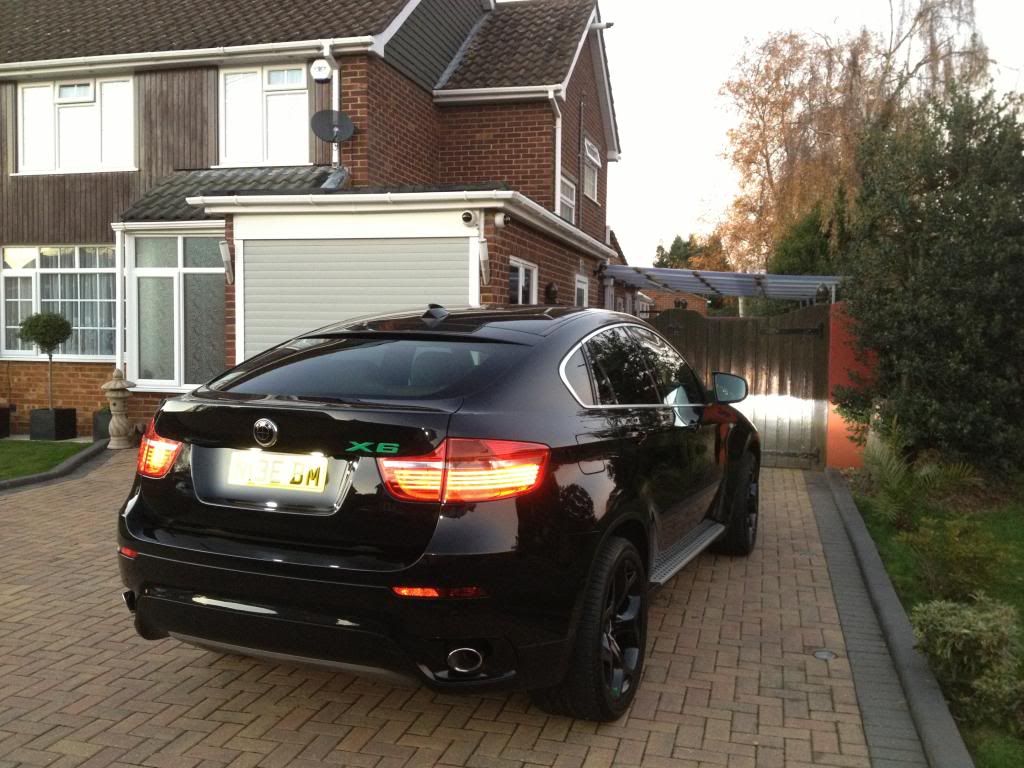 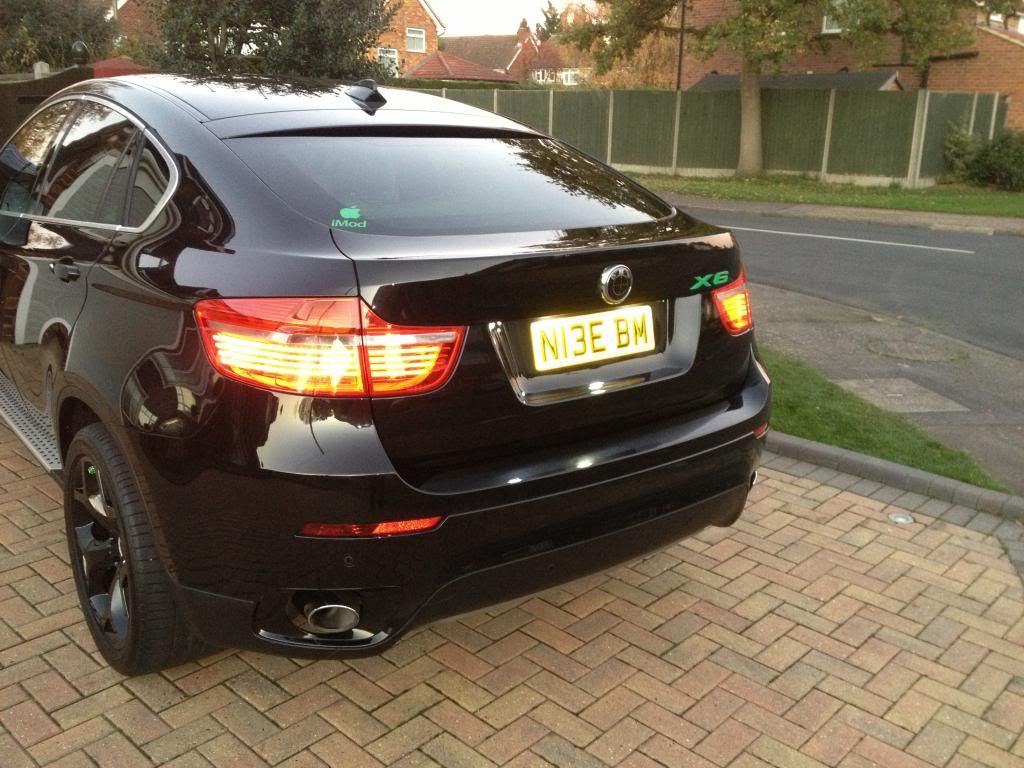 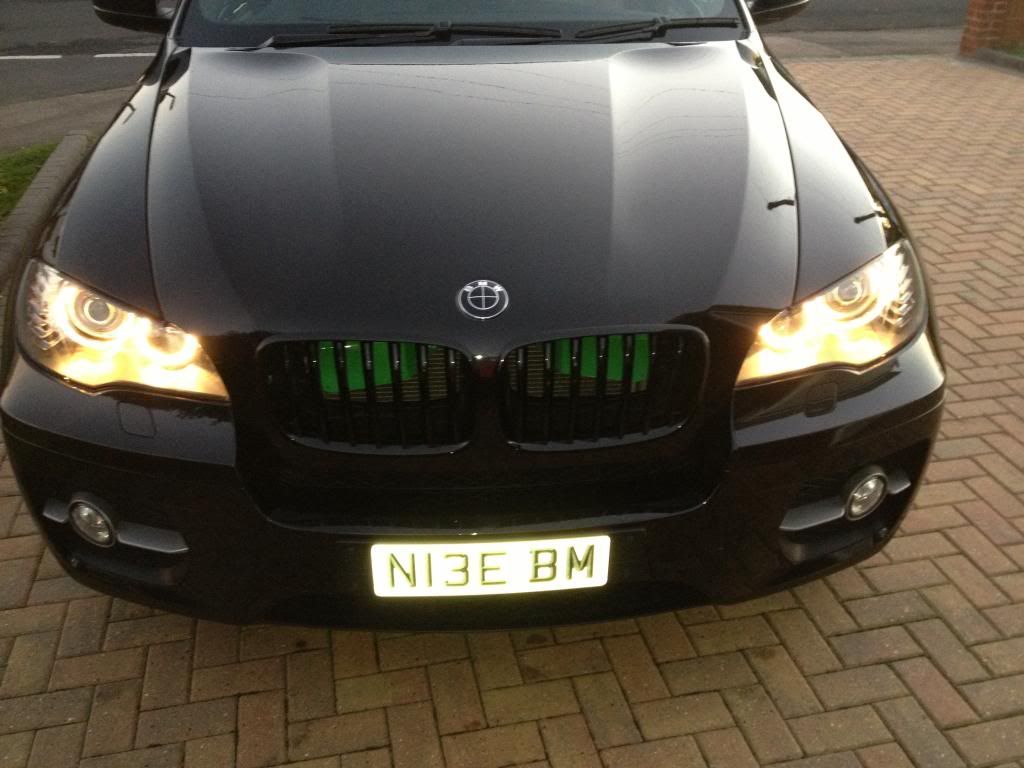 next up was the body work so I ordered the following VRS front carbon lip BMW X6M front bumper BMW performance side skirts BMW performance rear diffuser. The plan is to colour code the lot so sanding down the textured items was a pain in the arse! So £1500 lighter I am now the proud owner of this VRS for the x6m front bumper! pure sex 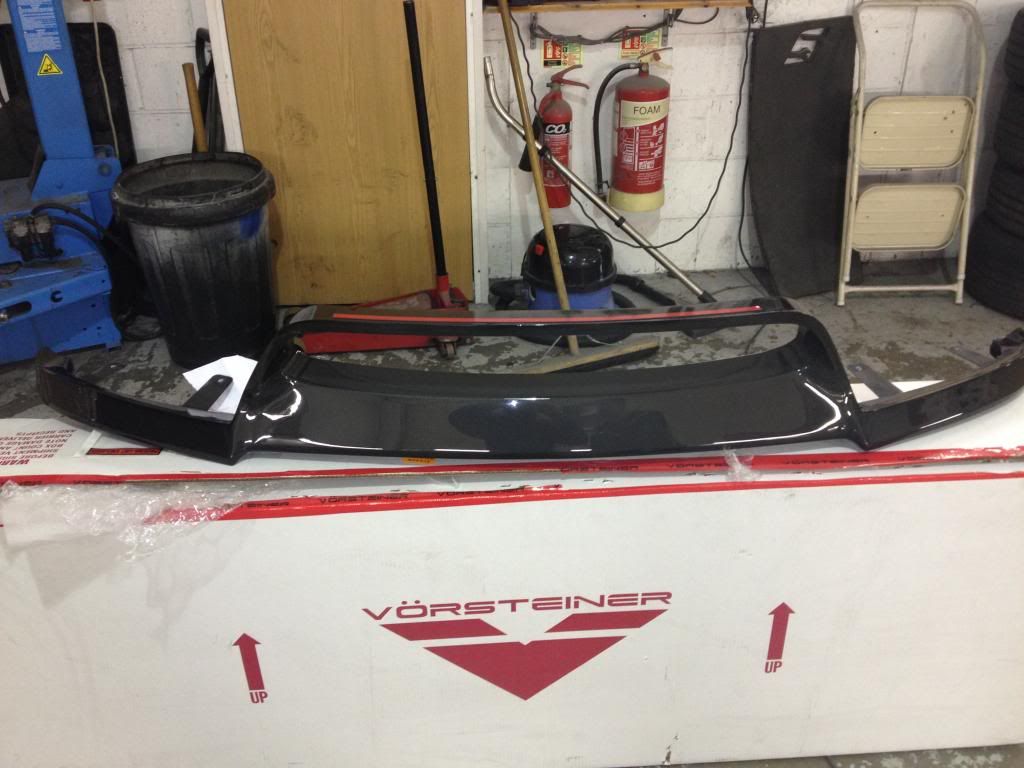 next up it was time to piant the kit, first off all the bits that should be painted (already primeded) were hit with the gun. The x6m front bumper doesnt come with the holes for the side view camera BMW supply the fitting kit so the holes have to be cut (lucky they are outlined behind the bumper) first coat of sap black going on 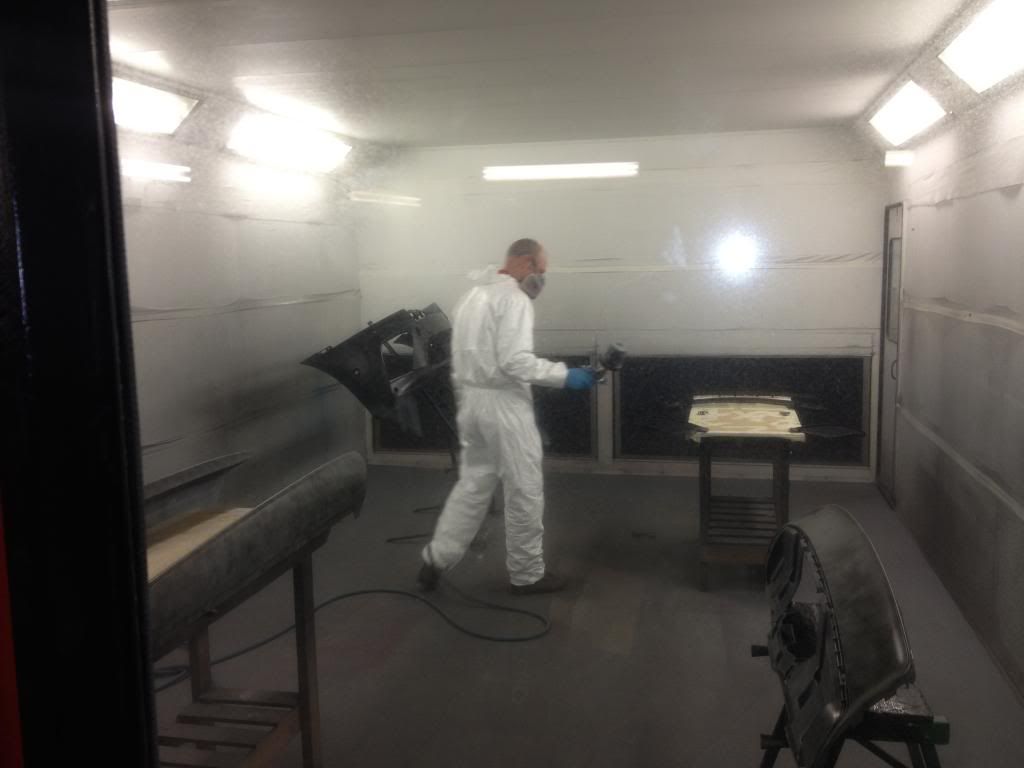 Few more coats don't be shy lamp it on phil 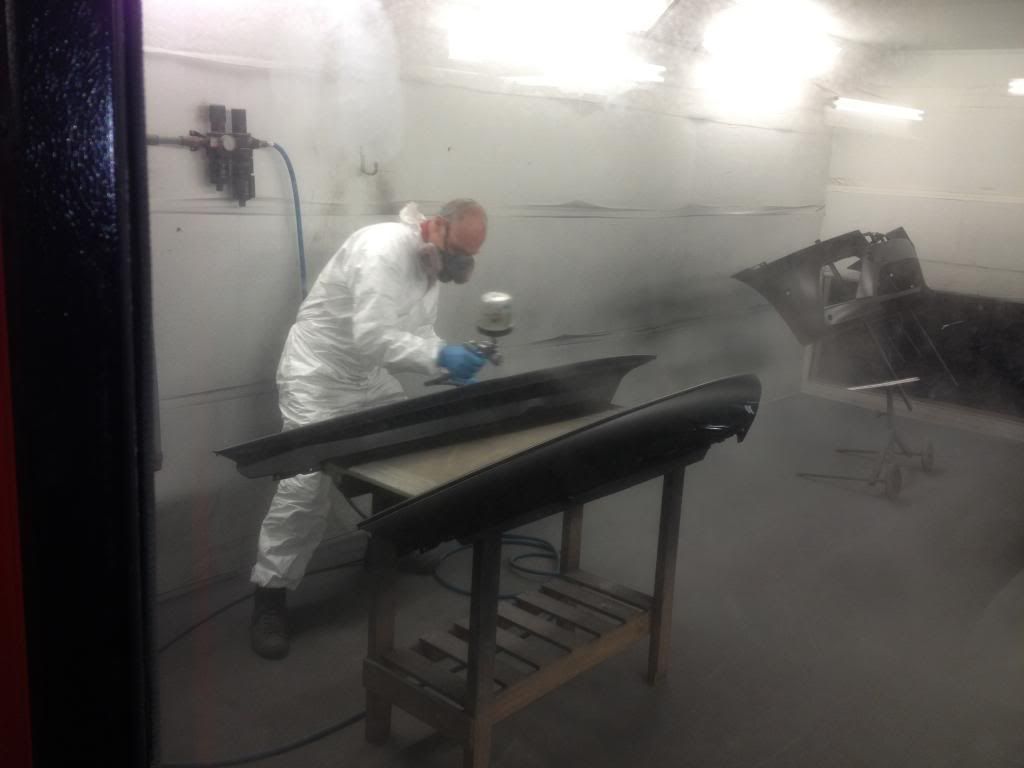 front bumper painted (the VRS is just placed on top it wellbe fitted once the bumper has been de nibbed and mopped) 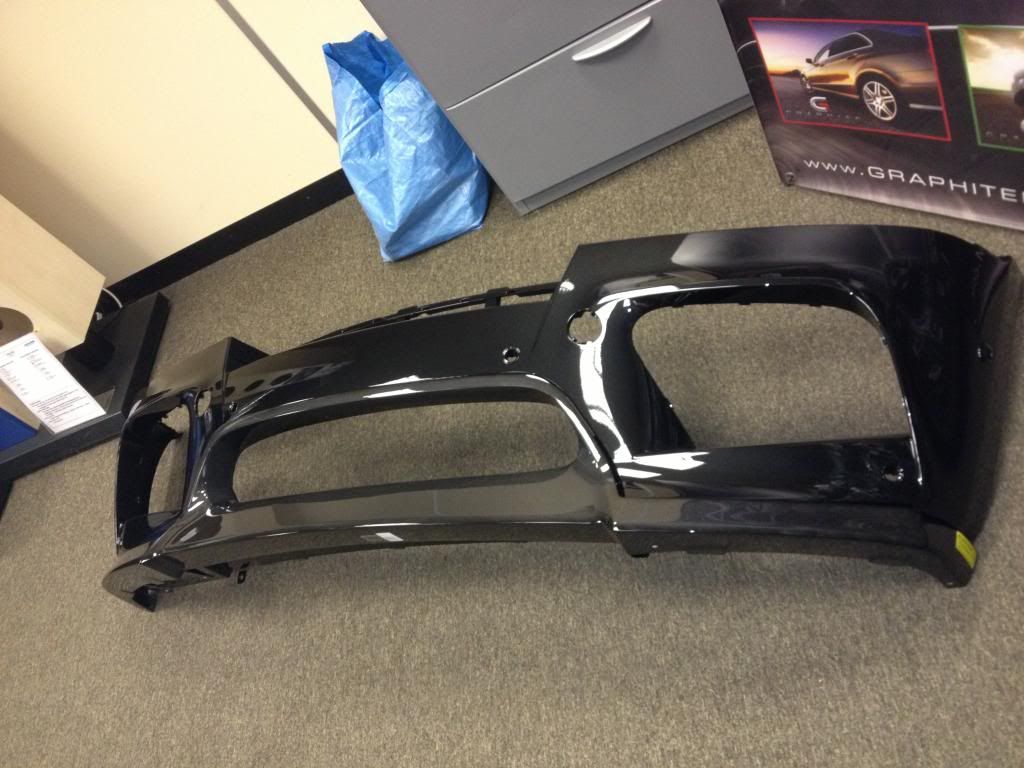 few other bits the side skirts come in 2 pieces so the long piece you see is the part that is normally colour coded The grills for the bumper (and under the bonnet) were also colour coded) 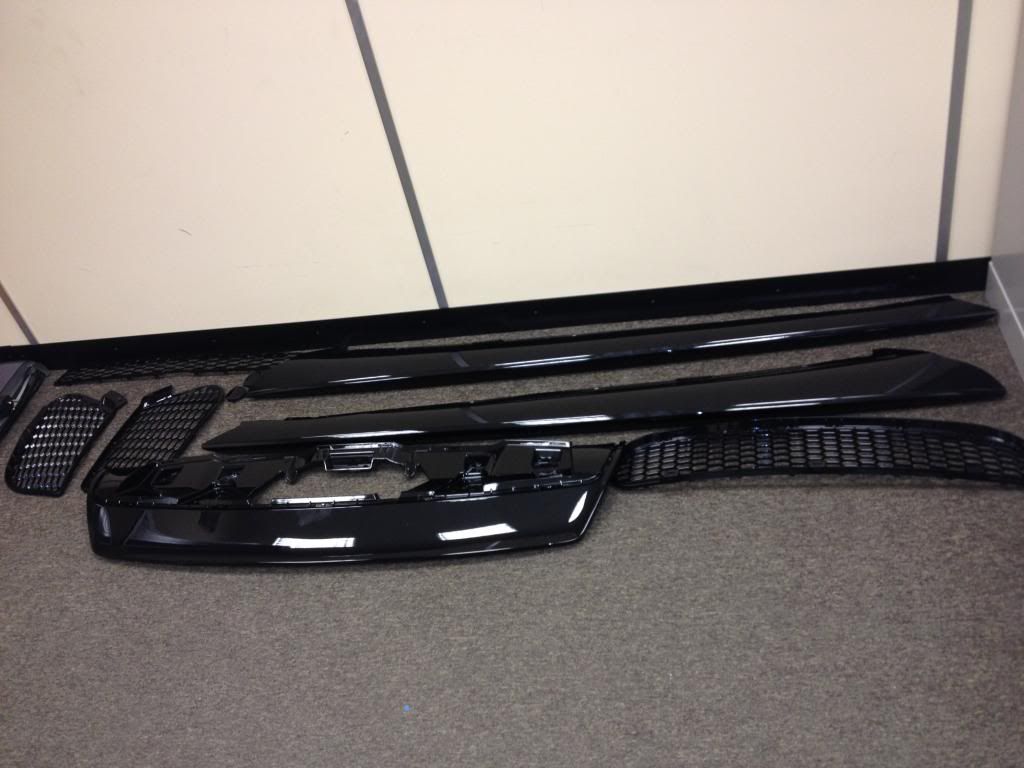 The textured parts were then sanded down by me ready for phil to high build primer. Theses parts are not normally colour coded but I think there look much better once they are done. the wheel sarches well be stripped tomorrow for the same treatment. The wings and bonne well also be taken off tomorrow ready for paint. The car well comeout spotless :-) 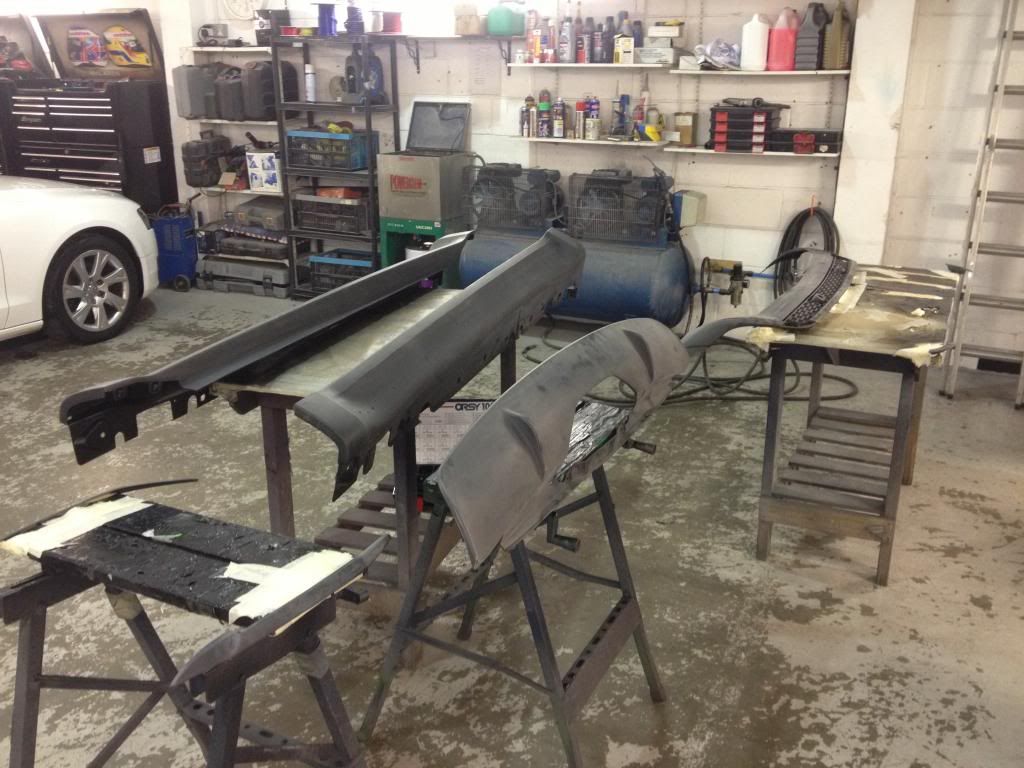 While this was being done i started to strip down the X6 as I wanted the front end blown over (few stone chips pissing me off) The rear end, this is actually quite easy lots of 8mm bolts and clips. In order to remove the out bits of the rear diffuser your have to remove the rear wheel arch trim as there is one plastic rivit there. Also the rivits are one use only so have a new set ready cheap as chips from BMW. To remove the wheel arch trim your need a trim tool, once the rivits are out you cant reuse them. Remember to remove the PDC etc from the rear trims 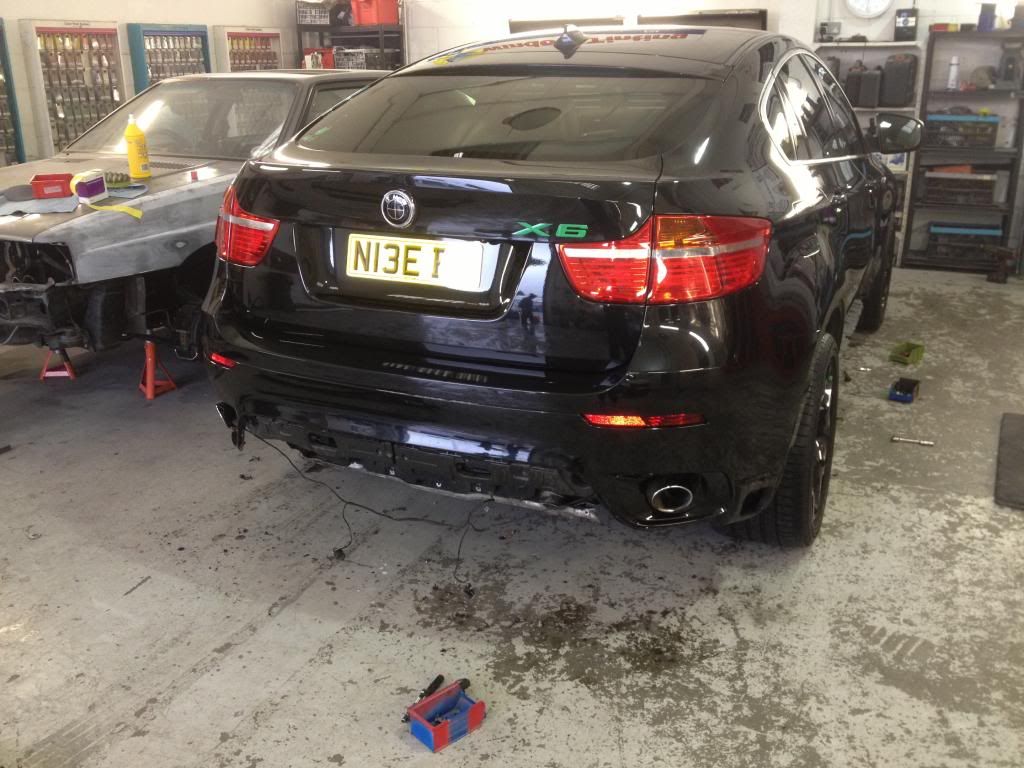 For the front bumper remove the 8mm bolts on the bottom and there are 2 on the inner arch. Once theses are undone pull on the bumper and it can be removed. remember to disconnect the fog lamps, side view camera PDC loom etc etc. Please note remove the front reflector on the side of the bumer there is an 8mm bolts behind it 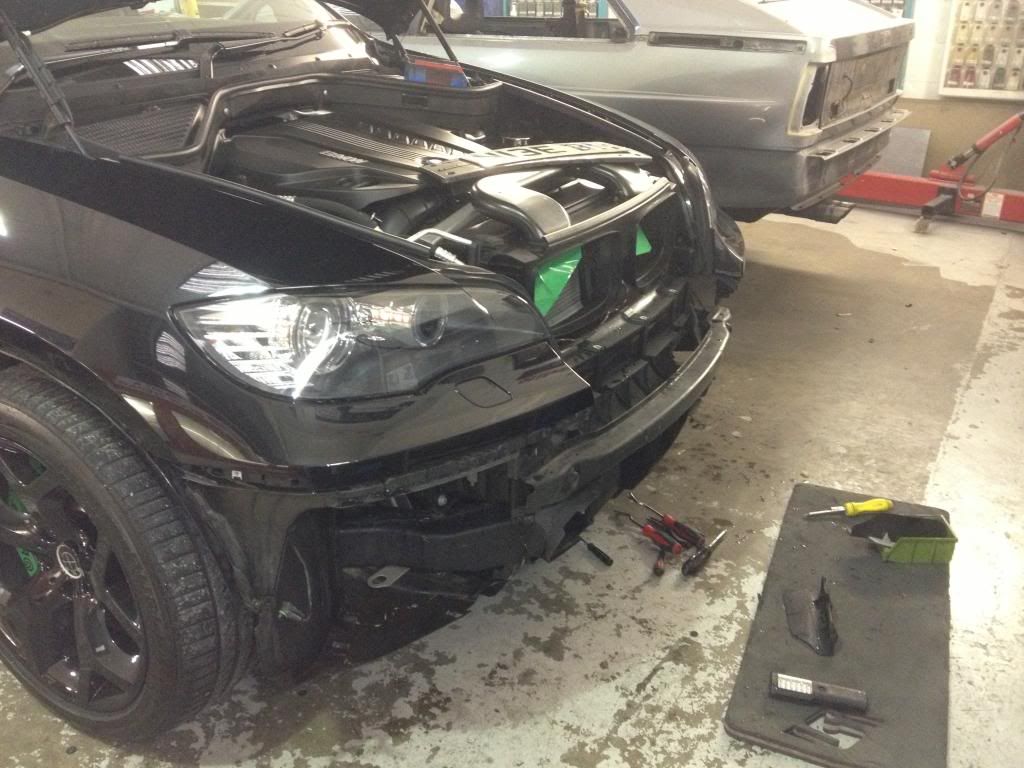 Side skirts. One torx 25 screw (plastic) at the bottom of the front side skirts. The resr are plastic pusher just pull on the bottom of the side skirt there pop out. once theses are out open the doors and pull the side skirts off (there are held in with white plastic clips. Again have spare ones from BMW. 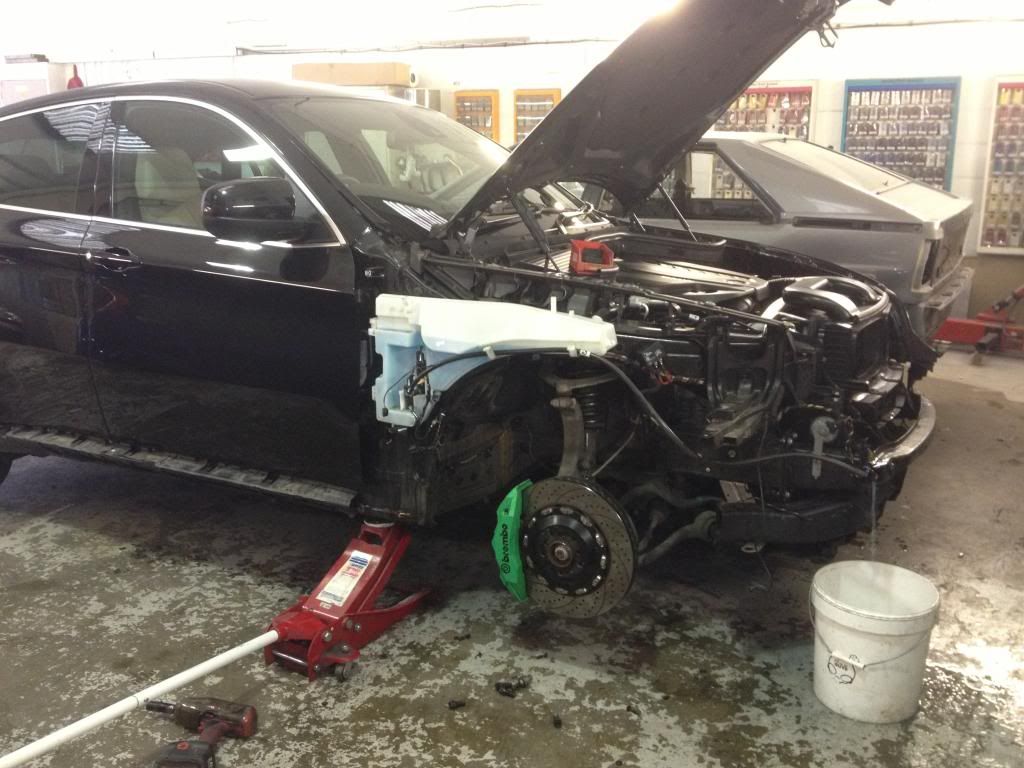 to remove the wing this is more involved. First remove the inner shit guards (about 20 8mm and 10mm bolts!). Once removed I jet washed mine lol 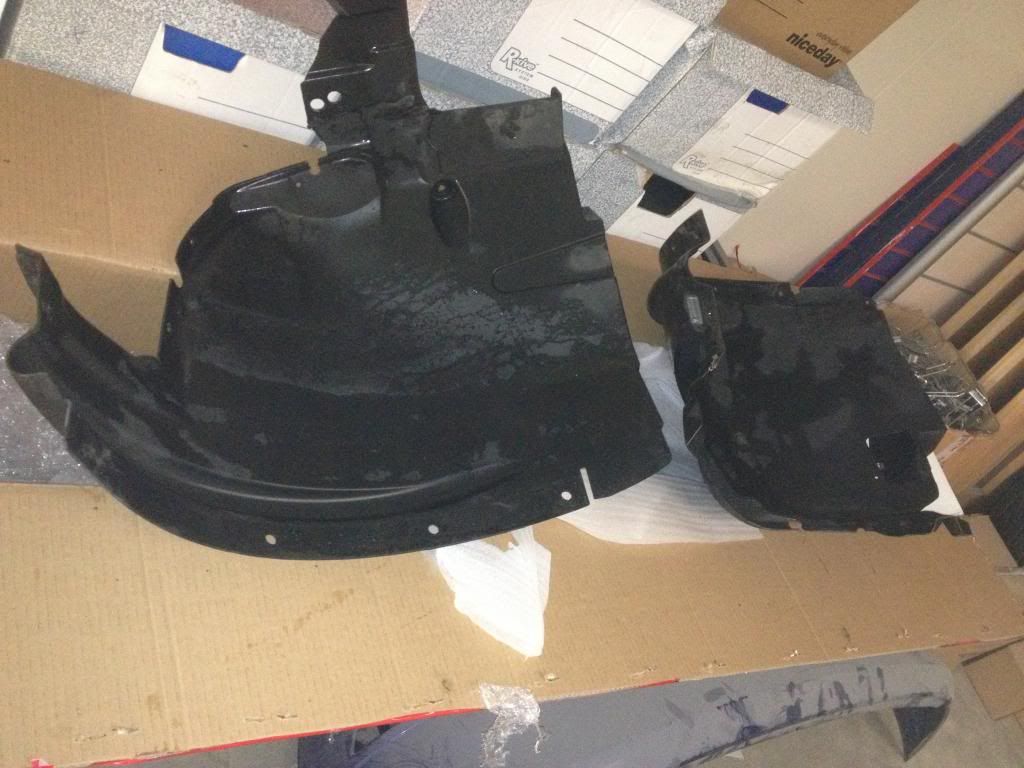 The headlight is bolted to wing. There are sone other bolts (remove the windscreen side trim there is a philps bolt there). The other bolts are on the top of the wing, open the drivers door to access the inner bolts. The other one is on the side of the headlight you rneed a right angle screew driver or similar tool as its a bitch of a torx to get to. YOur also need a bucket to drain the washer flud. The drivers side wing is more difficult then the passanger side due to the washer bottle. There you have it one wing 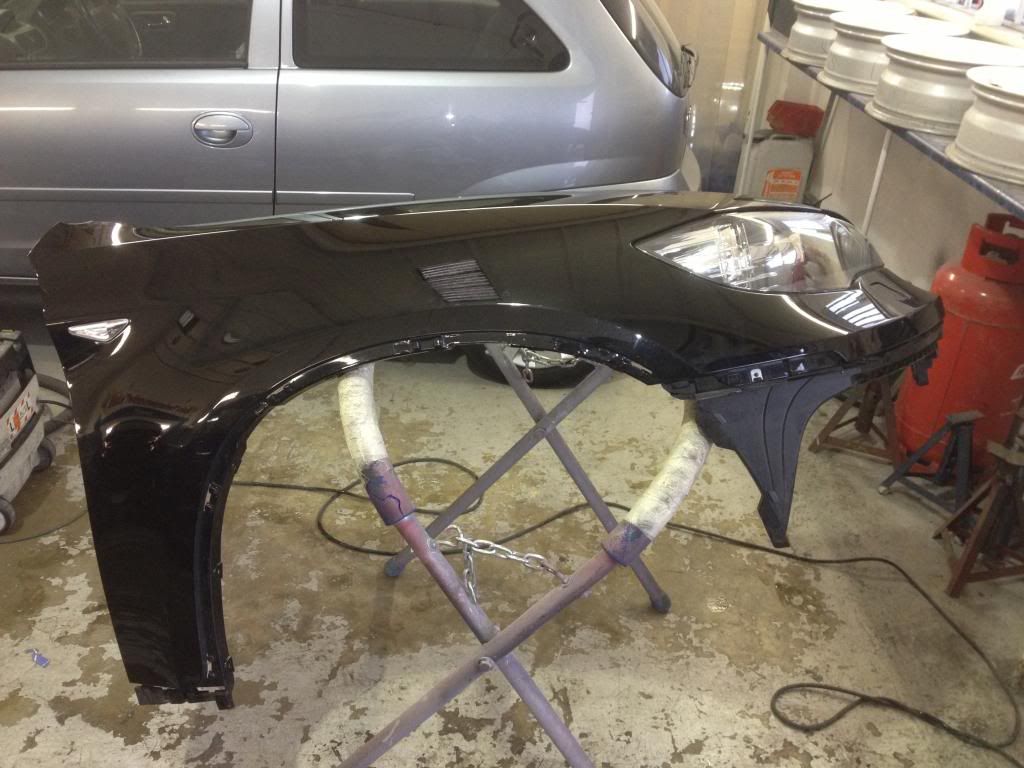 I didnt have time to remove the bonnet, My bodyshop well do that on Monday as I have stripped the most time consuming stuff off. Its such great fun stripping your car lol. Here are a few pics of my X5 4.8 Sport that I sold. I took the wheels and BBK off this. I'll stick the 22" on the x6 but shall I get the spokes painted black? 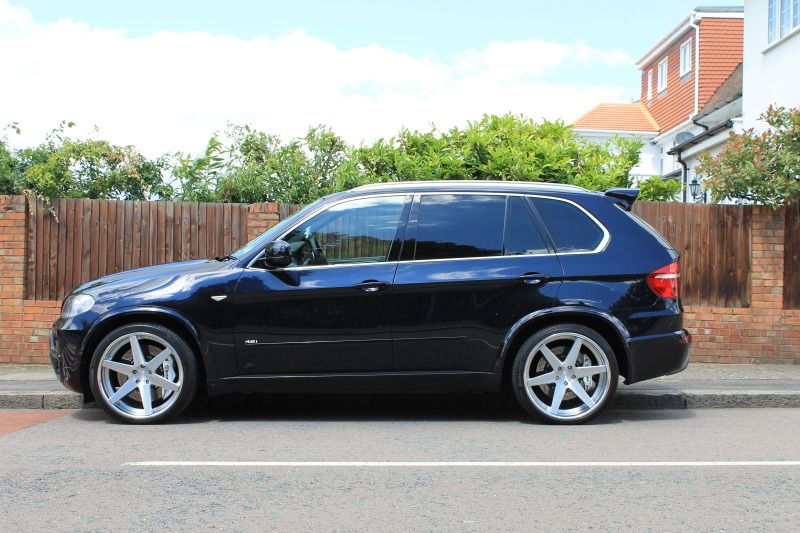 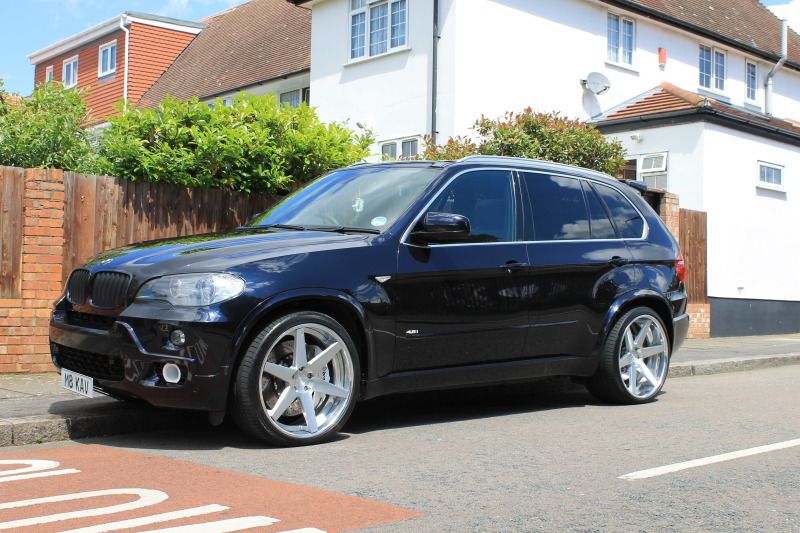 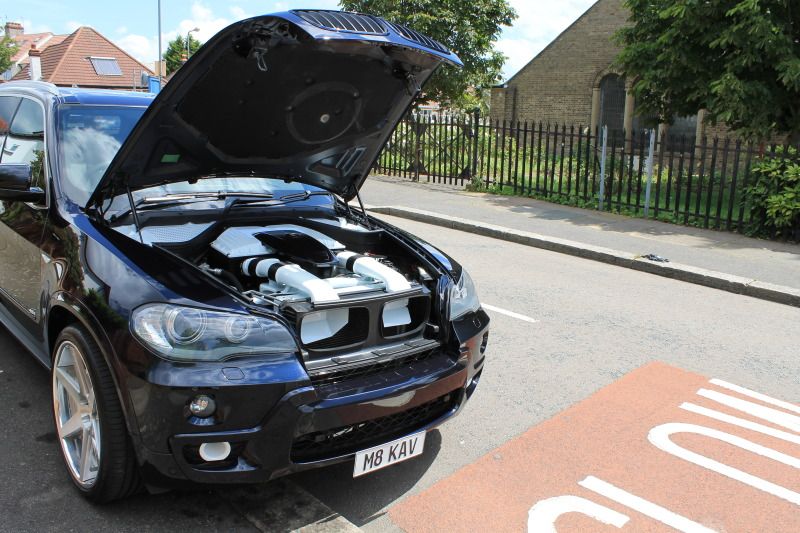 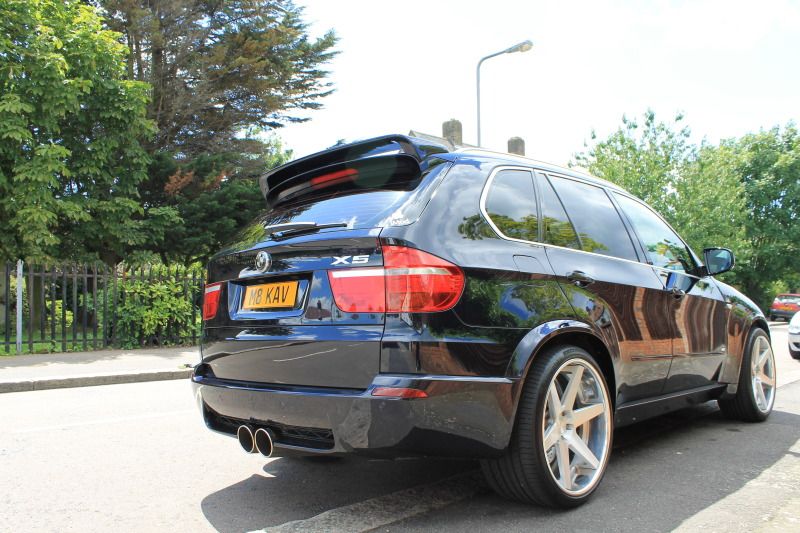 More updates to come for the x6 as lots more to do ICE and Engine bay next! I do have the white xenon angel kit to fit Ijust havent got arround to do it. The exhaust is also going to be a custom jobbie  |
| 11-27-2012, 10:53 AM | #2 |
|
Chief Senior Executive Managing VP of Orange Sales

585
Rep 2,581
Posts |
Dude - nice work!
I'm normally not a fan of all black, but in this case I think it looks killer. If you're going to put those 22" rims from your X5 on the X6, I'd definitely say paint/powdercoat them black. Great write up. Definitely will keep an eye out on this thread and look forward to the final project completed! |
|
Appreciate
0
|
| 11-27-2012, 02:46 PM | #5 |
|
Second Lieutenant
22
Rep 235
Posts |
yes i think i'll split the rims and paint the spokes black, i'll leave the dish polished
Ice wise in the x5 i had focal slimline components 5.25 up front focal slime components 4" in the rear earthquake subs (8") under the seats 13" w6 JL sub in the boot Audision bit 10 JL HD 600/1 to power the sub JL HD 600/6 to power the rest. The x6 has an additional set of speakers in the rear quarters there also 4" so I am going to buy another set of focals and put them in the rear. This will be powered by the 6 channel JL amp that I have and i'll buy another 2 channel JL amp to power the subs under the seats. The x6 also has a fiber optic input into the amp so the audsionbit 10 wqont work I have to buy another piece of kit to do that. I wont do the ice until March of this year. Once I put the x6 back together next week i'll wack some more pics up :-) Anyone else here from the UK? |
|
Appreciate
0
|
| 11-28-2012, 04:13 AM | #7 |
|
Lord Vader


7
Rep 162
Posts |
Great post dude, love your car. Did you buy some additional parts for the front X6M bumper besides the mesh? Can you list them? I'm thinking about changing the bumper also.
__________________
My ugly illusions are such a beauty!
|
|
Appreciate
0
|
| 11-29-2012, 09:38 AM | #8 | |
|
Second Lieutenant
22
Rep 235
Posts |
Quote:
the mesh which goes in the bumper (3 pieces) the mesh which goes under the bonnet (one piece) The brake ducts Apperently you also require the rad cowling to be changed I havent ordered this part yet as I dont think you need to change it, i'll find out when I put my car back together next week. If it is require I'll update the site. Also you need to trim the front plastic wheel arch extensions as the x6m front bumper is longer from the side, this is why I choose to colour code everything to make it more uniform. |
|
|
Appreciate
0
|
| 11-30-2012, 02:20 PM | #10 | |
|
Lord Vader
7
Rep 162
Posts |
Quote:

__________________
My ugly illusions are such a beauty!
|
|
|
Appreciate
0
|
| 11-30-2012, 03:10 PM | #11 |
|
Second Lieutenant
22
Rep 235
Posts |
[QUOTE=makdeniss;13079621]Thanks man. Really appreciate your reply. Could you please maybe indicate the part numbers besides the bumper and two meshes that go into it? Greatly appreciated.
[/QUOTEB51.74.7.205.943 BRAKE DUCT B51.74.7.205.944 BRAKE DUCT B51.11.7.205.559 GRILL B51.11.7.205.560 GRILL B51.11.7.205.577 GRILL B51.11.7.205.578 GRILL |
|
Appreciate
0
|
| 12-01-2012, 09:15 AM | #13 | |
|
Lord Vader
7
Rep 162
Posts |
[QUOTE=westsidee90;13079913]
Quote:
__________________
My ugly illusions are such a beauty!
|
|
|
Appreciate
0
|
| 12-09-2012, 10:55 PM | #14 |
|
New Member
2
Rep 15
Posts |
Awesome car! Love the black and green. Any concerns about putting 22" rims on? I was mistakenly sent 22s and I currently have 20s. Thinking of putting on the 22s and getting new tires for the rims. Not sure what to do...
|
|
Appreciate
0
|
Post Reply |
| Bookmarks |
|
|


 ...just enjoying life.