


|
|
|
| 11-10-2017, 07:11 PM | #1 |
|
Captain
 344
Rep 728
Posts |
X5M Stainless Steel Brake Line DIY
Hey Gents,
I needed to do a brake fluid flush and saw this as an opportunity to swap out the brake lines to stainless steel. I found three options for the E70: Stoptech clear 4-line set, ECS red 6-line set, and UUC blue 6-Line set. I went with the UUC set since the set had all six lines, they were pressure tested higher than Stoptech’s lines, and the UUC line coating was blue which matched my paint: 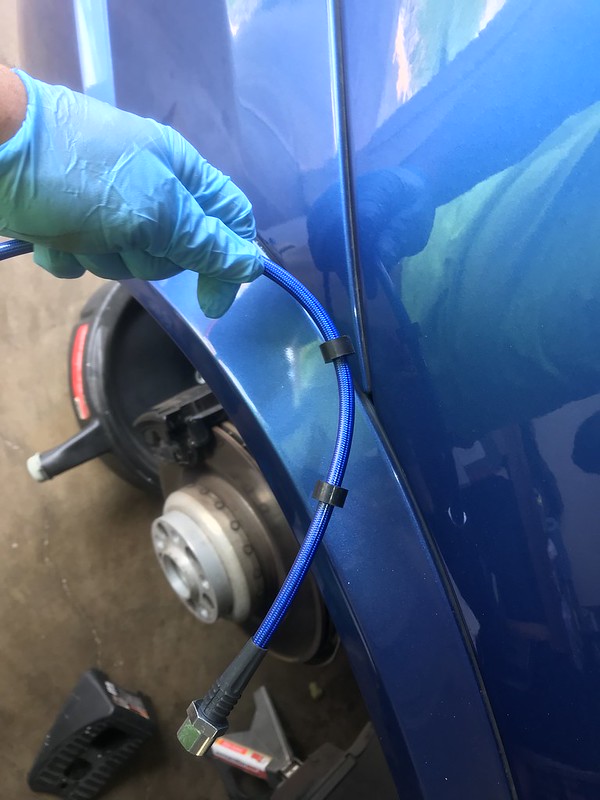 It turned out that since the X5M has the massive torque vectoring rear differential it was impossible to swap the rear center lines, even dropping the differential down an inch or two. I wasted an hour attempting to loosen after dropping the diff until it hit the exhaust (around 1.5”) then I spent 2 hours trying to realign the rear diff bolt. To swap out the rear center lines you need to drop the exhaust and the differential which I’m too lazy to do so I only swapped the front and rear caliper lines. Inner Rear Lines Above the Differential: 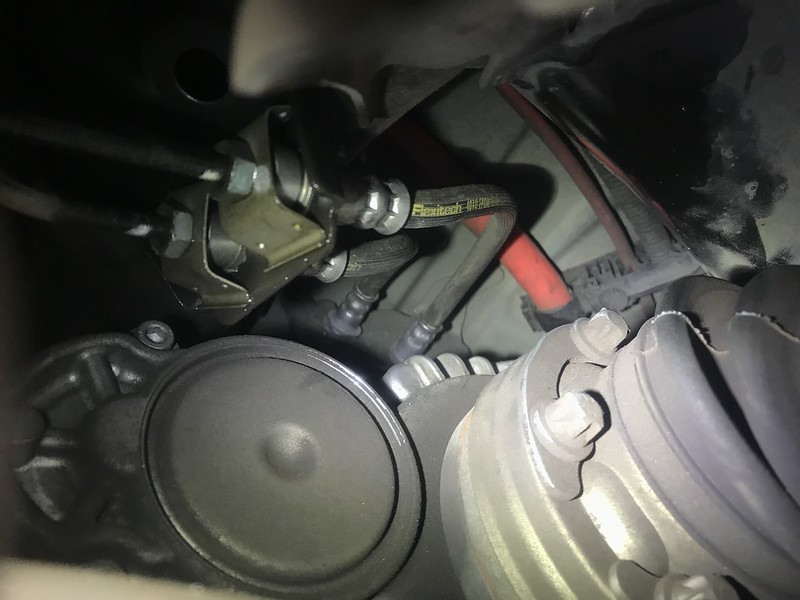 SAFETY NOTES: a) Lifting the vehicle is dangerous, get a buddy to help, if you don’t have the right equipment then don’t do it b) Brake Fluid is hazardous and it eats paint, wear gloves and eye protection, cover your paint where necessary, wipe immediately if any gets on your paint c) I did this by myself since I’ve done it a few times, but brakes are a serious safety feature of your vehicle so do it at your own risk d) Brake bleeding by yourself is time consuming but doable, make sure you keep the bleeder bottle above the bleeder valve so you don’t get air in the lines (It’s faster if you have a pressure bleeder; don’t do vacuum bleeding…I have a set and they don’t work well) e) If you do standard brake bleeding and the braking is mushy afterward you probably have air in the ABS. You need to get a scanner or coding software to activate the ABS and clear the air from the lines. I bought a FOXWELL NT510 for $155 and it did the trick. PARTS: 2 x Liter of DOT 4 Brake Fluid 1 x Set Front Brake Lines 1 x Set of Rear Brake Lines TOOLS: 1 x Jack 4 x Jack Stands 2 x Wheel Blocks 1/2" Drive Breaker Bar 17mm Deep Socket (1/2” Drive) 1/4" Drive Ratchet 1/4" Drive Ratchet extension 13mm Socket (1/4” Drive) 14mm Flarenut Wrench 11mm Flarenut Wrench 9/16” Flarenut Wrench Flathead Screwdriver Brake Bleeder Kit ($10 at O’Riellys and Autozone) 50” 2x4 bit of wood Funnel Drip Pan Shop Towels *BATTERY TENDER (To make sure the battery doesn’t die while ignition is on) *FOXWELL NT510 SCANNER (To activate the ABS) STEP 1: LIFT THE VEHICLE a) Get all four wheels off the ground using jacks/jack stands or a lift. b) Remove wheels c) There is a write up here: http://www.xbimmers.com/forums/showp...9&postcount=12 STEP 2: REPLACE REAR LINES a) Close master cylinder by depressing brake pedal with 2x4 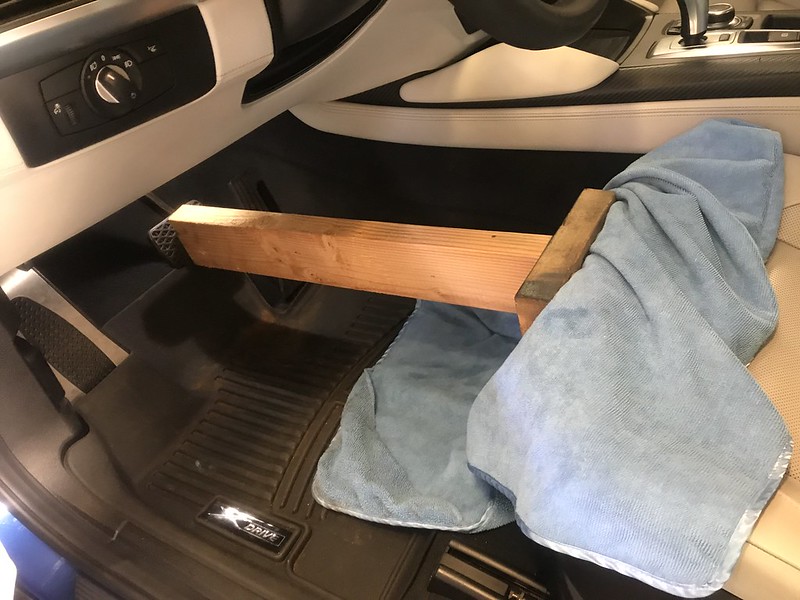 b) Pop the hood using latch in driver foot well c) Use 13mm socket to remove the driver side rain partition d) Clean the brake fluid reservoir cap and the area around the cap e) Place drip pan under working area f) Use Flat Head Screw Driver to remove brake line securing clip 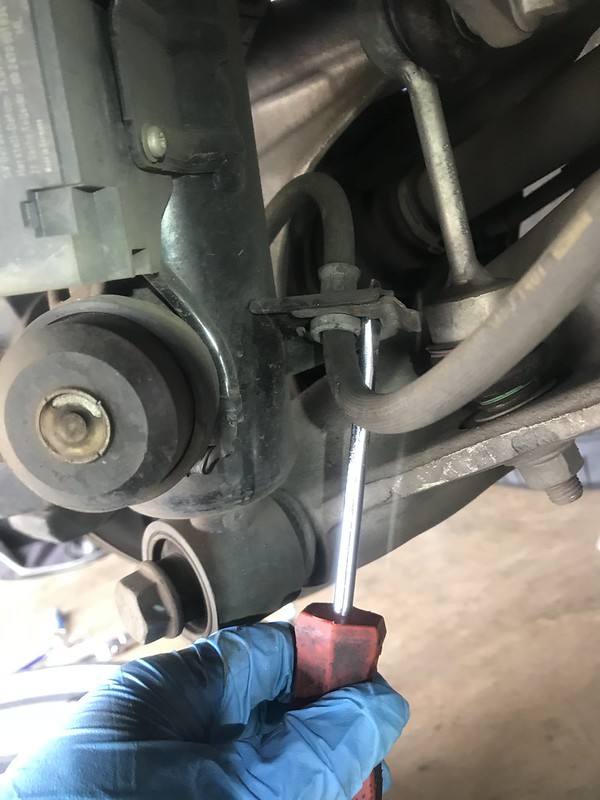 g) Use 11mm wrench to loosen and unplug inner brake line fitting (WATCH OUT FOR FLUID LEAKING OUT; KEEP DRIP PAN UNDER THE LINES TO CATCH FLUID) 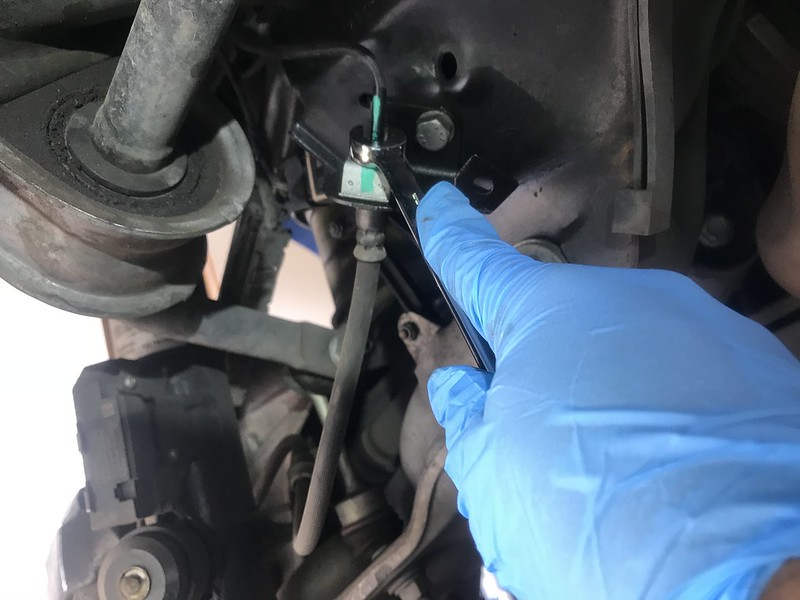 h) Use 14mm wrench to loosen and remove brake line from caliper 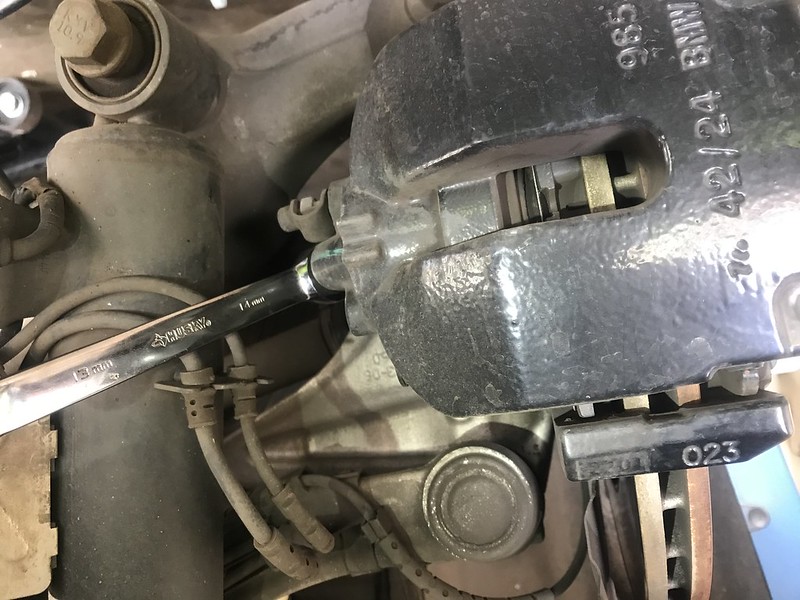 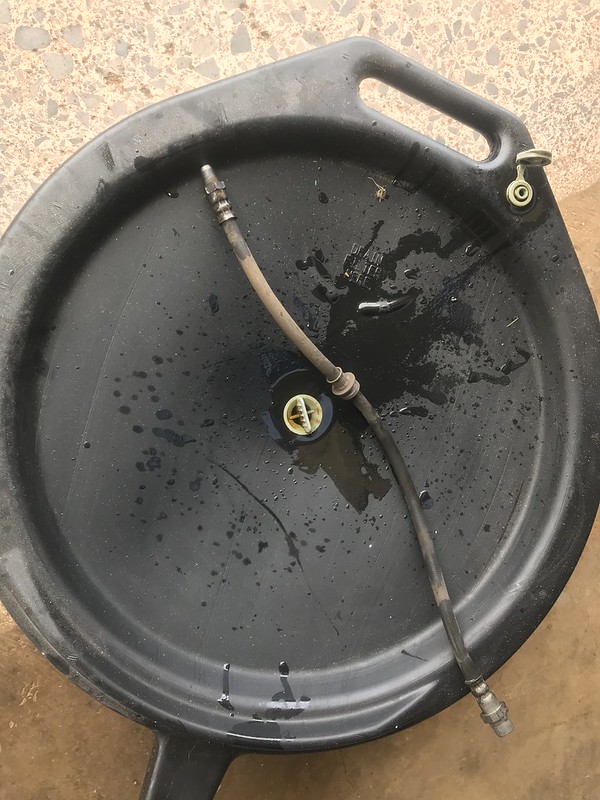 i) Screw new brake line into caliper and tighten using 9/16” wrench j) Push new brake line securing grommet onto the bracket k) Use 11mm wrench to screw the hard brake line into the new stainless brake line 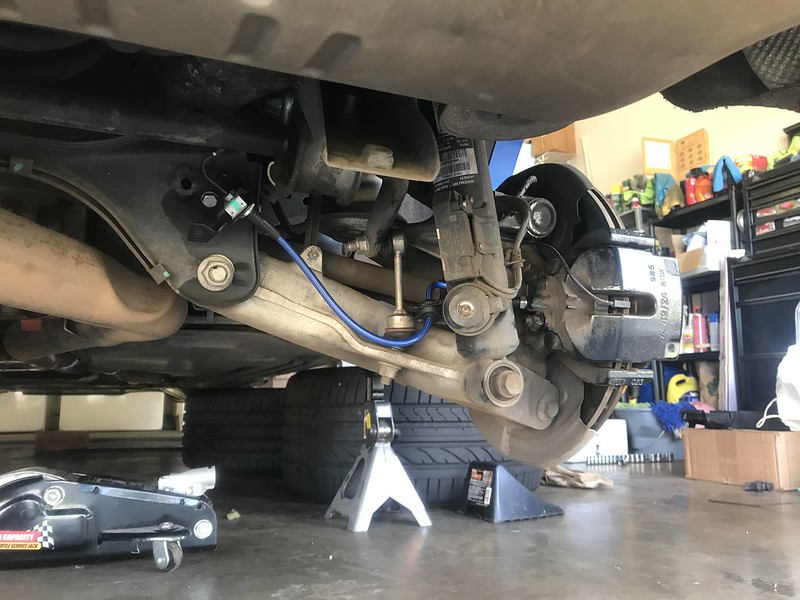 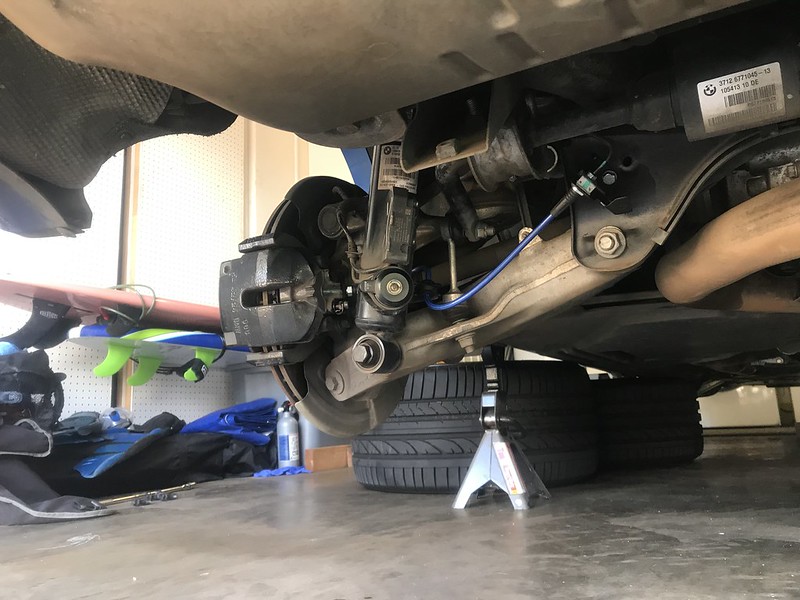 STEP 3: REPLACE FRONT LINES a) Use flat head screw driver to remove brake line securing clip 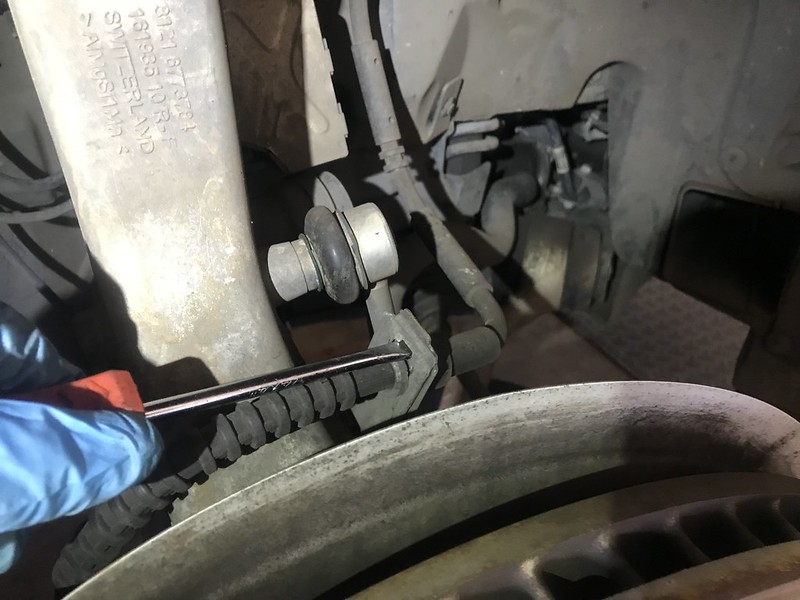 b) Use 11mm wrench to loosen and unplug inner brake line fitting (WATCH OUT FOR FLUID LEAKING OUT; KEEP DRIP PAN UNDER THE LINES TO CATCH FLUID) 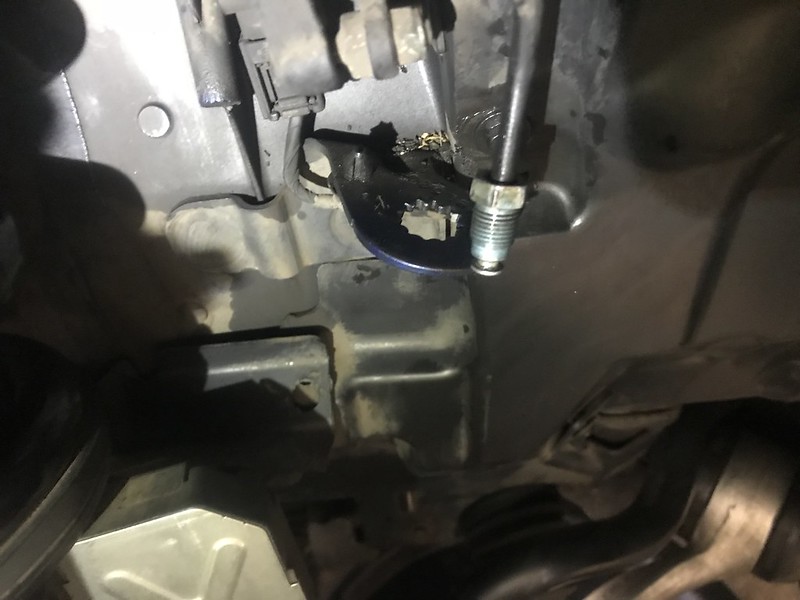 c) Use 14mm wrench to loosen and remove brake line from caliper 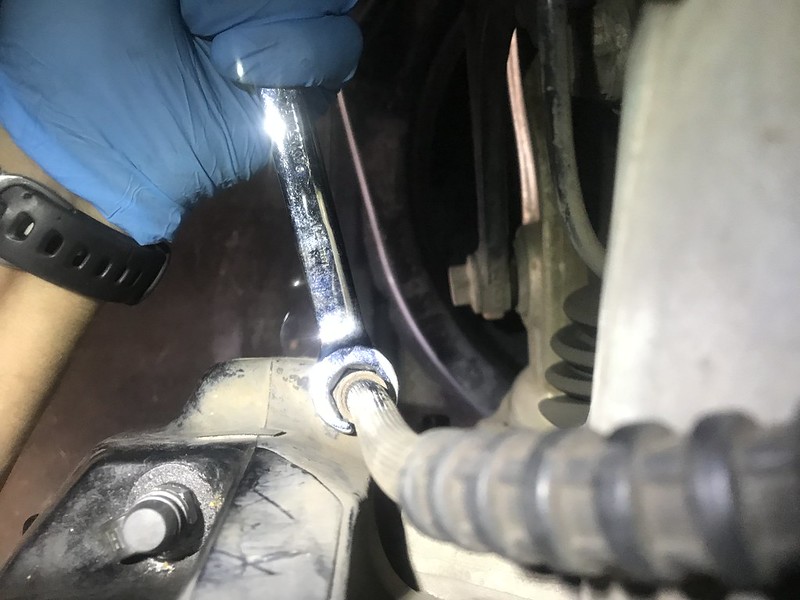 d) Screw new brake line into caliper and tighten using 9/16” wrench 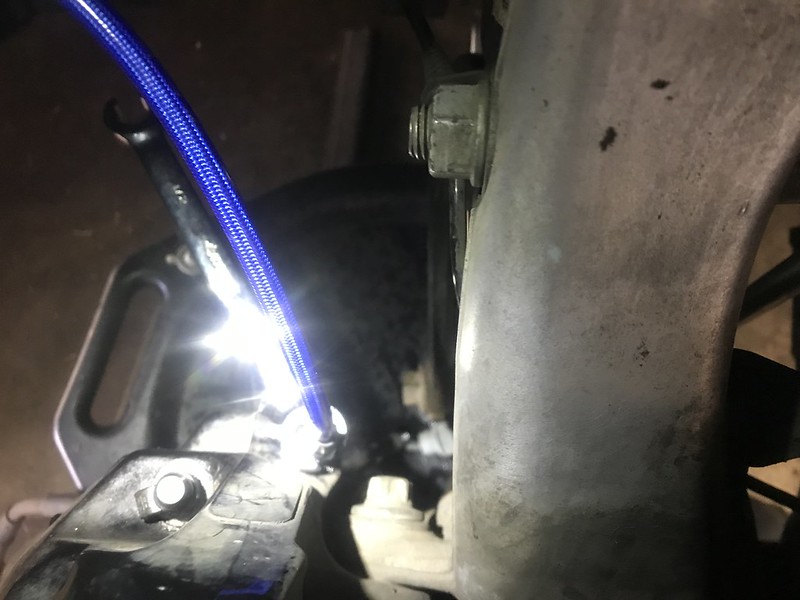 e) Slide steel brake line grommet onto the bracket and secure using metal clip 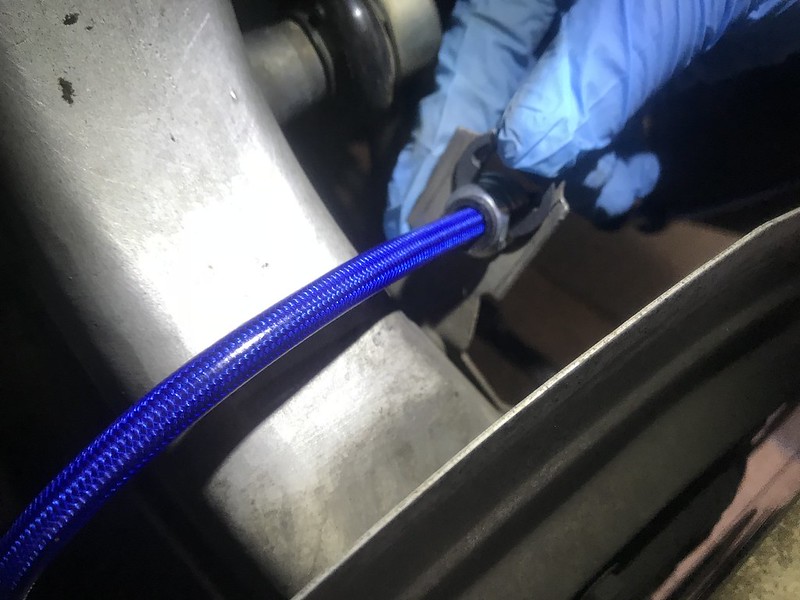 f) Use 11mm wrench to screw the hard brake line into the new stainless brake line 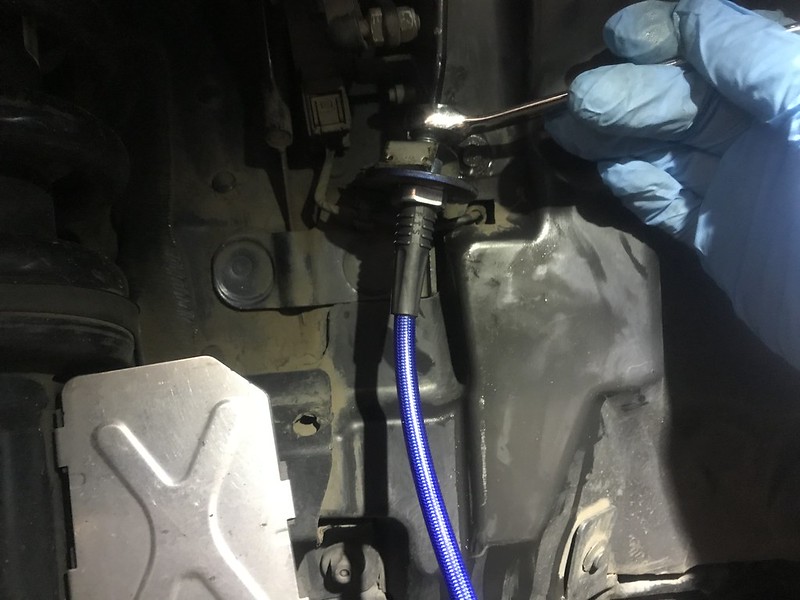 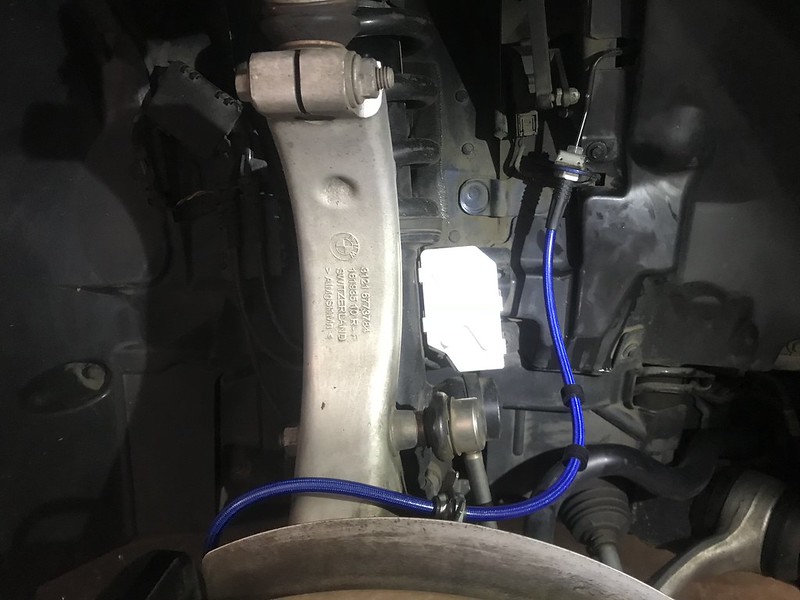 g) Remove wood from brake pedal STEP 4: BLEED/FLUSH THE BRAKES ALONE USING SCANNER/INPA a) Unscrew the brake fluid reservoir cap b) Use fluid pump to extract old brake fluid from reservoir c) Fill the reservoir up with fresh fluid until at MAX d) Connect battery tender to front positive terminal and grounding bolt then plug in battery tender e) Go to rear left caliper and position bleeder hose/bottle on the caliper bleeder valve with the bottle above the valve f) Place vehicle ignition into position 2 without turning the vehicle on by pressing START button twice without depressing brake pedal g) Plug in scanner and go to BMW>Automatic>Service Menu>Chassis>Brake Routine h) Use block of wood to depress brake pedal 90% i) Run the scanner’s brake routine (You may alternately select the lines individually using Chassis>Individual activation j) Use 11mm wrench to open the bleeder valve 1/4 turn k) Remove wood from brake pedal and pump brake pedal four times l) Inspect the bleeder hose and check to make sure only fluid is extending upward from the valve with no bubble coming out (BIG BUBBLES IN THE HOSE MEANS THAT AIR MOVED OUT OF THE NEW BRAKE LINES, TINY BUBBLES MAY MEAN THAT YOUR BLEEDER HOSE IS LETTING AIR IN AROUND THE VALVE) m) Pump the brake pedal several more times checking to see if all the air is out of the lines (EVERY FEW PUMPS MAKE SURE YOU CHECK THE BRAKE FLUID RESERVIOR TO ENSURE IT IS AT MAX LEVEL; IF IT IS NOT THEN FILL IT UP) n) Keep pumping the fluid out of the lines until you see clear, clean, new fluid coming out (THIS CAN TAKE A WHILE, KEEP DUMPING OLD FLUID FROM THE BOTTLE) o) On the last pump use the wood to keep the brake pedal depressed and close the bleeder valve p) Move to rear left REPEAT STEPS g to o q) Move to front right outer valve REPEAT STEPS g to o r) Move to front right inner valve REPEAT STEPS g to o s) Move to front left outer valve REPEAT STEPS g to o t) Move to front left inner valve REPEAT STEPS g to o u) Ensure the brake fluid reservoir is at max and firmly close the cap v) Enter the vehicle and firmly press on the brake pedal several times w) Check all of the lines and bleeder valves for leaks x) Reinstall driver rain partition using 13mm socket y) Remove scanner and battery tender z) Close Hood STEP 5: REINSTALL WHEELS AND LOWER VEHICLE STEP 6: TEST DRIVE STEP 7: CHECK FOR LEAKS …Extra Note: I have stock rims with 25mm Spacers front and rear and was able to bleed the brakes with the wheels on the ground…just need to make sure the outer bleeder screw is accessible on the front calipers (roll the car back or forward).
__________________
 2020 G01 X3 30e CURRENT M Sport Package 2019 Ford Raptor SuperCrew CURRENT 802A, KN Drop-in, RB Flaps, Husky Well Liners 2012 E70 X5M SOLD Stg 1+ Turbos, DPs, Velos Stg 2+, JB4, Race Cats, Bavauto Coils 2003 E46 M3 SOLD aFe CAI, AP Axleback, SSK, H&R Springs, TMS CMBR Arms, PF RTABs Last edited by jandref321; 11-10-2017 at 08:53 PM.. Reason: Add Photo |
| 11-12-2017, 07:56 AM | #2 | |
|
Private First Class
 20
Rep 138
Posts |
Very well written post, now thats what is expected from a enthusiast. Whats the advantage of using a steel break line. How much the stealerrship takes for this procedure
Quote:
|
|
|
Appreciate
0
|
| 11-12-2017, 09:10 AM | #3 |
|
Lieutenant
173
Rep 545
Posts |
Rubber lines, as they age, will expand when brake pressure is applied. Sometimes they actually begin to crack and crumble. Steel brake lines will not expand so you will get a firmer, more consistent brake pressure.
|
|
Appreciate
0
|
| 11-12-2017, 11:38 AM | #4 |
|
Second Lieutenant
93
Rep 291
Posts |
Great write-up! This is definitely on my list to-do since I plan to keep the car for a while.
FYI, if you get a brake flush from the dealer, most likely they will not use the method of using a scanner tool. A BMW tech told me they mainly use this when servicing items like the master cylinder and ABS module. |
|
Appreciate
0
|
| 11-12-2017, 11:31 PM | #5 | |
|
Captain
344
Rep 728
Posts |
Quote:
and like philly 42 said, the stealership won't run the ABS unless necessary during a swap. I had to run the ABS using a scanner to remove the air that got into the lines. I bled the brakes four times before calling it a day and ordering the scanner...that's how I know you can bleed the brakes with the tires on the ground lol. The dealer also won't swap your lines for anything but stock. I haven't gotten a quote from anyone on brake line swap pricing, but I imagine it would be around $500-600 for just the normal caliper lines and maybe $1100-1300 for the all 6 lines since you'd have to drop the exhaust and differential. It's a lot of labor. I was quoted $300 just to bleed the brakes using INPA from an Indy Shop.
__________________
2020 G01 X3 30e CURRENT M Sport Package 2019 Ford Raptor SuperCrew CURRENT 802A, KN Drop-in, RB Flaps, Husky Well Liners 2012 E70 X5M SOLD Stg 1+ Turbos, DPs, Velos Stg 2+, JB4, Race Cats, Bavauto Coils 2003 E46 M3 SOLD aFe CAI, AP Axleback, SSK, H&R Springs, TMS CMBR Arms, PF RTABs |
|
|
Appreciate
0
|
| 11-17-2017, 02:30 PM | #6 |
|
Captain

153
Rep 709
Posts |
Dang. I feel very lucky that I introduced no air when using the pressure bleeder to change the fluid in mine this summer. Did not have to bleed any air at all. Just bled each caliper until fresh fluid came out, closed the nipple and went to the next caliper. Drove it and it felt perfect.
I should have paid more careful attention to the pressure bleeder fluid level to make SURE it didn't run out. I did check it from time to time but if I had heard these experiences I would have been paranoid about it, to make dang sure, as I would not have been prepared to bleed them properly. No INPA or anything.
__________________
heatmizr [Todd]
g26 i4 e40 - Clean Machine e70 X5 50i M-Sport "The Boss" Loaded e90 328i - sold e36 M3 - Gone to become a track star |
|
Appreciate
0
|
| 11-18-2017, 10:41 AM | #7 | |
|
Captain
344
Rep 728
Posts |
Quote:
__________________
2020 G01 X3 30e CURRENT M Sport Package 2019 Ford Raptor SuperCrew CURRENT 802A, KN Drop-in, RB Flaps, Husky Well Liners 2012 E70 X5M SOLD Stg 1+ Turbos, DPs, Velos Stg 2+, JB4, Race Cats, Bavauto Coils 2003 E46 M3 SOLD aFe CAI, AP Axleback, SSK, H&R Springs, TMS CMBR Arms, PF RTABs |
|
|
Appreciate
0
|
| 11-23-2017, 03:16 AM | #8 |
|
Private First Class
23
Rep 175
Posts |
I was speaking to one of the guys from Zeckhausen Racing a few weeks back, he mentioned that if you keep you car keys away from the car while replacing brake lines or calipers the ABS module valve will remain close and no air should get trap in it and bleeding it shouldn't be any harder than any conventional brake system.
He said whaterver brake job you need to make, do it one corner at the time followed by a bleed, no need to bleed every corner. Each caliper has its own brake line to the master cylinder and there's no way to air to travel from one to the other. |
|
Appreciate
0
|
Post Reply |
| Bookmarks |
| Tags |
| brake, caliper, line, stainless, steel |
|
|


