


|
|
|
| 12-01-2016, 09:52 PM | #1 |
|
Captain
 345
Rep 728
Posts |
F85 ///M Front Badge on E70 DIY
Gents,
I recently purchased an E70 X5M and it was debadged when it was delivered. I don’t think I’m too much of a badge nut but I do care for the ///M symbol if it looks appropriate. I didn’t care for the early aftermarket fix of only putting a stock ///M badge on the front grill, but preferred the refined look of the newer F85 badges as they were subtle and unassuming. I could not find a readily available badge for the E70 X5M so I began to plan a DIY. I had most of the parts in my garage already so I built a list. PARTS: -OE BMW X5M lettering from an F85 https://www.ecstuning.com/b-genuine-...k/51138063149/ -Sheet Metal from ACE Hardware (I think I used 1/8” Sheet Metal that was left over from fabricating Hawaii registration sticker plates) -Bolts from Home Depot (They were standard 1/4” zinc bolts and nuts which were long since I intended to cut them) -Black silicon caulk (used to prevent marring on the exterior of the grill) -Metal epoxy (I used Loctite instead of JB Weld based upon reviews) -Gloss black rust preventive spray paint (Used ACE Hardware brand left over from registration sticker plates) -Gloss Clear coat enamel (left over from painting calipers) TOOLS: -Drill -Drill bits (I used a smaller bit for pilot holes and a 1/4” bit for the actual holes but the size will be based upon your bolt size) -Dremel -Dremel Sander attachment -Dremel metal cutter -Angle Grinder (Only needed if you have a battery powered dremel. A plug in dremel with metal cutter will easily handle the job and your cut will be straighter. -1000-3000 Grit Sandpaper (You should try and step it down to make the finished product look good) -Vice or vice grips or C-clamp (used to hold the metal while cutting and drilling) -Wooden block to drill into -A square measuring device 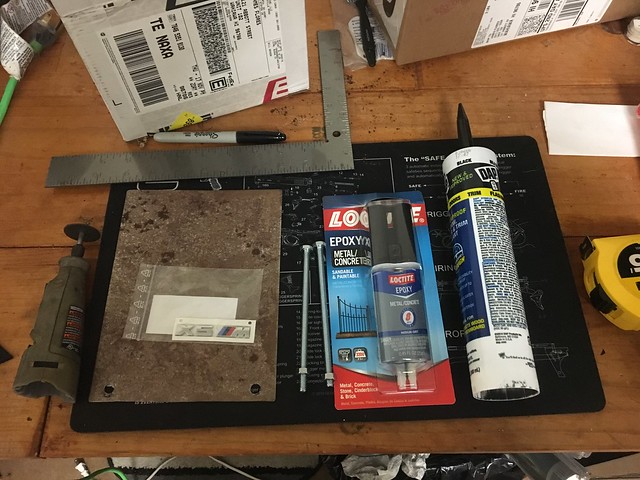 IMG_1927 IMG_1927STEP 1: CUT THE METAL I determined that the best size based upon the lettering size was 2-3/4” X 3/4". I measured this out and marked the cuts on the steel using a sharpie marker and the square. I first tried using the dremel but the battery was crappy so I used my angle grinder. 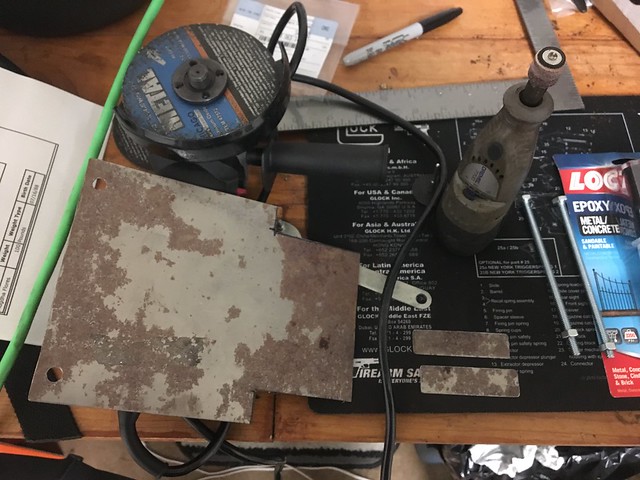 IMG_1928 IMG_1928STEP 2: SAND, MARK, AND DRILL THE HOLES I used the dremel and sander attachment to sand the corners and edges of the plates smooth then used the sand paper to remove the rust and prepare the surface of the plates. DO NOT use the dremel on the flat surfaces or you may cut deep into the plates. The Grill slats slope off to the right so to balance the lettering visually the bolts must be offset. I did a few quick measurements and marked them on the plates. This OFFSET portion is appropriate for the FACEPLATE ONLY. I learned this only after install so THE PICTURES ARE INACCURATE. The faceplate will have the bolts secured with epoxy offset but the rear plate will need to have the holes centered. Use the available space between the lines (slat opening) to mark the holes. I secured the plate with a C-clamp, drilled pilot holes, then drilled the actual holes. 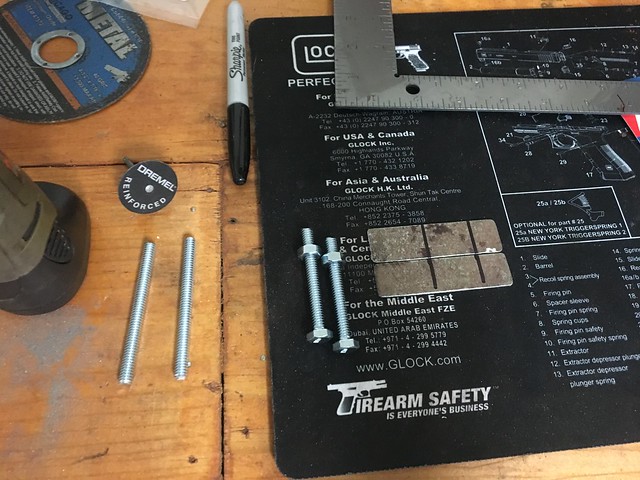 IMG_1929 IMG_1929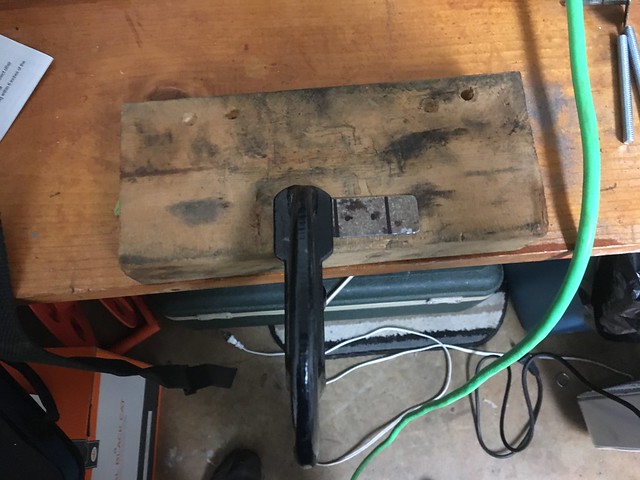 IMG_1930 IMG_1930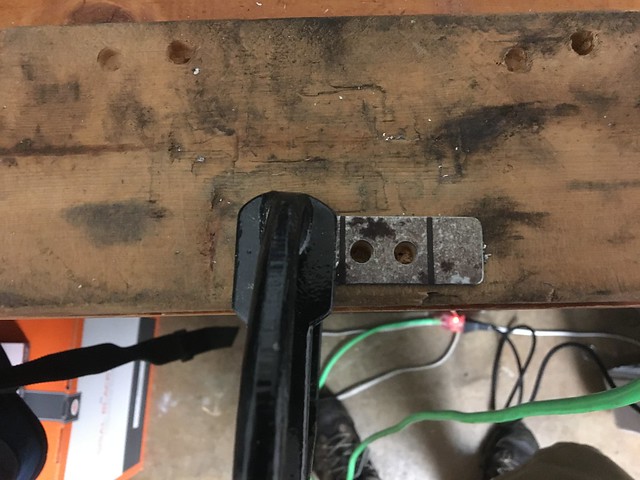 IMG_1932 IMG_1932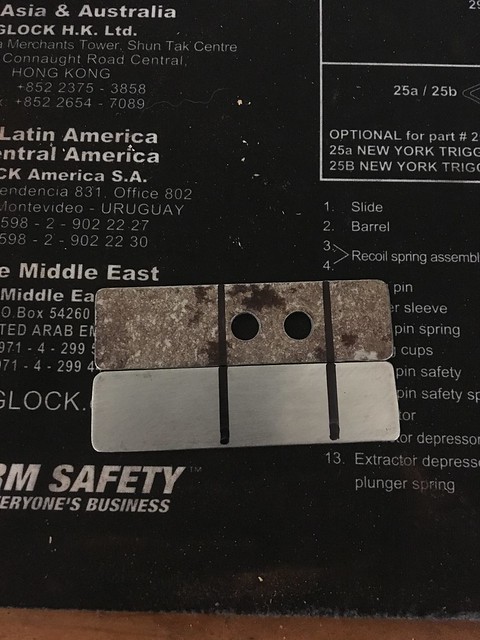 IMG_1934 IMG_1934STEP 3: CUT AND EPOXY THE BOLTS I held the bolts in place behind the front plate and placed the assembly on the grill to measure the appropriate length of the bolts. I then cut the bolts at the appropriate length (approximately 1-1/2" from the plate surface for the final cut including the heads) Using the available space I set the bolts onto the metal surface and planned how to set them so that they would account for the curvature of the slats and allow the plate to sit flat. I mixed the epoxy and set the bolts using the nuts and back plate to ensure they would set straight. I cannot stress enough ALLOW THE BOLTS AND EPOXY 24 HRS TO SET. I realized later that my original cut had the bolts too long and this led to the epoxy breaking while I tried to cut it. 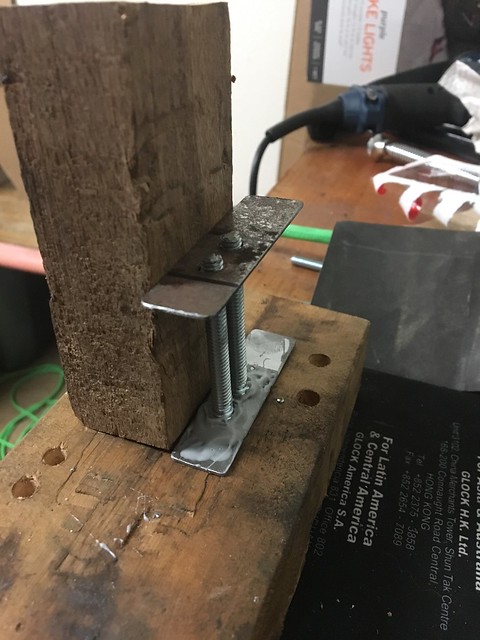 IMG_1935 IMG_1935STEP 4: PREP AND PAINT THE PARTS I sectioned off a bit of the bolts to allow the nuts to go on easily, but this is not necessary if you have cut to the appropriate length. I added 4 coats of black and 3 coats of clear waiting the appropriate 3 min between black coats and 10 min between gloss. Again, I cannot stress enough ALLOW 24 HRS FOR PAINT TO DRY AFTER THE LAST COAT. I was impatient which led to wrinkles.  IMG_1936 IMG_1936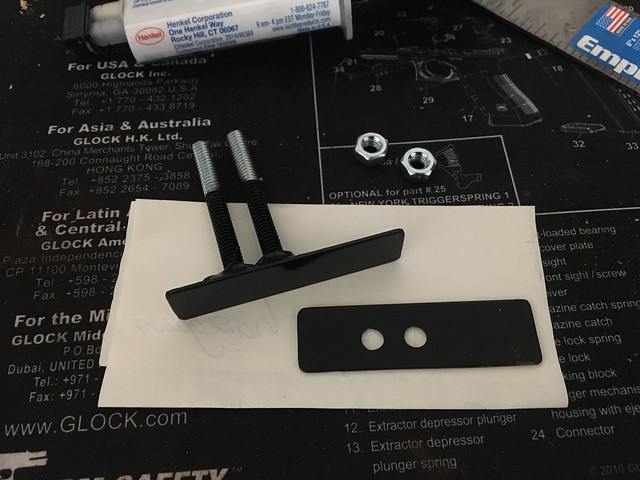 IMG_1939 IMG_1939STEP 4: APPLY SILICON I applied a decent amount of black silicon caulk to the REAR of the faceplate and the rear plate and spread it with tooth picks (The rear is not needed or recommended since it is visible it will be better to keep a gloss finish). The silicon can be difficult to manage and aggravating so be careful and remain patient. I don’t have a picture of this step because I was too angry while doing it to snap one. STEP 5: TEST FIT If you have been lucky enough to get it this far without messing it up then make sure to test fit the item before applying the lettering…this will save you the only important and indispensable part: the lettering itself. (I messed up the bolt length but already applied the lettering and handling the assembly, not allowing drying time for the enamel or the epoxy, led to wrinkles in the enamel and breaking of the epoxy.) STEP 6: APPLY THE LETTERING Good news, the lettering carrier is the same size as the faceplate, that’s why I chose that size. Simply align it and press hard for a few seconds; I used a drilled bit of wood as a stand while I applied it. 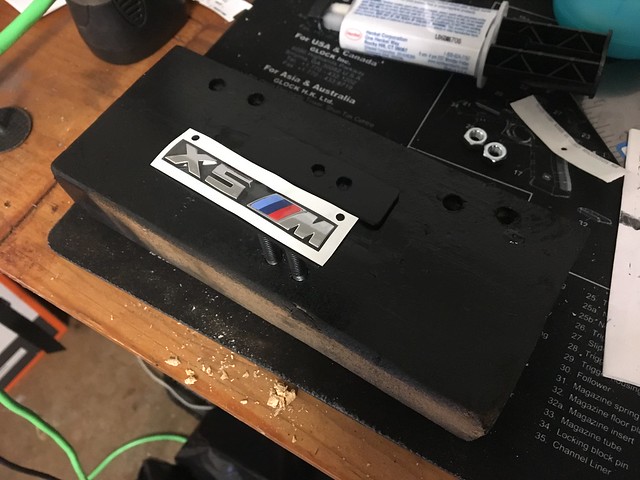 IMG_1943 IMG_1943STEP 7: INSTALL Open the hood, place the faceplate where you want it vertically in the grill, put on the rear plate, apply Loctite on the rear of the bolts and tighten down the nuts. Enjoy! 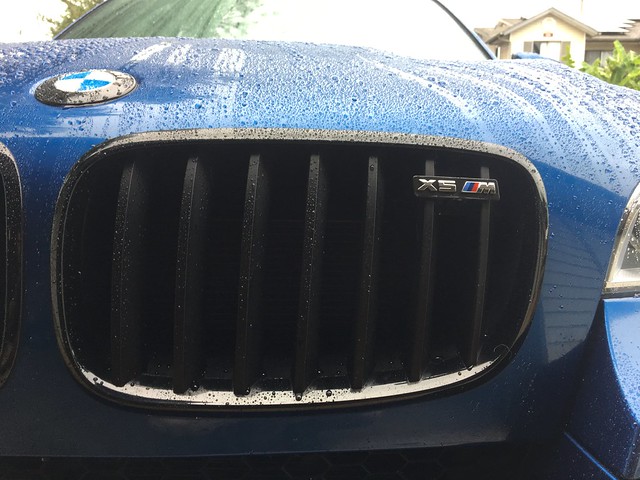 IMG_1945 IMG_1945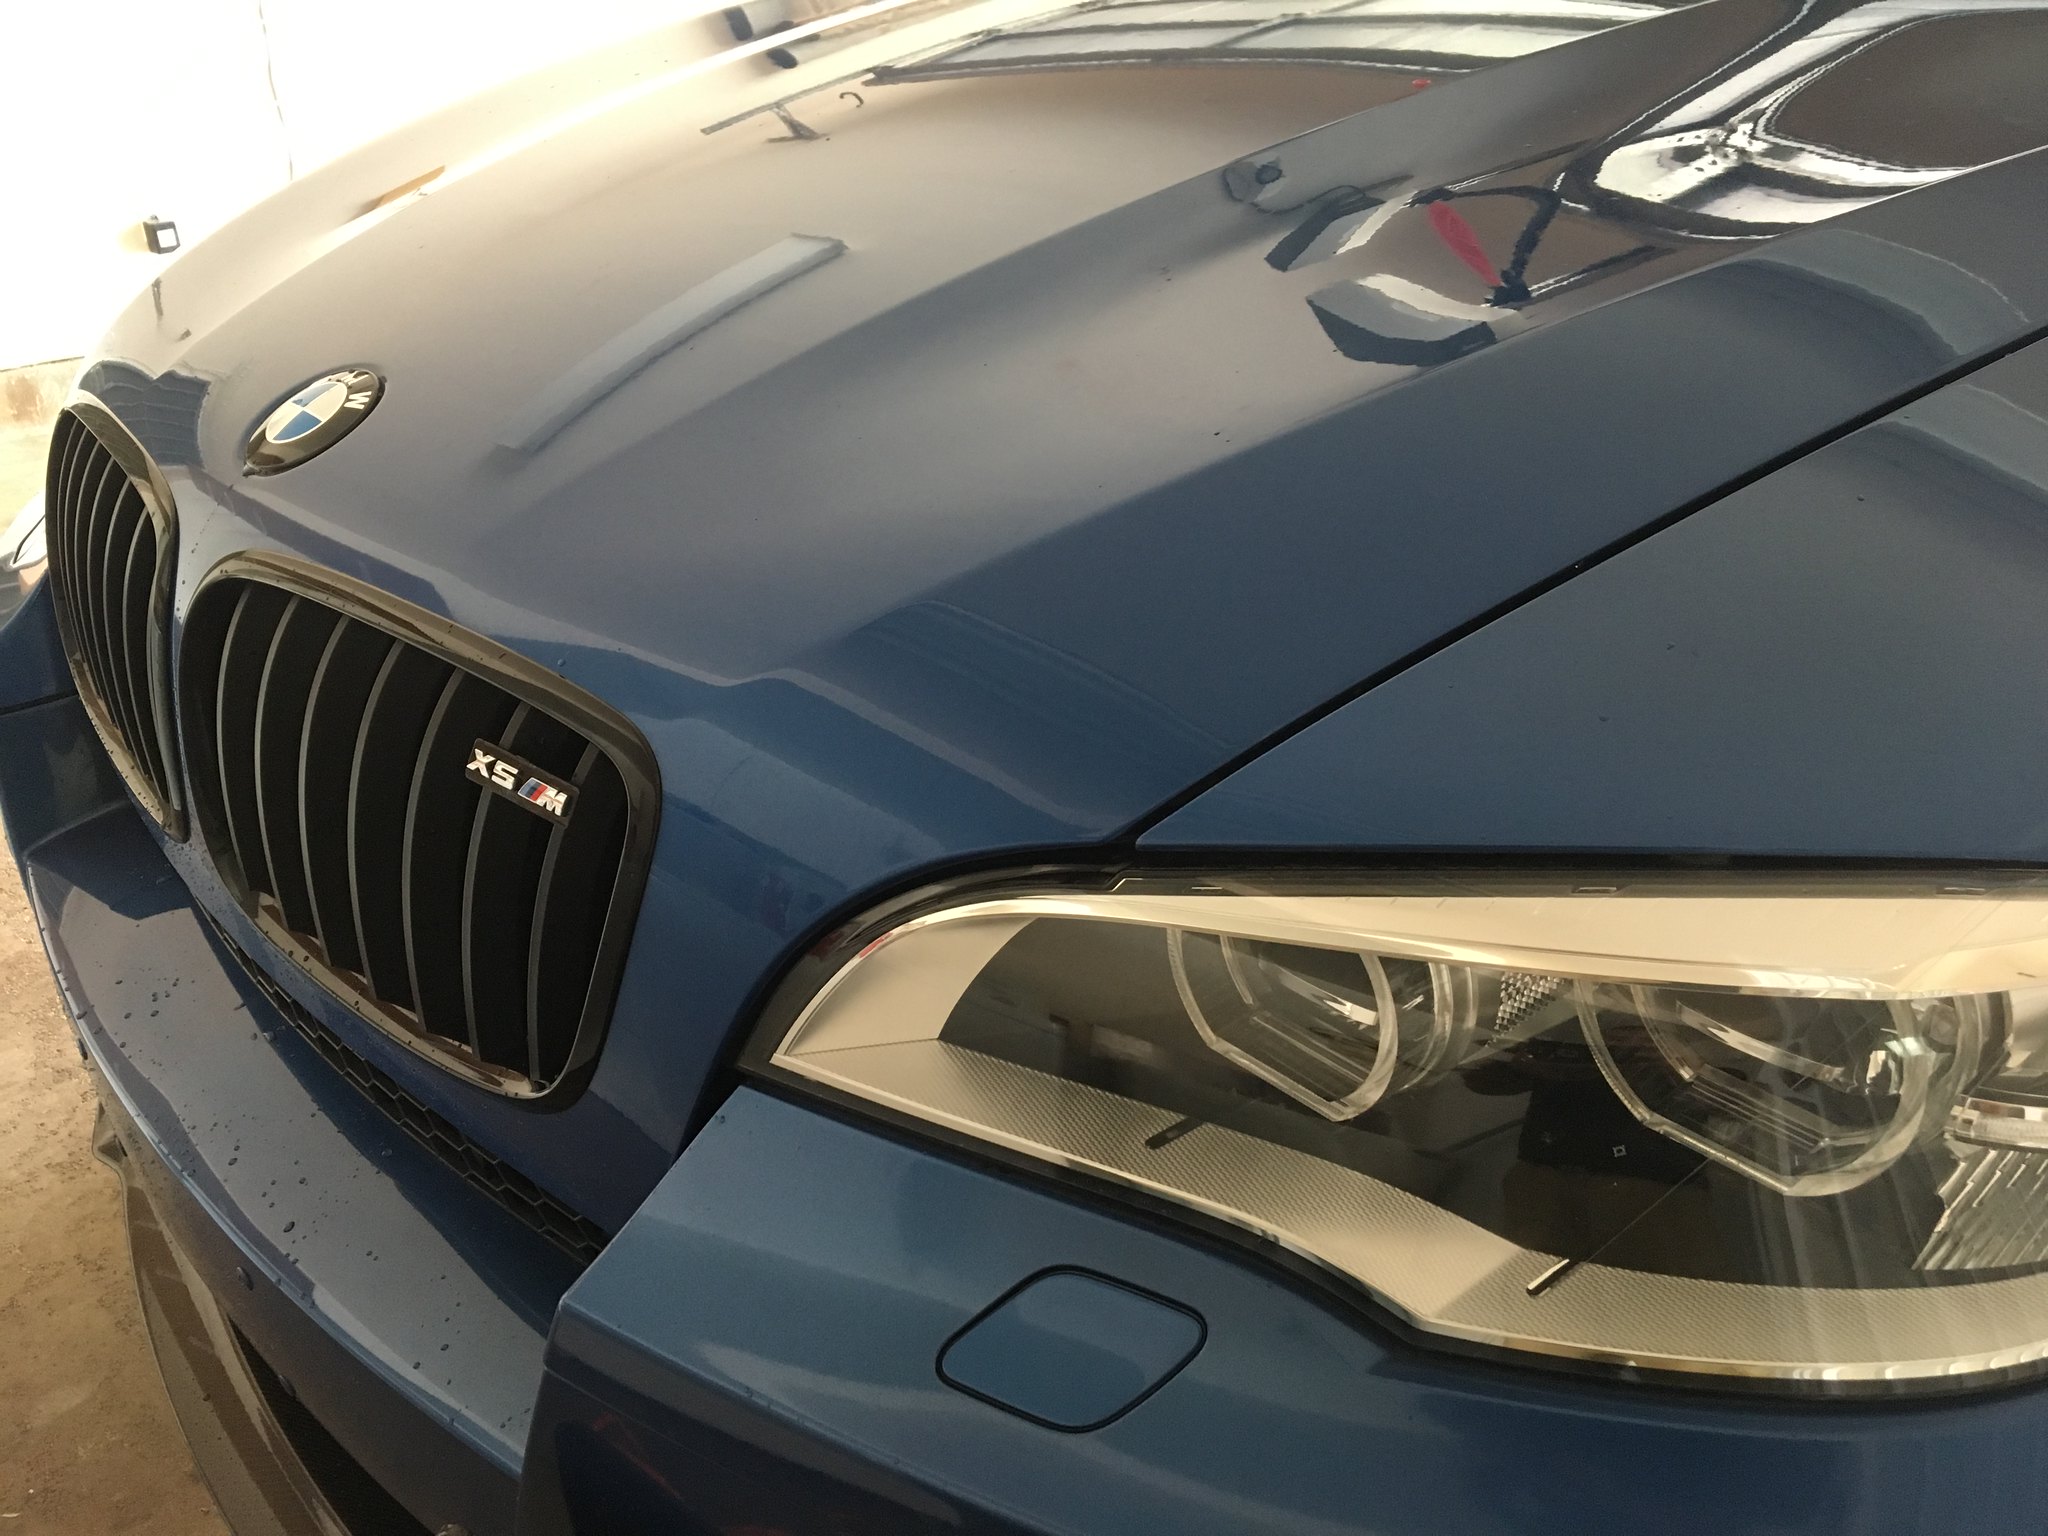 IMG_1946 IMG_1946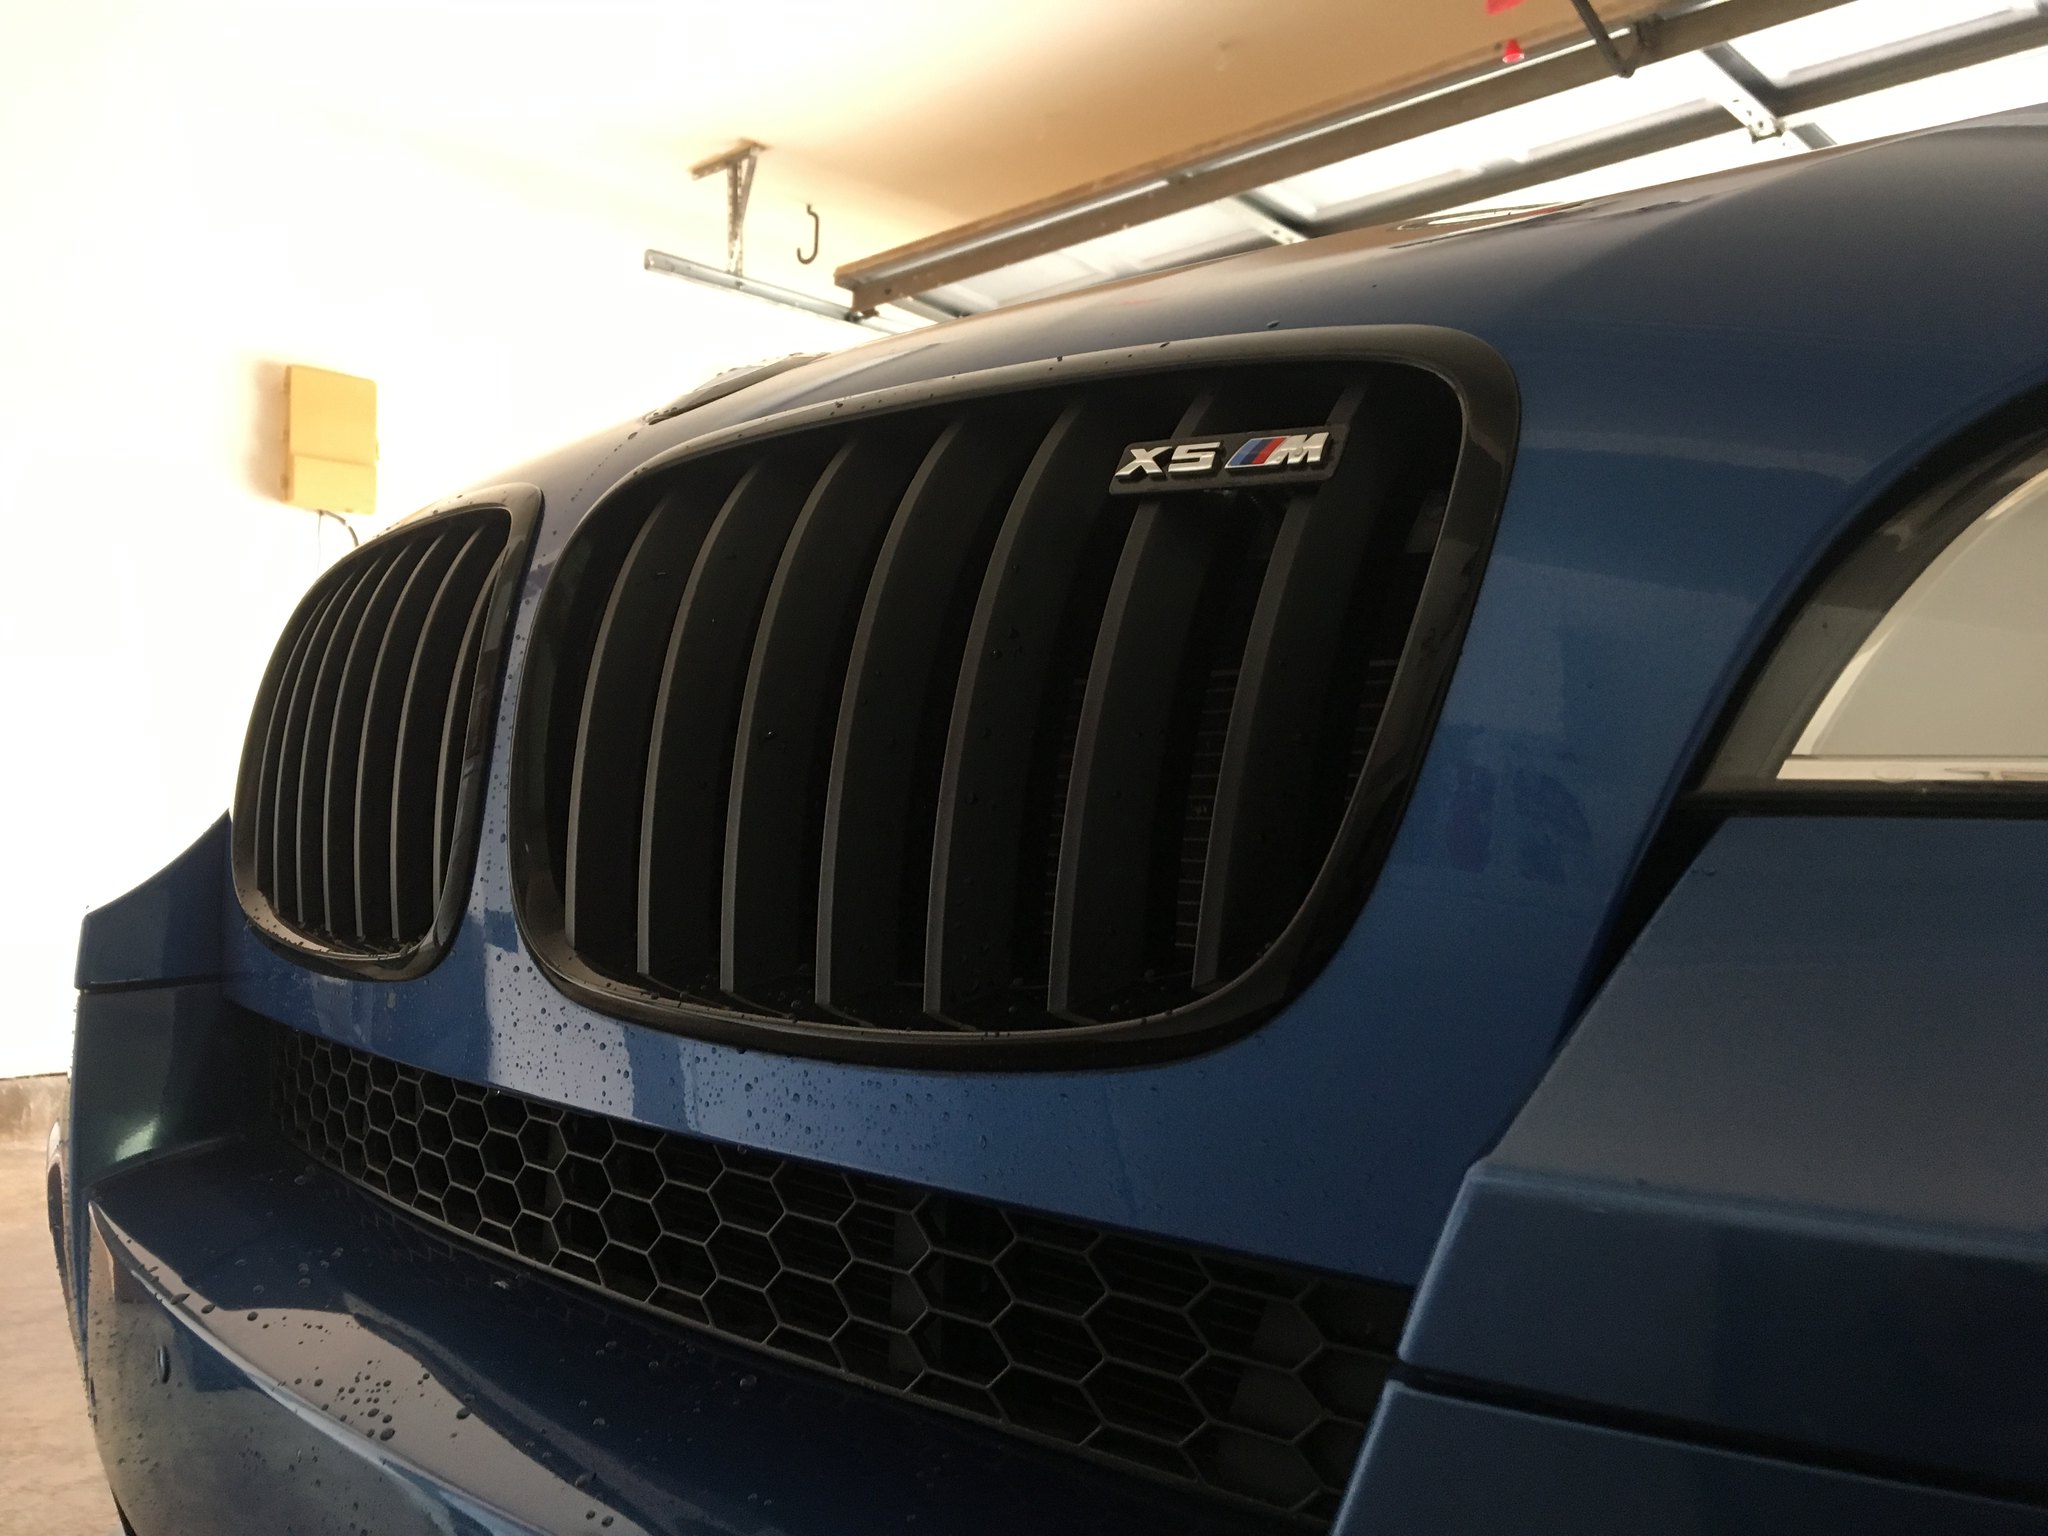 IMG_1947 IMG_1947
__________________
 2020 G01 X3 30e CURRENT M Sport Package 2019 Ford Raptor SuperCrew CURRENT 802A, KN Drop-in, RB Flaps, Husky Well Liners 2012 E70 X5M SOLD Stg 1+ Turbos, DPs, Velos Stg 2+, JB4, Race Cats, Bavauto Coils 2003 E46 M3 SOLD aFe CAI, AP Axleback, SSK, H&R Springs, TMS CMBR Arms, PF RTABs Last edited by jandref321; 12-01-2016 at 10:51 PM.. Reason: add detail to instructions |
| 12-02-2016, 05:06 AM | #3 |
|
Second Lieutenant


70
Rep 233
Posts |
I did the same by using a bit of glossy black plastic out of an old VHS casset and some good glue..
 Looks good your project.. Are there some Pictures of the whole car somewhere? Last edited by X Driver; 12-02-2016 at 05:15 AM.. |
|
Appreciate
1
Qarban25.50 |
| 12-02-2016, 11:56 AM | #5 |
|
Brigadier General
 
2001
Rep 3,035
Posts
Drives: 2022 BMW X5
Join Date: Nov 2013
Location: Boston
|
nicely done, congrats
 |
|
Appreciate
0
|
| 12-02-2016, 06:16 PM | #7 | |
|
Captain
345
Rep 728
Posts |
Quote:
http://www.xbimmers.com/forums/showthread.php?t=1330336
__________________
2020 G01 X3 30e CURRENT M Sport Package 2019 Ford Raptor SuperCrew CURRENT 802A, KN Drop-in, RB Flaps, Husky Well Liners 2012 E70 X5M SOLD Stg 1+ Turbos, DPs, Velos Stg 2+, JB4, Race Cats, Bavauto Coils 2003 E46 M3 SOLD aFe CAI, AP Axleback, SSK, H&R Springs, TMS CMBR Arms, PF RTABs |
|
|
Appreciate
0
|
| 12-06-2016, 03:58 AM | #8 | |
|
Private First Class

26
Rep 116
Posts |
Quote:
Last edited by Qarban; 12-06-2016 at 04:05 AM.. |
|
|
Appreciate
0
|
| 12-06-2016, 04:04 AM | #9 |
|
Private First Class
26
Rep 116
Posts |
|
|
Appreciate
0
|
| 12-06-2016, 08:12 AM | #10 |
|
Lieutenant
94
Rep 410
Posts |
That's pretty cool DIY!
__________________
2011 E70 35i MHD Tune Stage 2+ (CURRENT) Daily Driver
1989 R32 Skyline GT-R (CURRENT) The Hunter 2010 E90 335i 1M FBO MHD Tune (SOLD) 2009 E92 335i FBO JB4 G5 ISO (SOLD) |
|
Appreciate
0
|
| 12-06-2016, 09:03 AM | #11 |
|
Tanzanite Blue II X5M Pilot
1047
Rep 2,023
Posts
Drives: M3, M4, X3 M40i, X5M
Join Date: Nov 2011
Location: WS, GSO High Point, NC
|
Gixxer likes!
__________________
 2020 X5M - Tanzanite II 2012 M3 - Alpine White |
|
Appreciate
0
|
| 12-06-2016, 11:23 AM | #12 | |
|
Private First Class
15
Rep 109
Posts |
Quote:
 |
|
|
Appreciate
0
|
| 12-06-2016, 11:47 AM | #13 | |
|
Brigadier General
2001
Rep 3,035
Posts
Drives: 2022 BMW X5
Join Date: Nov 2013
Location: Boston
|
Quote:
|
|
|
Appreciate
0
|
| 12-06-2016, 12:32 PM | #14 | |
|
Captain
345
Rep 728
Posts |
Quote:
__________________
2020 G01 X3 30e CURRENT M Sport Package 2019 Ford Raptor SuperCrew CURRENT 802A, KN Drop-in, RB Flaps, Husky Well Liners 2012 E70 X5M SOLD Stg 1+ Turbos, DPs, Velos Stg 2+, JB4, Race Cats, Bavauto Coils 2003 E46 M3 SOLD aFe CAI, AP Axleback, SSK, H&R Springs, TMS CMBR Arms, PF RTABs |
|
|
Appreciate
0
|
| 12-06-2016, 10:56 PM | #15 | |
|
Private First Class
26
Rep 116
Posts |
Quote:
|
|
|
Appreciate
0
|
| 12-29-2016, 10:57 AM | #16 |
|
Captain
345
Rep 728
Posts |
Plate Update
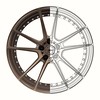
I started working on making more plates about a month ago and has been slow going but finally finished with plate production. I made 5 plates using the same DIY with the exception of how I applied the epoxy and how I applied a non-marring surface to the rear of the plates.
EDIT: I also reduced the size of the plates to that it looked more sleek. The new size is 2-5/8 x 5/8 this is just slightly smaller than the original. Epoxy: I mixed the epoxy in the center an 8"x8" piece of wax paper and folded the paper in half twice, then cut the center corner...essentially making a baking pipette for the epoxy so I could squeeze it out and apply a little bit easier that using toothpicks. Non-Marring Surface: In the DIY I used just black caulking which was a PITA. This time I bought a roll of garage door gasket rubber and cut to size then applied the caulk as an adhesive. Hopefully this will hold and work better, it was definitely less messy and quicker to apply. 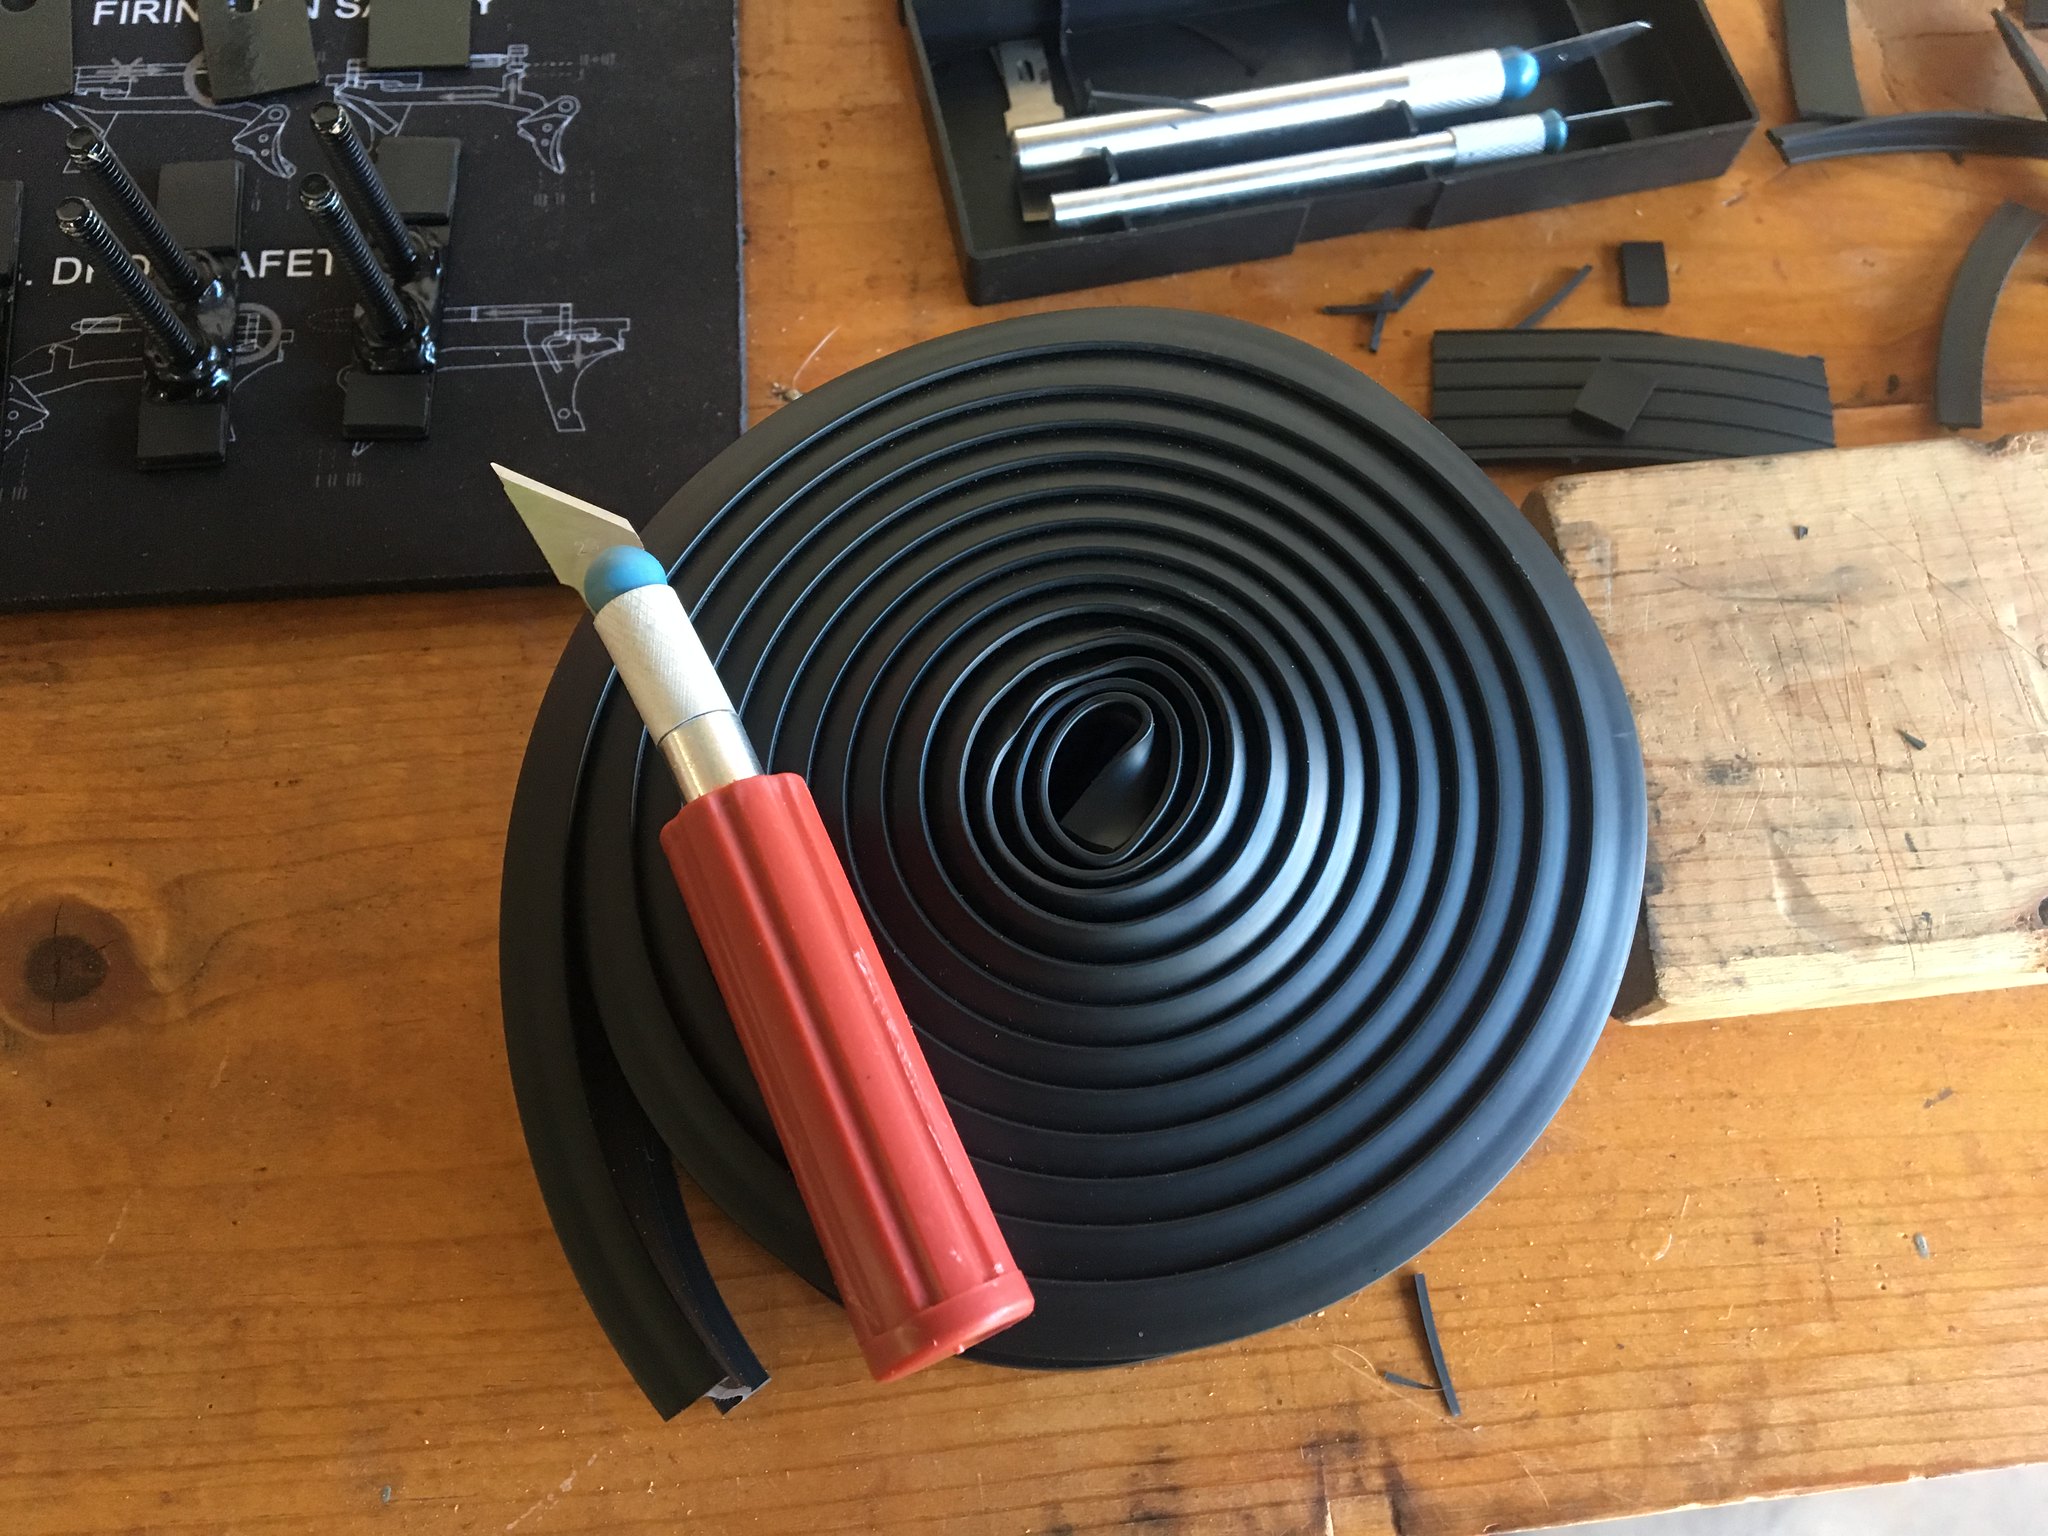 I made 5 plates which I'll be trying to sell and see if they work out for the owners and go from there. These are hand made. They were cut using an angle grinder and shaped/sanded using a dremel and sand paper. It took me 10-12 actual hours to make these, trying to get them right. Cut and sanded by hand means imperfections, but I think they turned out great. I'll start a sale thread once I get in the badges and apply them...Hopefully not messing them up in the process.  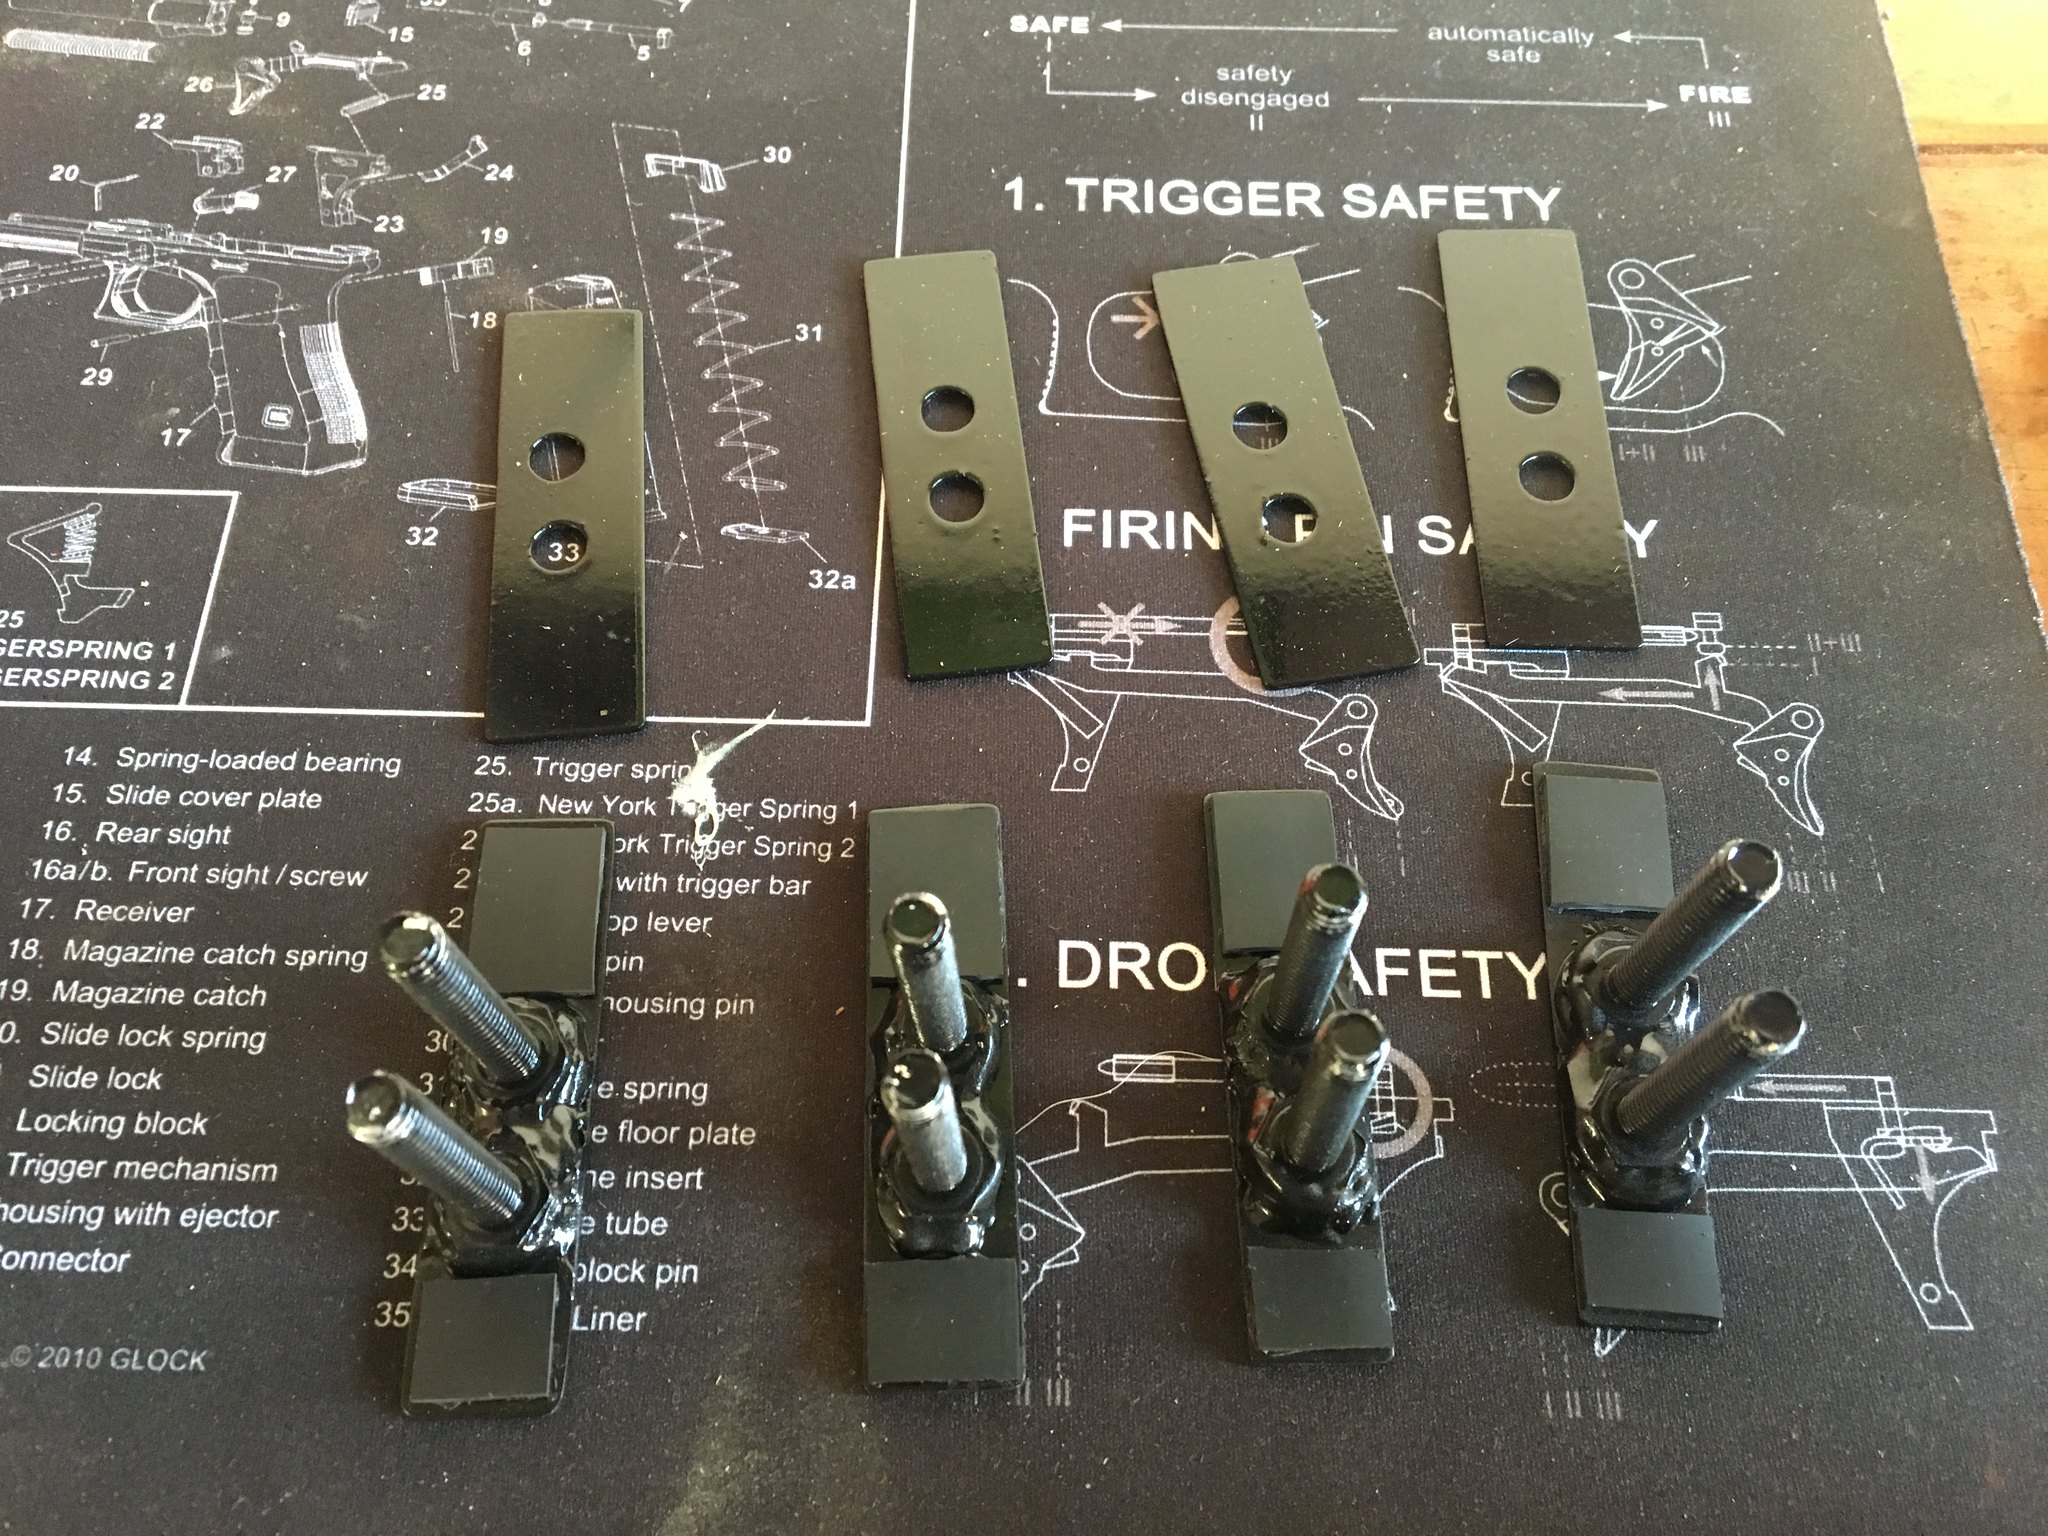 The other 4. The dust you see on the back plates is ontop, not in the paint. I did get some dust on the plate surface during the first spray and had to sand and repaint...better now  Better look at the rubber pads
__________________
2020 G01 X3 30e CURRENT M Sport Package 2019 Ford Raptor SuperCrew CURRENT 802A, KN Drop-in, RB Flaps, Husky Well Liners 2012 E70 X5M SOLD Stg 1+ Turbos, DPs, Velos Stg 2+, JB4, Race Cats, Bavauto Coils 2003 E46 M3 SOLD aFe CAI, AP Axleback, SSK, H&R Springs, TMS CMBR Arms, PF RTABs Last edited by jandref321; 12-29-2016 at 11:06 AM.. Reason: Added the new size and fixed the photos |
|
Appreciate
1
Qarban25.50 |
| 12-29-2016, 12:54 PM | #17 |
|
Second Lieutenant
77
Rep 238
Posts |
Wow thats a lot of work! Looks sweet though, I'd definitely like to pick one up if you're selling them.
Will they fit over the double slat F series kidney grilles? With the upgraded LED headlights I think it would look good with the F15 X5M kidney grilles with the badge! 
__________________
Pure Stage 2 Turbos / JB4 / BPM tuned / Catless DPs / PTP Turbo Blanket / RK Intkakes / Eisnemann Sport / M Performance lip / IND Blackout / KWV3 Coilovers / MV Forged ML10 / Pirelli Pzeros / LED Headlights
|
|
Appreciate
0
|
| 12-29-2016, 03:57 PM | #18 | |
|
Captain
345
Rep 728
Posts |
Quote:
__________________
2020 G01 X3 30e CURRENT M Sport Package 2019 Ford Raptor SuperCrew CURRENT 802A, KN Drop-in, RB Flaps, Husky Well Liners 2012 E70 X5M SOLD Stg 1+ Turbos, DPs, Velos Stg 2+, JB4, Race Cats, Bavauto Coils 2003 E46 M3 SOLD aFe CAI, AP Axleback, SSK, H&R Springs, TMS CMBR Arms, PF RTABs |
|
|
Appreciate
0
|
| 01-07-2017, 02:36 AM | #20 |
|
Private First Class
26
Rep 116
Posts |
jandref321, I got the badge holder today. I installed it to the oem kidney grill while waiting for the gloss black double slat I ordered off eBay, hopefully it will fit too. Thanks for letting me order for the badge holder only.
 Mounting the badge on the plate was a little bit of a challenge so for those who are interested in ordering I suggest that you order the holder with the badge already mounted on the plate (let jandref321 do the hard work, lol!)   I was very impressed with the build quality of the product, jandref321 really spent a lot of time and effort, (although not needed in my opinion) he even added a printed step by step instruction  Here's the before and after   More iphone pics    |
|
Appreciate
0
|
| 01-07-2017, 01:09 PM | #21 |
|
Second Lieutenant
77
Rep 238
Posts |
^^ That looks sweet!!
I'd love to see how the double slat gloss black looks with the badge as well. I was going to do the same thing but was worried about the badge fitment being off.
__________________
Pure Stage 2 Turbos / JB4 / BPM tuned / Catless DPs / PTP Turbo Blanket / RK Intkakes / Eisnemann Sport / M Performance lip / IND Blackout / KWV3 Coilovers / MV Forged ML10 / Pirelli Pzeros / LED Headlights
|
|
Appreciate
0
|
| 01-07-2017, 07:02 PM | #22 | |
|
Captain
345
Rep 728
Posts |
Quote:
__________________
2020 G01 X3 30e CURRENT M Sport Package 2019 Ford Raptor SuperCrew CURRENT 802A, KN Drop-in, RB Flaps, Husky Well Liners 2012 E70 X5M SOLD Stg 1+ Turbos, DPs, Velos Stg 2+, JB4, Race Cats, Bavauto Coils 2003 E46 M3 SOLD aFe CAI, AP Axleback, SSK, H&R Springs, TMS CMBR Arms, PF RTABs |
|
|
Appreciate
0
|
Post Reply |
| Bookmarks |
| Tags |
| badge, e70, grill, lettering, x5m |
|
|


