


|
|
|
| 10-25-2015, 07:19 PM | #1 |
|
New Member

1
Rep 14
Posts |
P3Cars VIDI Install in E70 DIY
I searched high and low for an install guide since there doesn't seem to be one from P3Cars for our application. I couldn't find one, so I dug through other guides and hoped ours would be similar. There are parts of other instructions that are.
May as well put up a DIY guide to help others. :-) First, remove the 3 screws holding the lower trim panel up and drop the aft part down a few inches. This provides access to the OBD port.  Pull the weatherstripping straight back in the area around the left dash panel. 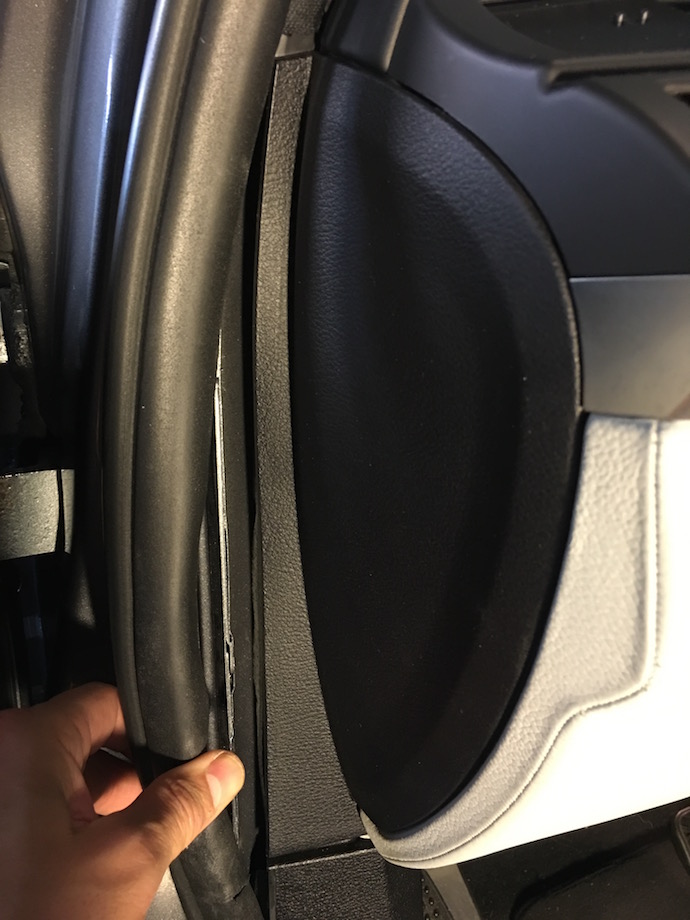 Using your fingers, pull the left panel away from the dash, starting at the bottom, working up. 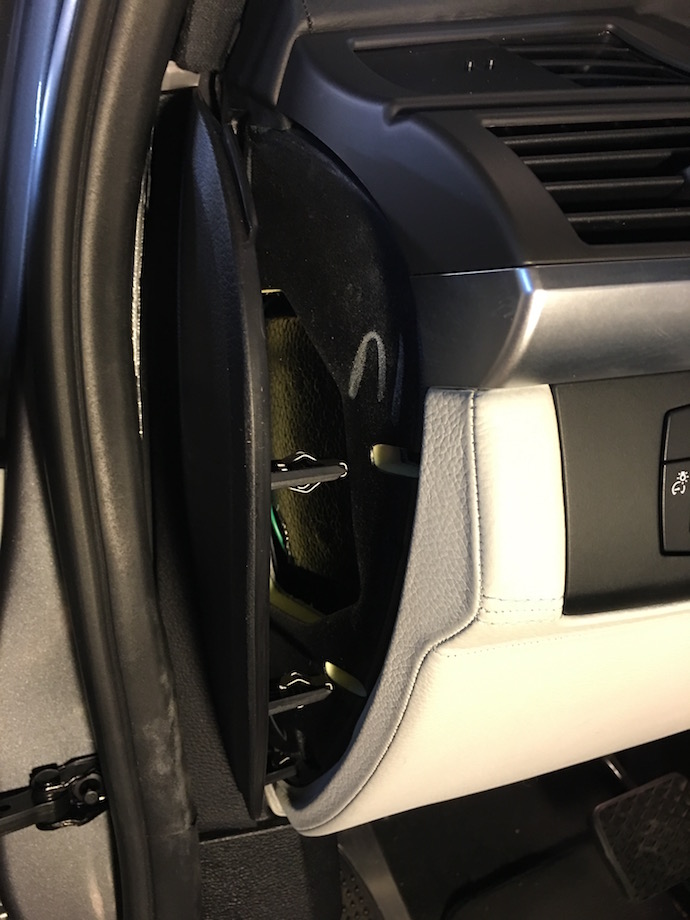 Again using fingers, gently pull the trim piece below the vent rearward, starting at the left, then the right side. 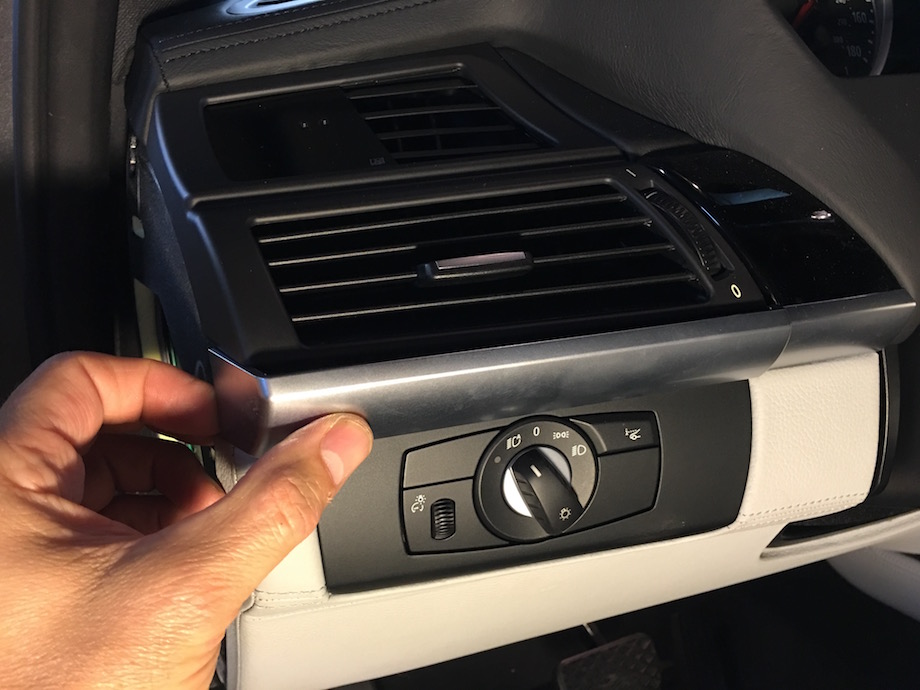 Trim removed, now unscrew the single screw that holds the bottom of the vent in place and pull the vent out.  Now remove the trim piece on the vent by prying the locking tabs away from their hooks while gently pulling the trim piece away from the vent. The following photos show these locking tabs.  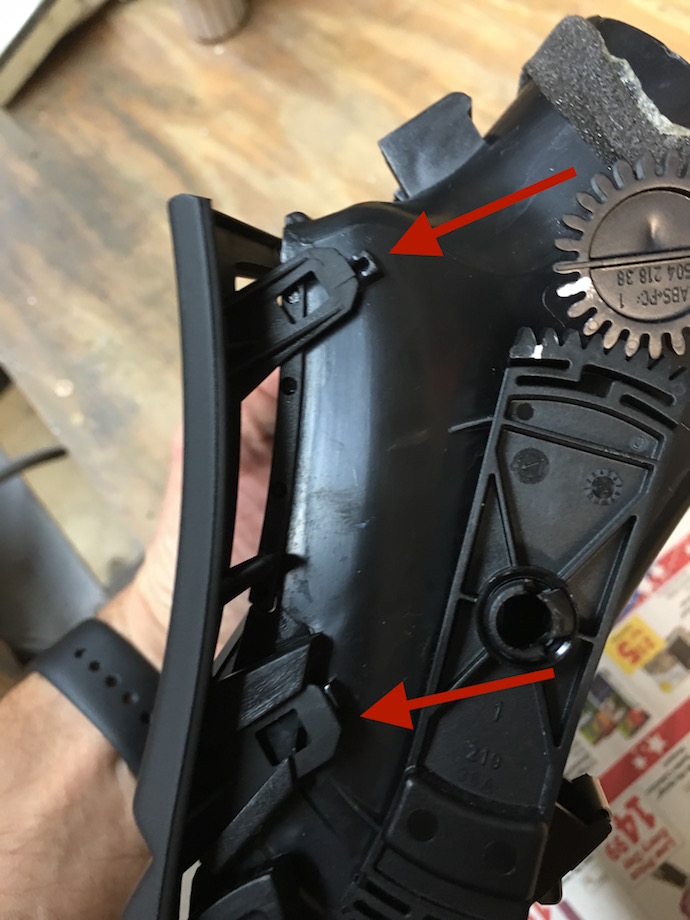 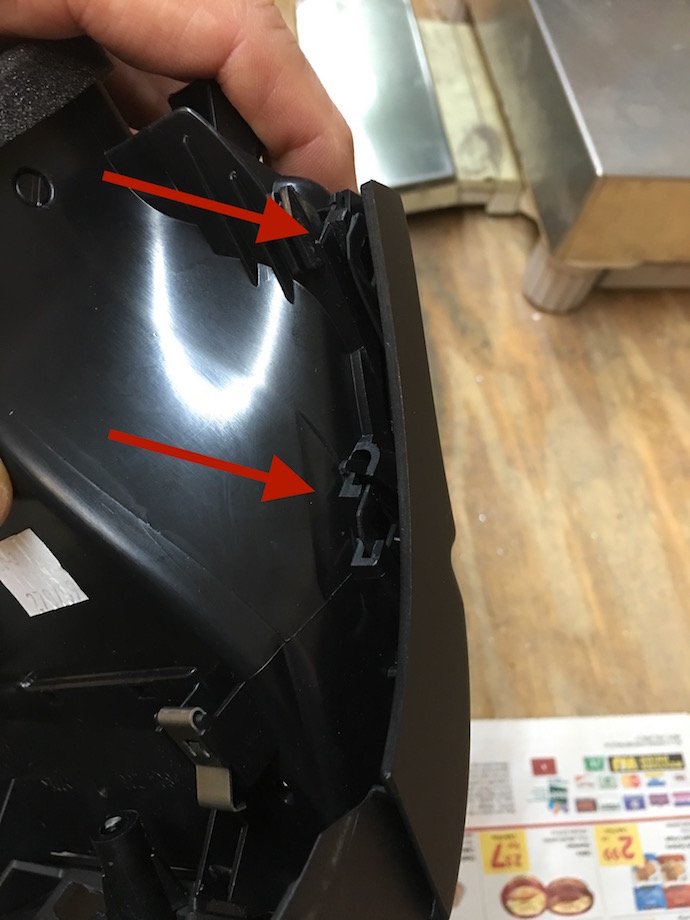 These are trickier, but not bad. The upper one needs to be unlocked via the thin tab and the lower one just lifts over the hook. 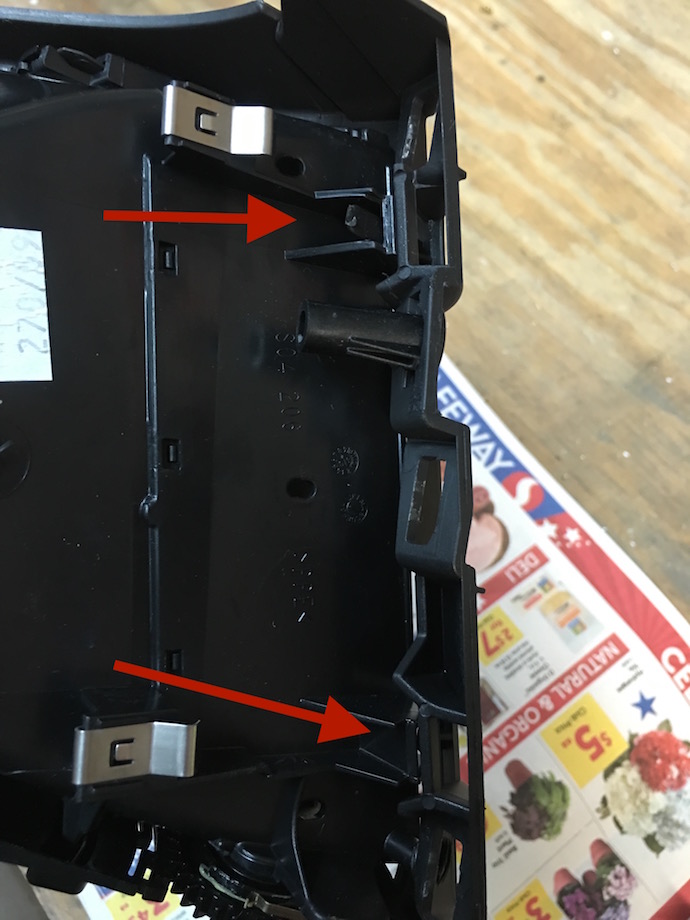 There is a plastic peg melted in-place. This weld will just break when you pull the trim off. No big deal.  Now with the trim piece removed, lift out the upper vent vanes. Pulls right off.  Route the flat cable from the P3Cars VIDI readout through the vent and install the readout. The right side slips in hooks at the top and bottom. I bent that side slightly to follow the gentle curve of the vent. The upper left corner nestles in a gap for a flush fit. 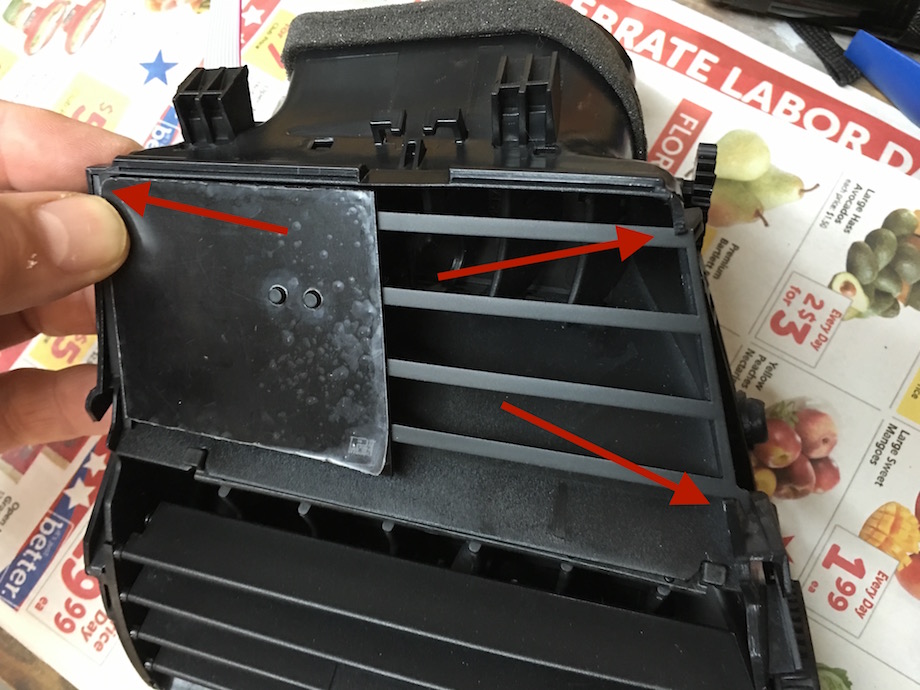 Carefully pop the trim piece back in place, lining up all the locking tabs while holding the readout flush. A little tricky.  I looped the flat cable over the bottom edge and taped in-place to make install easier. The duct fitting into the source AC vent duct will hold the wire permanently.  Route the OBDII cable, DB15 end up, through the lower panel you unscrewed, into the dash and out the lower side of the opening in the left of the dash. I had to use long needle nose pliers a couple times to grab the edge of the ground/shield to pull it up. Then route it back into the dash behind the vent opening. 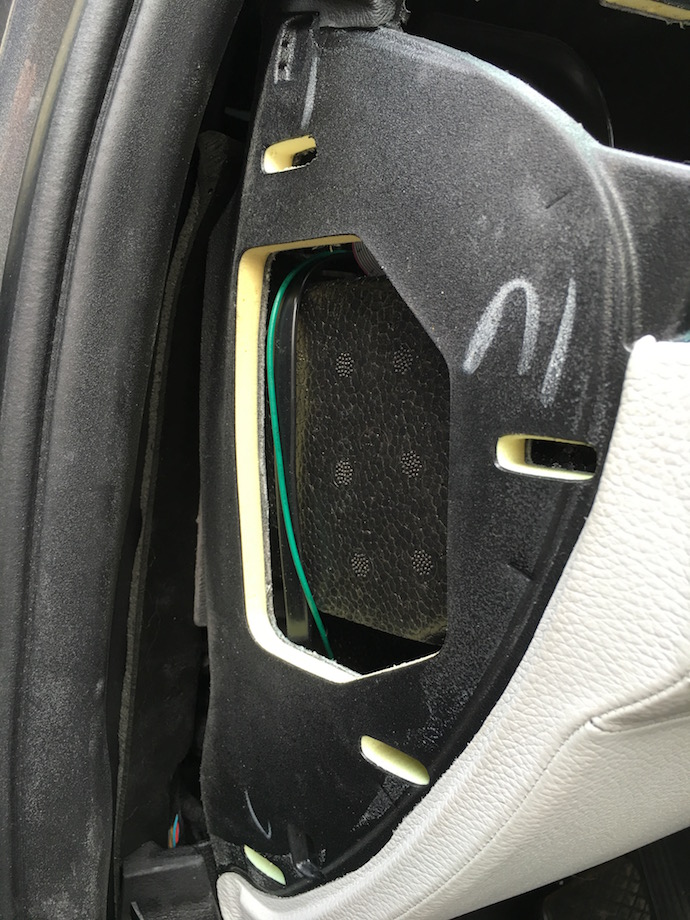 Connect the DB15 connector, tighten the thumb screws and zip tie the wires back to aim towards where they will route. 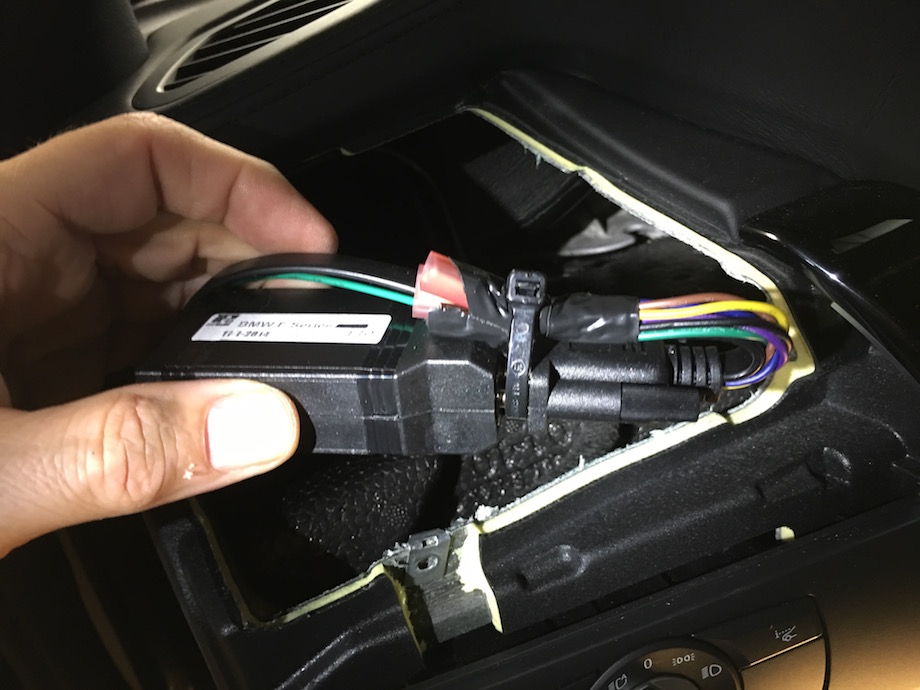 Clean the styrofoam area for good adhesion. 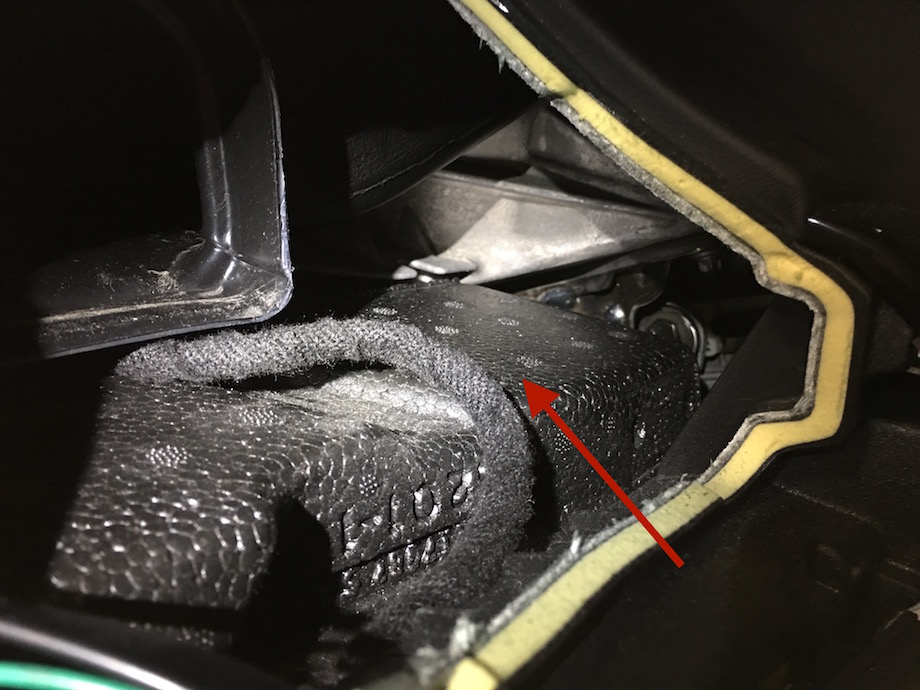 Apply adhesive-backed velcro to the control module on the side without the part info sticker, both the hook and loop parts. Then peel the plastic off the remaining velcro halves and place the assembly onto the styrofoam. This way, the velcro on the styrofoam will be in the right spots. Position the DB15 connector to the right and RJ45 (ethernet type) to the left, keeping clear of anything the wires or module could rub against. 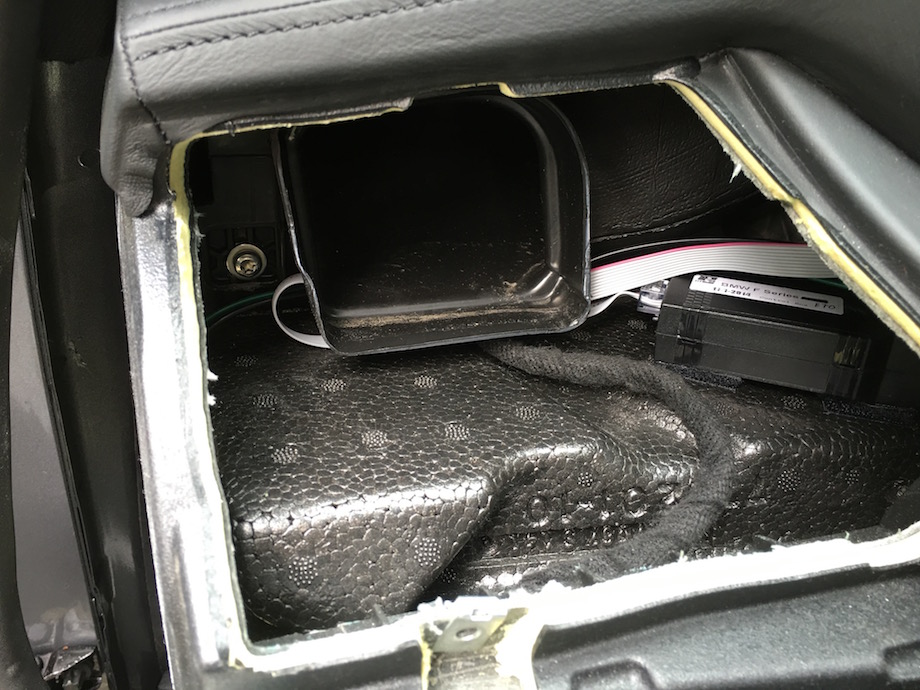 One area where online instructions led me wrong. They showed simply yanking the cap away from the OBDII plug to remove it... I did this and broke the plug off the dash! So either leave the cap hanging or carefully pull it out while pushing firmly up on the plug to not put all the stress on the plug's mounting tabs. 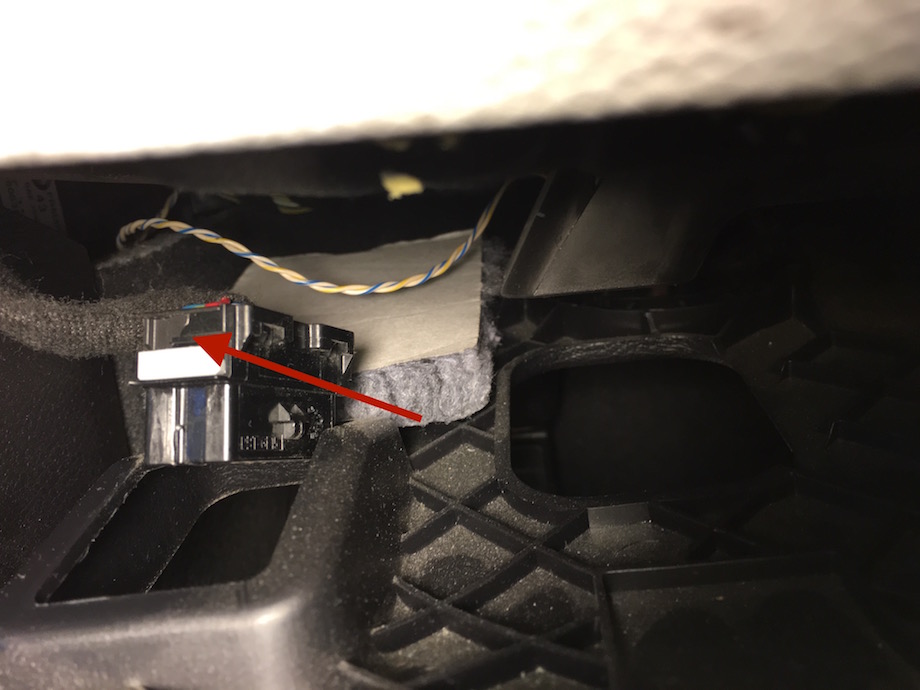 Install the VIDI OBDII plug onto the car's OBDII plug. 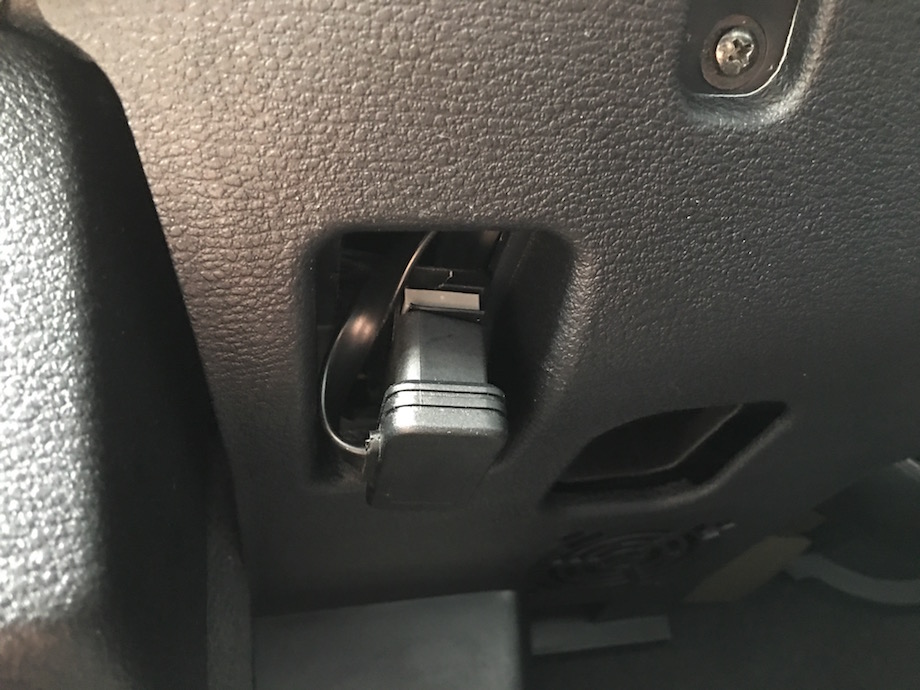 Re-install everything and start the car. Looks great!  |
| 10-26-2015, 02:08 PM | #2 |
|
Brigadier General
 
1692
Rep 3,200
Posts |
Great write up, thanks for sharing!
 I have a similar write up in my journal, but it is with the pre-installed vent. Nice to see a guide for the non pre-installed option. Btw you able to get your air intake temp? I found the only way the gauge gives me a reading is by putting it in car3. Now since we are car8 that obviously doesn't work out that well. Been thinking of emailing them to see if they can implement a solution of some sort. |
|
Appreciate
0
|
| 10-30-2015, 08:28 PM | #3 |
|
Wicked Fast +1

18
Rep 254
Posts |
I have one as well! Great mod and top notch quality.
__________________
Doc
2013 X5 50i M Sport/BMS Stage 1/Magnaflow/P3Cars gauge/H&R 1.2/Style 215s 2002 M3 Race car bimmerworld/Turner/Markert modified  |
|
Appreciate
0
|
| 11-08-2015, 01:55 AM | #4 | |
|
New Member
1
Rep 14
Posts |
Quote:
|
|
|
Appreciate
0
|
| 12-18-2021, 11:26 AM | #5 |
|
Captain
 
134
Rep 613
Posts |
So I realize I've gone full necromancer here raising a thread from 2015....
Anyone who has done this - where did you tap into for the auto dim function? Needs to be a wire that receives voltage when the headlights are on. |
|
Appreciate
0
|
| 12-18-2021, 03:46 PM | #6 | |
|
Captain
538
Rep 872
Posts |
Quote:
https://www.bimmerpost.com/forums/sh...php?p=26367976
__________________
2013 X5M AW/Blk
Build Thread: https://www.xbimmers.com/forums/show....php?t=1499820 |
|
|
Appreciate
0
|
Post Reply |
| Bookmarks |
|
|


